Upgrade Your Laundry Room with Smart Cabinets & Rods Today
Make space, tame clutter, and add style with a storage plan that works as hard as your appliances.
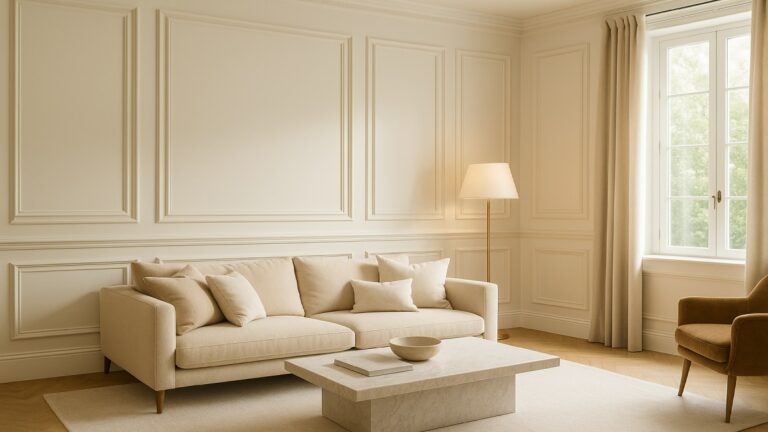
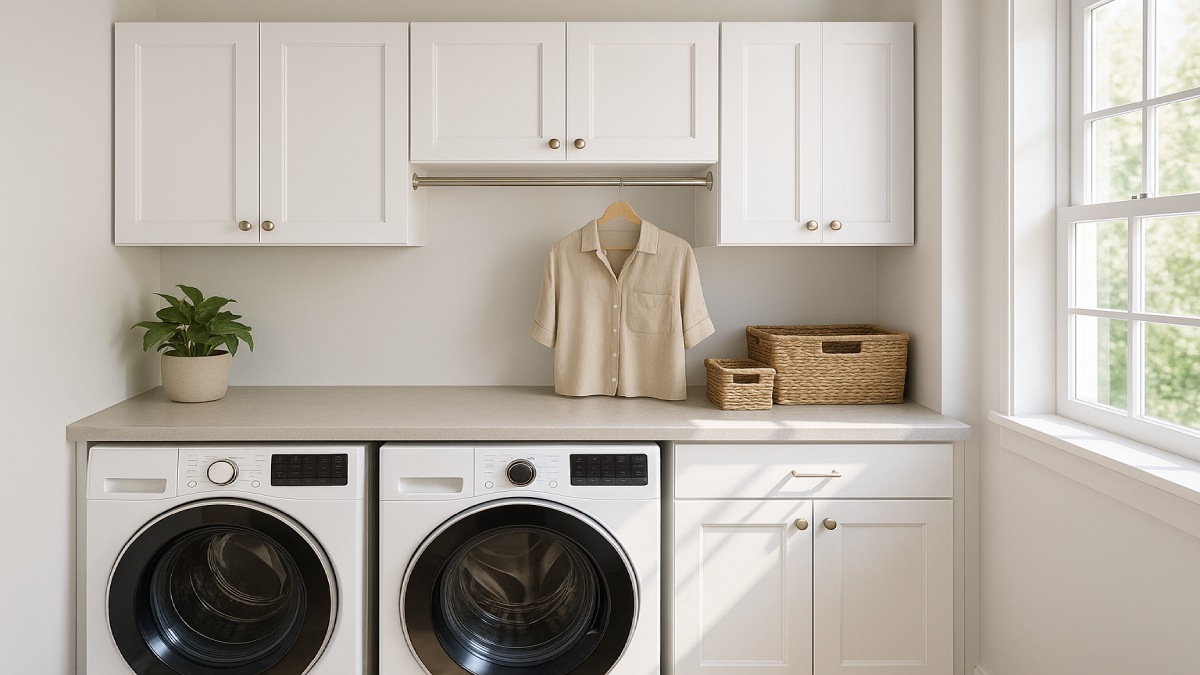
Well-planned laundry rooms feel calm and work efficiently. The secret is vertical storage that keeps supplies within reach and off the floor. Wall cabinets and drying rods deliver that balance of order and convenience. With the right layout, you’ll fold faster, air-dry delicates without a mess, and keep every bottle, bin, and brush in its place.
This guide walks you through the full project—planning clearances, picking moisture-smart materials, and installing cabinets and rods with a solid, pro-quality method. You’ll learn standard heights, clever layout tricks for tight rooms, and styling ideas that make a small corner look custom. By the end, you’ll have a blueprint that’s ready for your tape measure and drill.
Why Cabinets and Rods Change the Way You Do Laundry
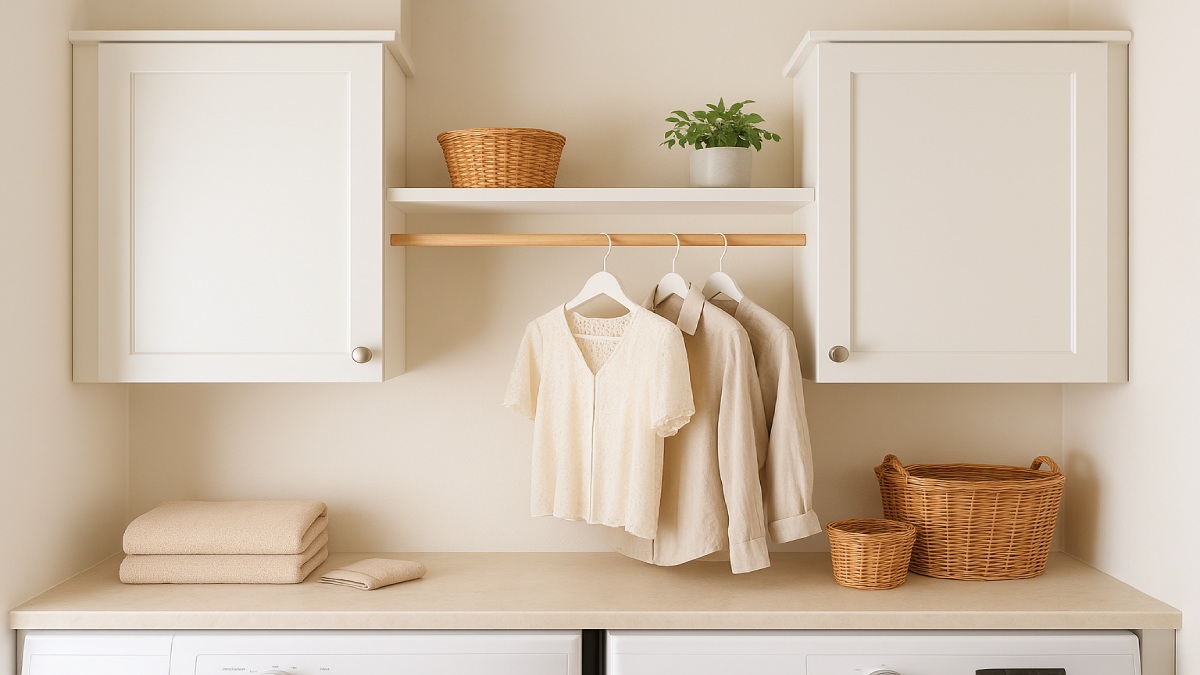
Cabinets hide visual clutter and protect supplies from humidity and dust. That alone reduces stress every time you step in to wash a load. A thoughtfully placed hanging rod adds quick-dry capability right where you need it. Shirts come out of the washer, hang up with space between hangers, and dry without taking over the shower curtain or bedroom door.
Less Mess, More Workflow
Closed storage keeps detergents, stain removers, and bulk refills off machines and out of sight. Label a bin for lint rollers, another for delicates, and a third for dryer sheets. Set a shallow pull-out near eye level for everyday essentials, and reserve the highest shelf for extra inventory or less-used tools.
Air-Dry Space That Actually Fits Clothes
Rods outperform fold-down racks when you hang shirts, blouses, and slacks. Leave roughly two inches between hangers so air circulates and wrinkles relax. If you prefer a shelf-and-rod combo, mount the shelf first and then place the rod 2–4 inches below the shelf underside. That gap lets hangers move freely.
Resale Appeal and Daily Comfort
Buyers notice storage that feels built-in and intentional. Smart cabinet lines, finished end panels, and aligned hardware give the room a custom look. Even in a compact home, a tidy laundry zone reads as thoughtful design—one more nudge toward a strong offer.
Plan the Layout Before You Lift a Cabinet
Measure What You Have—and What You Need
Start with the true footprint of your machines. Note width, depth, and height. Leave at least an inch on each side and a generous 4–6 inches behind for venting and hoses. Mark shutoff valves and outlets on painter’s tape right on the wall.
Set Heights for Easy Reach
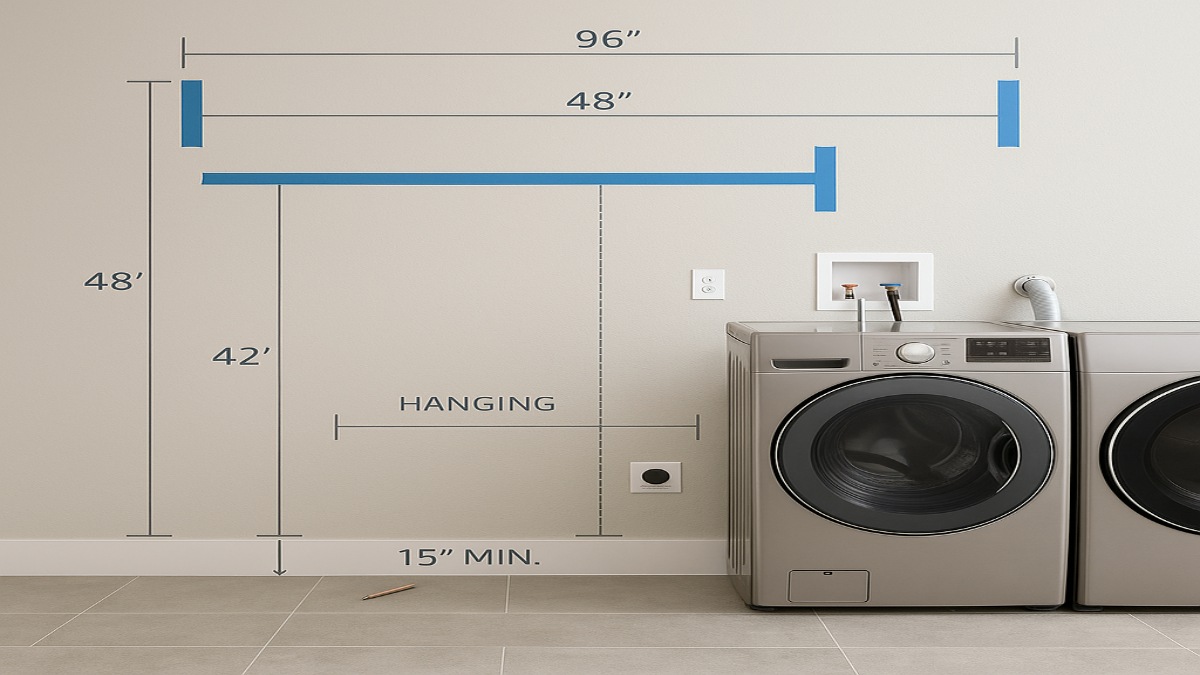
Keep frequently used shelves between 15 and 48 inches above the floor. That reach range works comfortably for most adults and helps kids grab a basket safely. If you have a countertop above side-by-side machines, position wall cabinets with 18 inches of space above the counter. That gap leaves room for baskets and folding.
Place the Rod with Clearance in Mind
For shirts, a rod at 40–48 inches above the counter works well. For dresses or longer garments, raise it to 60–66 inches. If you’re mounting between cabinets, confirm the span and use center support if it’s over 48 inches. A thick, deflection-resistant rod prevents sag and rattles when clothes are wet.
Account for Doors, Lids, and Light
Confirm that cabinet doors open fully without hitting light switches or window trim. If your washer has a top-hinged lid, lay your tape measure across the open position and keep cabinetry clear. For stacked sets, measure the total height, then mount the lowest shelf where you can reach it safely without a step stool.
Pick Materials That Handle Heat and Humidity
Plywood vs. MDF vs. MR-MDF
Plywood boxes excel in rooms that see steam and splash. The layered construction resists sag and holds screws firmly. Standard MDF can swell if edges stay exposed or get dings, though it’s fine for painted doors if you seal all edges. MR-MDF (moisture-resistant MDF) is a stronger choice for humid spaces when you prefer super-smooth painted finishes. If you want the best of both, pair plywood boxes with MR-MDF doors.
Face Frames, Frameless, and Door Styles
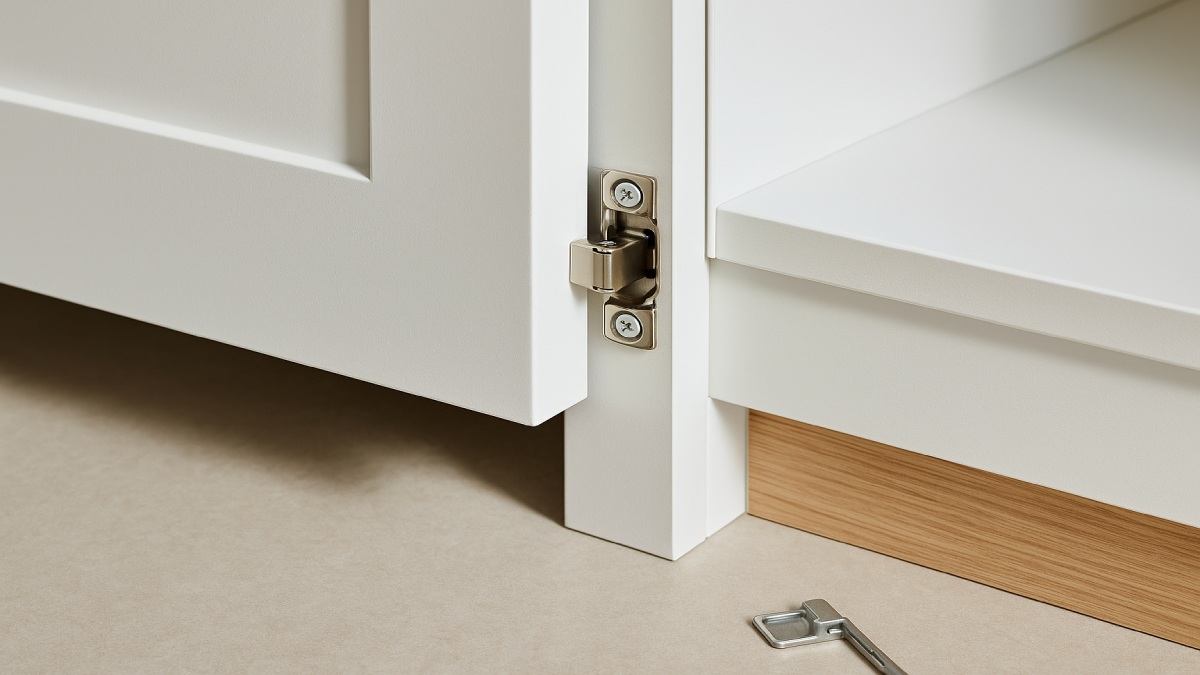
Face-frame cabinets give you a classic look and a little extra structure at the front. Frameless (European) boxes deliver maximum access and sleek lines. For doors, Shaker suits almost every style, slab doors favor a modern vibe, and beadboard adds cottage charm. Use soft-close hinges and slides to keep noise down and fingers safe.
Finishes Built for Cleanup
Satin or semi-gloss paints wipe clean and shrug off moisture rings. If you prefer wood grain, choose durable catalyzed finishes or high-performance waterborne coatings. Inside the boxes, a light maple-look interior reflects light so you can see items easily.
Hardware That Won’t Rust
Stick with stainless, powder-coated, or brass hardware in spaces with steam and splashes. Use cabinet pulls long enough to grab with wet hands. For rods, look for thick-wall aluminum, stainless, or a hardwood dowel with a protective finish. Solid metal flanges spread the load and keep the rod locked in place.
Install Cabinets Like a Pro: A Step-by-Step Sequence
Tools and Supplies
Gather a stud finder, tape measure, 4-foot level, impact driver, drill bits, cabinet screws, shims, clamps, a ledger board, painter’s tape, and safety gear. If you’re working solo, add a cabinet jack or a sturdy temporary stand.
Find Studs and Mark a Level Line
Use the stud finder to mark studs with painter’s tape. Snap or draw a perfectly level reference line where the bottom of the cabinets will sit. Fasten a straight ledger board along that line into studs. The ledger holds cabinet weight while you work and helps you set every box to the same height.
Hang the First Cabinet and Work Outward
Start with the corner or the most visible cabinet. Lift it onto the ledger. Check level and plumb, then drive cabinet screws through the back into studs. Add the next cabinet. Clamp face frames or edges together and pre-drill before driving the connector screws. Shim as needed to keep doors aligned across the run.
Tie Cabinets to the Wall and Each Other
Drive at least two screws into each stud behind every cabinet. Check reveals as you go. Step back often and sight the line from both ends. Small twists and out-of-square walls are common; shims behind the box cure most issues. When the run is perfect, remove the ledger, patch the holes, and touch up the paint.
Install the Rod and Supports
Measure the span between cabinets or side panels. Cut the rod to fit with 1/8–1/4 inch of clearance. Mark flange locations and pre-drill into solid material. Use center support for long spans. Give the rod a light tug test with your body weight under it—not a pull-up, just a confidence check. If you see flex, upgrade to heavier tubing or add a middle bracket.
Design Ideas That Fit Any Room Size
Small Laundry Closets and Nooks
Use shallow uppers (12–15 inches deep) over stacked machines. Swap swing-out doors for lift-up or pocket-style hardware if space is tight. A narrow rod under a single shelf can still handle a weekly batch of shirts. Choose a bright paint color and LED under-cabinet lighting to keep the space feeling open.
Mid-Size Rooms for Busy Households
Run a full cabinet bank above side-by-side machines and add a counter for folding. Place the rod between two uppers at shoulder height. Include a tall cabinet with pull-out hampers labeled lights, darks, and towels. If you iron often, mount a fold-down board inside a tall cabinet door and park the iron on a heat-proof shelf.
Large Laundry Rooms and Multi-Use Spaces
Create zones: cleaning supplies near the sink, pet care in a base cabinet with a bin drawer, and household tools in a narrow tall unit with pegboard. Add a second rod at a higher level for long garments and a retractable valet hook for steaming. Warm wood doors paired with satin brass pulls bring a boutique feel.
Style Notes for a Finished Look
Match cabinet crown to nearby trim for a built-in effect. Align the bottom of the uppers with the top of a window or door casing for crisp sightlines. Repeat a metal finish two or three times—rod flanges, pulls, and a light fixture—to look intentional without feeling matchy-matchy.
Moisture and Safety: Protect the Room and Your Gear
Keep Air Moving
Steam collects fast in a small room. A quiet exhaust fan on a timer clears humidity between loads. If you air-dry inside the room, crack a nearby window or run the fan for 20–30 minutes after you hang clothes.
Mind the Vent and Shutoffs
Leave a service path to the dryer vent and water shutoffs. A removable back panel behind a base cabinet near the hookups can save headaches when it’s time to replace hoses or reset connections. Avoid routing a rod where it blocks access to valves.
Store Smart
Keep detergents and bleach in closed cabinets, high enough to stay safe from kids and pets. Use drip trays under liquids and line the shelf with a wipeable mat. Never store heavy bottles on top of the dryer; vibration can walk containers off the edge.
Maintenance That Extends the Life of Your Build
Quarterly Checks
Open each cabinet and tighten any hinge screws that start to back out. Test soft-close dampers and adjust as needed. Spin each pull to confirm set screws are snug. Wipe rod flanges and check for play. If the rod sags under a typical load, step up to thicker tubing or add a center bracket.
Finish Care
For painted doors, use a non-abrasive cleaner and microfiber cloth. Avoid magic-eraser sponges on satin finishes; they can burnish the sheen. For wood doors, clean with a slightly damp cloth and dry immediately. Nicks along cabinet edges can be touched up with a color-matched pen.
Counter and Sink Upkeep
If you added a counter, wipe spills promptly and avoid leaving damp laundry baskets in one spot. For a utility sink, use a mesh strainer to catch lint and threads. Wipe the faucet base dry after each use to prevent buildup around gaskets and seals.
Budget: What to Expect, Where to Save
Typical Costs
Expect to spend $250–$800 per wall cabinet depending on size, material, and finish. Rod hardware runs $50–$200 based on span and finish. If you hire a pro, set aside $400–$1,200 for hanging a short run of uppers and a rod, more if walls need reinforcement or rerouting of plumbing or power.
Smart Savings
Assemble-yourself cabinet boxes and DIY installation shrink labor costs quickly. A paint-grade door with a catalyzed finish often costs less than stained hardwood, especially in larger runs. Consider open shelves for a small section to cut the total cabinet count without losing function.
When to Call a Pro
Bring in help if walls are out of plumb, studs don’t land where you need them, or utilities must shift. A professional can add blocking inside the wall, reframe as needed, and move outlets or valves to better positions.
Frequently Asked Questions
How high should I hang laundry room wall cabinets?
A common setup leaves 18 inches between a countertop and the cabinet bottom. Over a washer or dryer without a counter, many homeowners land between 20 and 24 inches to clear controls and give space for baskets.
What’s the best height for a drying rod?
For shirts and blouses, 40–48 inches above the counter feels natural. For dresses or long items, 60–66 inches works better. If the rod spans more than 48 inches, plan a center support.
Can I use drywall anchors to hang cabinets?
No. Cabinets must be fastened into studs. A temporary ledger board helps hold weight during installation. For tricky walls, a French cleat tied into studs makes the job easier and spreads the load.
What materials hold up best in a humid laundry room?
Plywood cabinet boxes with sealed edges are hard to beat. MR-MDF doors accept paint beautifully when edges are primed and sealed. Choose hardware finishes rated for damp environments.
How do I keep the room feeling open?
Use light paint colors, add under-cabinet lighting, and keep the counter clear. Repeat metals two or three times for cohesion, not clutter. Limit open shelving to one small section so the room stays calm.
Conclusion: Make Laundry Day Easier—and Better Looking
Good storage shortens the time you spend moving laundry from pile to closet. With wall cabinets set at comfortable reach, a sturdy rod for air-drying, and materials that shrug off humidity, the room finally works like a station. The workflow becomes simple: sort, wash, hang, fold, and put away, all within a few steps.
Start with a measured drawing. Mark studs. Set a ledger. Hang the first cabinet straight and true. Build outward with patience, and your laundry zone will feel custom, tidy, and ready for years of busy weeks. A small upgrade—done well—turns a chore space into a room you’re happy to see every day.