Tips on How to Use a Shop Vacuum for Dust and Water Cleanup
Set up your wet/dry vacuum the right way, switch between dust and water with confidence, and keep suction strong with smart filter care and maintenance.
A shop vacuum is the most useful cleanup tool in a garage or home workshop. It handles sawdust, drywall fines, and tracked-in grit, then pivots to water removal after a spill or a mini flood. With the correct setup, you can clean faster, protect the motor, and avoid that frustrating loss of suction that shows up mid-job.
This guide walks you through the entire workflow in plain language. You’ll learn how a wet/dry vacuum moves air, what CFM and water lift actually mean, and how to configure the machine for dry or wet operation. You’ll also see which filters to install, how to use attachments for better results, and the exact steps to drain, rinse, and dry the tank so the vac stays fresh for next time.
How a Wet/Dry Shop Vacuum Works
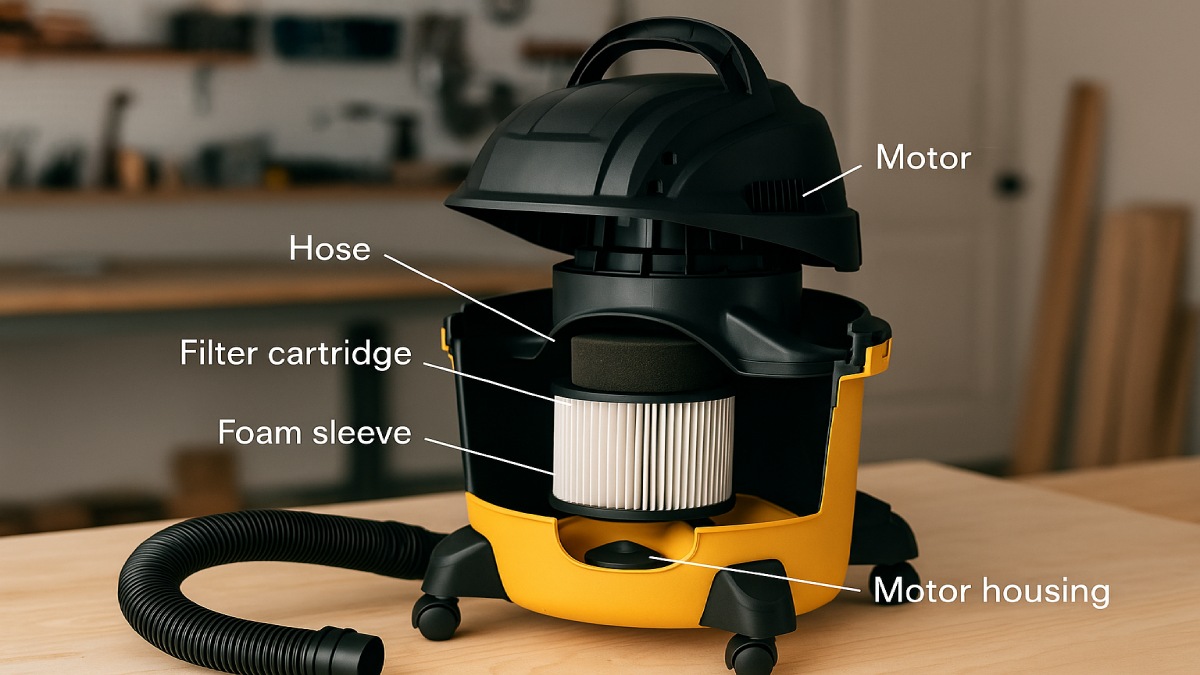
Every shop vac follows the same basic airflow pattern. The motor creates low pressure at the inlet, pulling air through the hose and into the tank. Debris and liquid drop out of the airstream inside the drum. Air continues through a filter stage and back out the exhaust. When you pick up water, a float valve inside the filter cage rises and closes the passage once the drum reaches a safe level. That’s the “whoop” sound and sudden loss of suction you hear when it’s full.
Why CFM and Water Lift Matter
Manufacturers publish two specs that describe performance. CFM (cubic feet per minute) indicates airflow. Higher CFM clears light debris over a wide floor nozzle. Water lift measures sealed suction in inches. High lift helps pull water, dense chips, and heavy debris through long hoses. A balanced machine has enough CFM for broad pickup and enough lift for tough messes. “Peak HP” looks impressive on the box, but it isn’t a reliable measure. Compare CFM and lift instead.
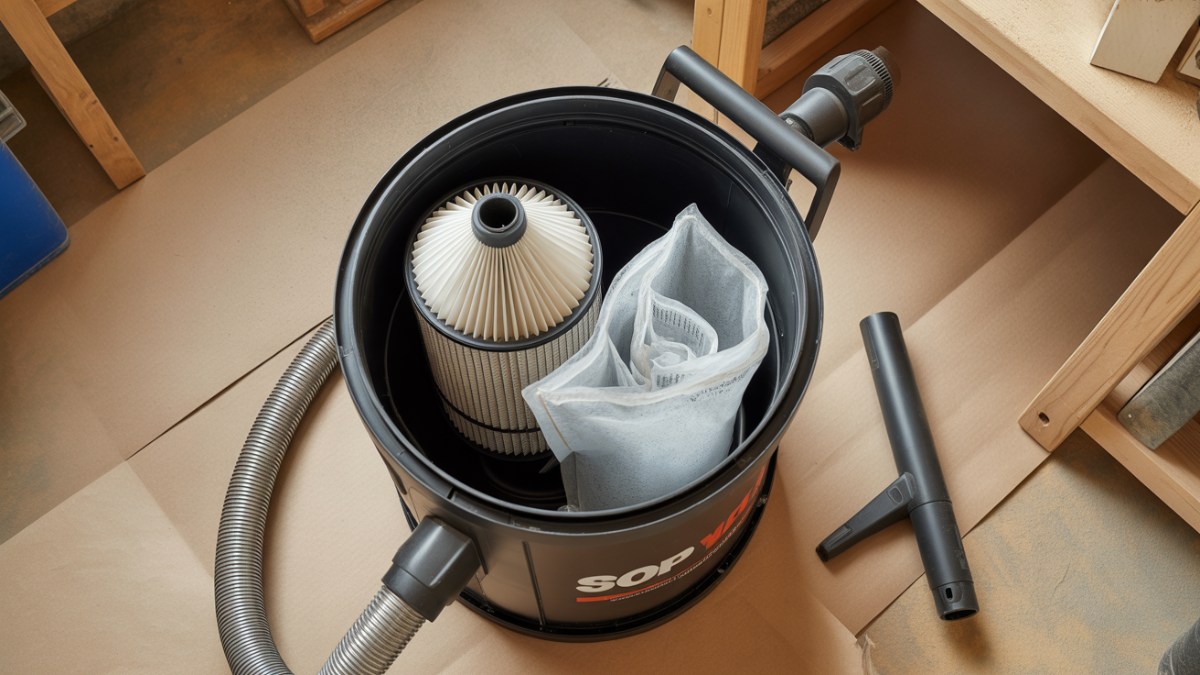
The Role of Filters and the Float
Filters protect the motor and your lungs. For dry jobs, a cartridge filter (paper or pleated synthetic) catches dust, while a dust bag inside the drum keeps fines from caking the cartridge. For wet jobs, you remove paper elements and install a foam sleeve or rely on the filter cage alone if your manual allows it. The float valve stops airflow before liquid reaches the motor. Never remove the float or its cage, and never run the vac with a soaked paper filter.
Dry Cleanup: Set Up for Strong Suction and Clean Exhaust
Sawdust, drywall dust, and garage grit each behave differently. A few minutes of setup prevents clogs and keeps the exhaust clean so you’re not breathing what you just vacuumed.
Install the Right Dry Filter
- General debris: Standard cartridge filter.
- Fine dust (drywall, cement, sanding): High-efficiency or HEPA-rated cartridge plus an internal high-efficiency dust bag.
- Allergens or very fine powder: Sealed dust bag + HEPA cartridge on compatible units.
The bag does most of the heavy lifting and prevents the cartridge from loading up. Suction stays stable longer, and cleanup is as simple as removing the bag, sealing the collar, and tossing it.
Step-by-Step Dry Setup
- Open the drum and confirm it’s empty and dry.
- Slide a dust bag onto the inlet inside the tank until it clicks or seats fully.
- Install a clean cartridge filter with its gasket seated flat on the cage.
- Attach the hose and lock the latches. Pick a nozzle that fits the task.
- Power on and listen. A steady, smooth pitch signals healthy airflow.
Smart Dry Techniques
- Floor first, then corners. Clear the open area with a wide nozzle and finish with the crevice tool.
- Use a brush on paint and trim. It prevents scuffs and keeps bristles from flinging dust.
- Work in lanes. Overlap passes so you don’t push dust into clean areas.
- Ventilate the space. Even with good filtration, fresh air helps.
Wet Cleanup: Switch Modes Safely
Spills, pet accidents, and minor flooding call for a different configuration. Changing the filter setup only takes a minute and protects the motor from water ingestion.
Convert the Vacuum for Water Pickup
- Unplug the unit. Remove the lid and take out the dust bag.
- Remove the paper cartridge filter. Install a foam sleeve on the filter cage if your model requires it.
- Confirm the float valve moves freely inside the cage.
- Re-latch the lid, attach a wet nozzle or squeegee head, and route the cord safely.
- Plug into a GFCI outlet. Keep connectors and hands dry.
Water Pickup Techniques
- Start at the perimeter. Create a dry border with the squeegee, then pull water toward a central path.
- Empty before the float trips. If the tone rises or mist appears at the exhaust, stop and dump the tank.
- Use extension wands. Stand upright on large floors to keep a steady stroke and reduce fatigue.
- Protect finishes. On wood floors, work gently and dry immediately with towels or a fan.
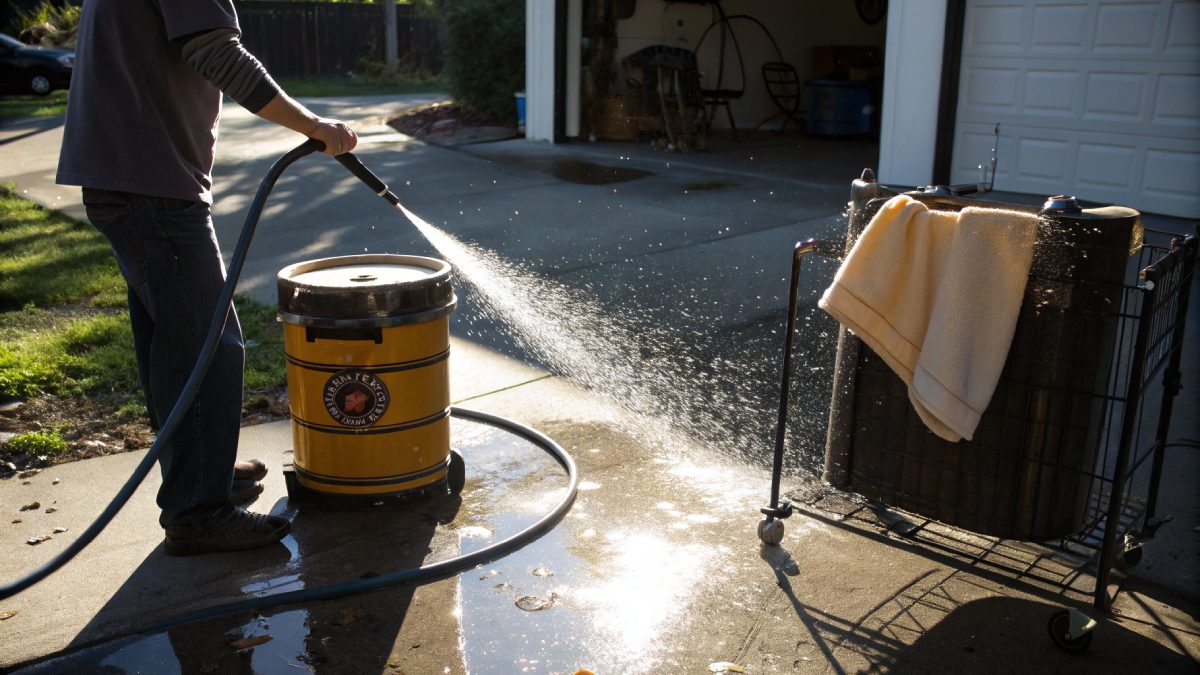
Drain, Rinse, and Dry the Tank
As soon as you finish, roll the vac to a suitable drain and empty the drum. Rinse the tank with clean water and remove residue from the hose and nozzles. Shake out the foam sleeve and set it somewhere with airflow to dry completely. Leave the lid cracked open for a few hours so moisture can escape. This small habit prevents mold, odor, and rust.
Safety Rules You Should Never Skip
A shop vacuum is an electrical appliance with a powerful motor. Respect it and you’ll never have a bad day with one.
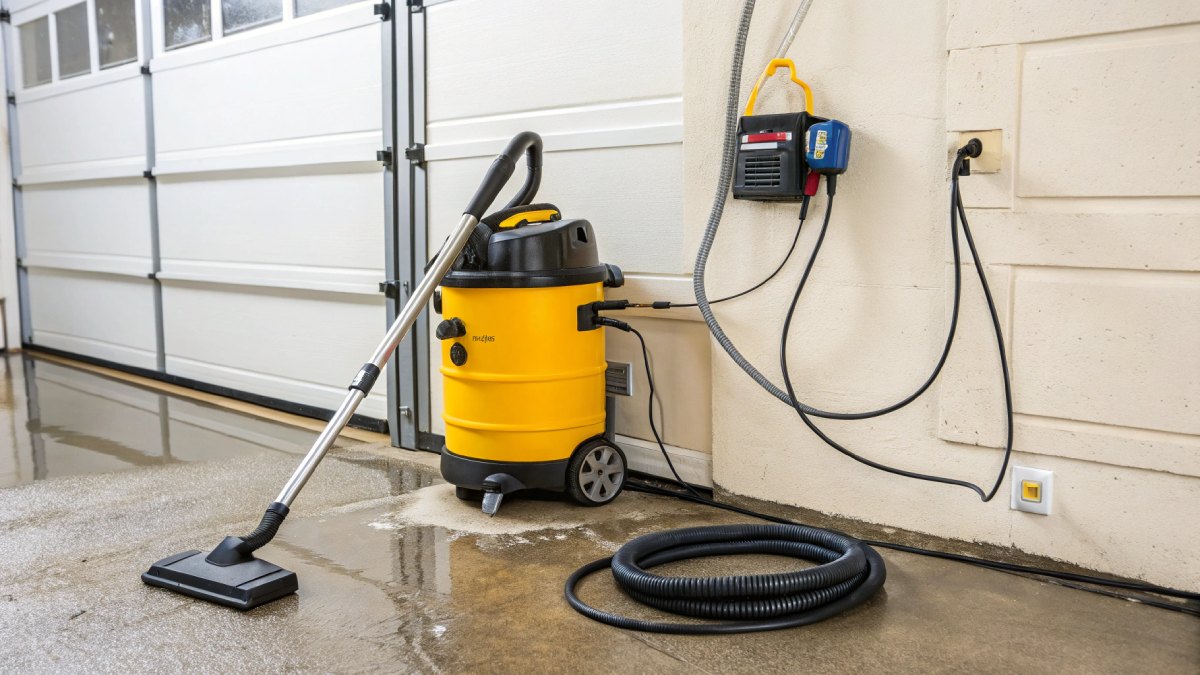
Electricity and Water
- Use a GFCI outlet for any wet job or outdoor task.
- Keep cords out of puddles and never handle plugs with wet hands.
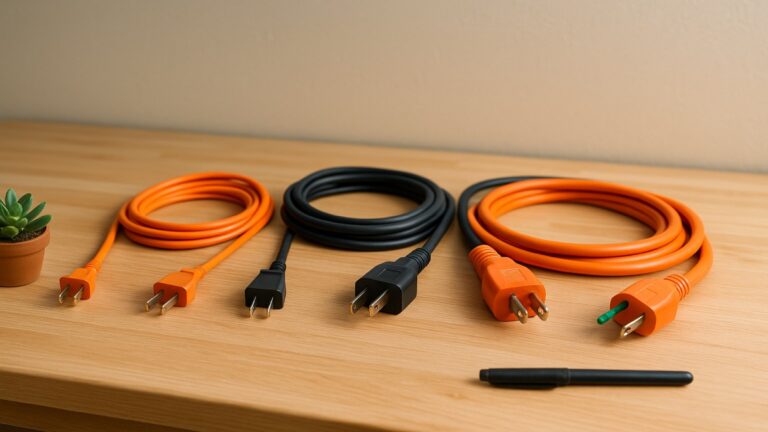
- Use a three-wire grounded extension cord sized for the current draw and length.
Materials to Avoid
- No flammable liquids or vapors. Gasoline, solvent fumes, and oil-based finishes can ignite.
- No explosive dusts. Grain, metal, or fine combustible powders need specialized gear.
- Regulated dusts. Lead paint and silica require certified HEPA extractors and special procedures.
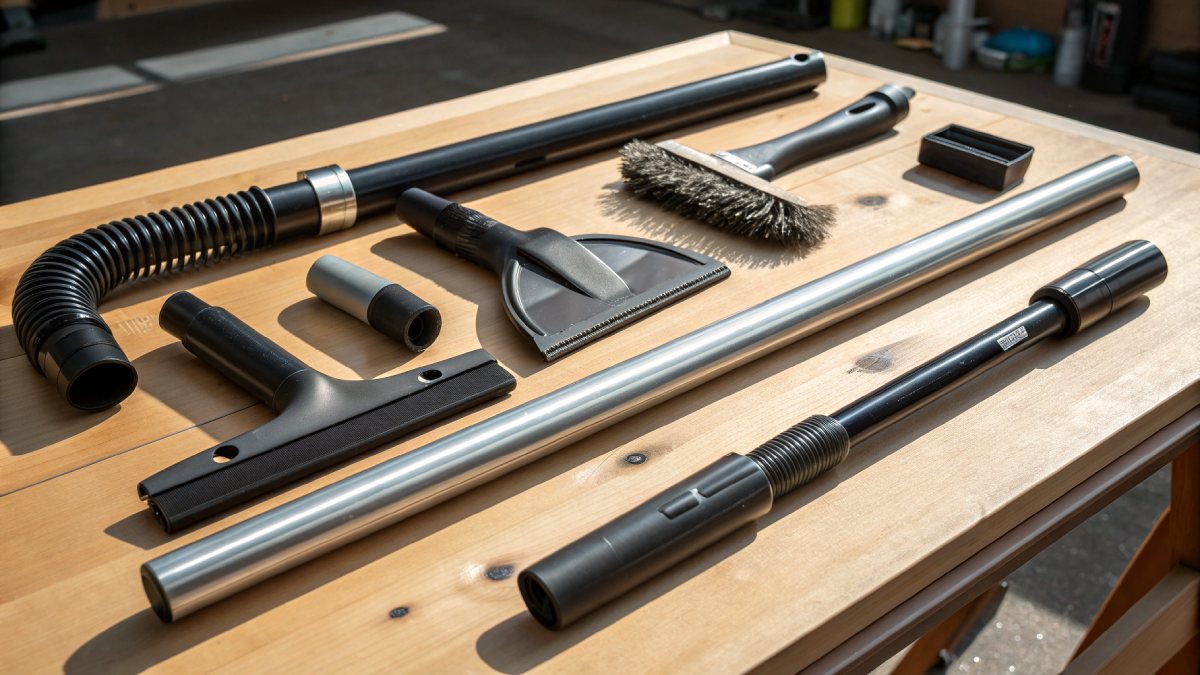
Use the Right Attachment for the Job
No single nozzle handles every mess well. A small kit of tools turns your vac into a cleanup system rather than a loud bucket with a hose.
Dust and Debris
- Wide floor nozzle: Fast coverage across concrete and shop floors.
- Brush tool: Gentle on trim, blinds, and automotive interiors.
- Crevice tool: Reaches between appliances, into tracks, and under baseboards.
Water and Slurry
- Squeegee head: Pulls water into the nozzle and leaves a drier surface.
- Flexible wand: Works behind toilets, under sinks, and in tight corners.
Upgrades That Keep Filters Clean
- High-efficiency bags: Catch fines before they load the cartridge.
- Cyclone pre-separator: Spins out chips and dust so suction stays strong during long sanding sessions.
- Anti-static hoses: Reduce nuisance shocks with dry fines in winter air.
Troubleshooting Common Problems
When suction drops or the vac starts acting odd, a handful of checks usually solves it in minutes.
Loss of Suction
- Full tank: Empty it and check that the float valve moves freely.
- Clogged filter: Tap the cartridge clean outdoors or replace it. If it’s wet from a previous job, let it dry fully.
- Hose leaks: Inspect the hose for cracks and verify the couplers lock tight.
- Inlet blockage: Remove the bag and poke out impacted debris at the inlet collar.
Water Spraying from the Exhaust
- The float has closed because the tank is full. Power off and dump the drum.
- A paper filter was left in place for a wet job. Remove it, install the foam sleeve, and let the cartridge dry before dry use.
Hot Smell or Unusual Noise
- Check for a blocked hose or filter restricting airflow.
- Ensure the exhaust port isn’t covered.
- Stop immediately if the cord, plug, or switch shows damage. Replace worn electrical parts before operating again.
Maintenance and Filter Care That Keep Suction Strong
A few routine habits extend the life of the vac and protect the motor.
- Empty after wet work. Standing water breeds mildew and rust.
- Dry filters completely. A damp cartridge clogs instantly when you switch back to dust.
- Clean the foam sleeve. Rinse, squeeze gently, and air-dry. Don’t wring; it tears.
- Store indoors. Extreme heat or cold shortens hose and gasket life.
- Flatten the bag collar. Seal it before removing to keep dust out of your face.
Advanced Tips for Heavy Users
If the vac runs daily in a workshop or during a renovation, small upgrades pay off fast.
Dial in the System
- Shorten hose runs. Less length and fewer bends mean stronger suction at the nozzle.
- Match nozzle width to CFM. Very wide tools need strong airflow; undersized machines feel weak with oversized heads.
- Use tool-triggered outlets. Some extractors start automatically when the sander or saw runs, and stop a few seconds later to clear the hose.
Protect the Filter on Dust-Heavy Jobs
- Pre-separator + bag + fine cartridge. This trio keeps suction steady during hours of sanding or drywall work.
- Adopt a two-filter routine. Keep a dry cartridge for dust and a second foam sleeve for wet tasks so you’re never stuck with a damp filter.
FAQs
Can I use a shop vac without any filter?
For wet pickup, many models run with only a foam sleeve on the cage. For dry debris, always use a cartridge filter, and add a dust bag for fine powder. Running dry without a filter blows dust out the exhaust and risks motor damage.
Why does suction fade so quickly on drywall dust?
Fine particles clog the cartridge in minutes. Use a high-efficiency dust bag inside the drum plus a fine or HEPA-rated cartridge. Empty the bag before it bulges into the filter area.
Is a higher “peak HP” always better?
Not necessarily. Compare CFM for broad pickup and water lift for heavy debris and liquids. A balanced machine with strong airflow and lift will outperform a higher “HP” unit with weak specs.
Can I pick up fireplace ash?
Only when the ash is completely cold and only with high-efficiency filtration. Hot embers can ignite the bag or the tank. Dedicated ash vacuums with metal hoses are safer for fireplaces and stoves.
How do I get rid of odors after wet cleanup?
Rinse the tank with a mild cleaner, flush the hose, and let everything dry fully. Wash the foam sleeve and leave the lid cracked open to vent moisture. A dry machine doesn’t smell.
Quick Setup Checklists
Dry Dust Setup
- Empty drum and install dust bag.
- Seat cartridge filter; verify gasket seal.
- Pick nozzle: floor → brush → crevice.
- Test airflow and work in overlapping lanes.
Water Cleanup Setup
- Remove bag and paper filter; install foam sleeve.
- Confirm float valve moves freely.
- Attach squeegee head; route cord to a GFCI outlet.
- Empty before the float trips; rinse and dry after use.
Troubleshooting Flowchart
Suction Low?
- Tank full → Empty.
- Filter loaded → Clean/replace.
- Hose leak → Inspect and reseat.
- Inlet blocked → Clear at the collar.
Exhaust Mist or Spray?
- Float closed → Dump tank.
- Paper filter left in for wet job → Remove and dry.
- Foam sleeve saturated → Squeeze and air-dry.
Care Habits That Make the Vac Last
Strong suction tomorrow depends on what you do today. Empty liquid quickly. Keep a spare dry cartridge on hand. Store the vac where hoses don’t kink and wheels can roll. Label one shelf “dry filters and bags” and another “wet foam sleeves” so you never mix them up during a rush job.
Conclusion: Clean Faster, Stay Safer, Protect Your Gear
A shop vacuum is only as good as its setup. Use the dust bag and the right cartridge for dry work, swap to a foam sleeve for water, and plug into a GFCI whenever liquids are involved. Keep an eye on CFM and water lift when you compare models, and don’t forget the small things—attachments, hose length, and a tidy filter routine. With these habits, you’ll move from constant clogs and weak suction to fast, clean results in every corner of your home and workshop.