Safely Replace a Broken Kitchen GFCI Outlet Step-By-Step
A GFCI outlet protects you from shock near sinks and other wet areas by monitoring current balance and tripping within milliseconds when a fault occurs. If your kitchen GFCI no longer resets, feels loose, or fails testing, replacing it restores protection and keeps the circuit code-compliant. The process is straightforward when you shut off power, verify it’s de-energized, and wire the new device to the correct terminals.
This guide walks you through the entire job from breaker to final test. You’ll learn how to identify line versus load, match amperage and configuration, avoid common wiring mistakes, and verify protection with the outlet’s test buttons and a plug-in tester. If anything looks unsafe, stop and call a licensed electrician—electricity can injure or worse when handled improperly.
What a GFCI Does and Why Kitchens Need It
GFCI stands for ground-fault circuit interrupter. It compares outgoing and returning current; if even a small difference is detected—often caused by current leaking through a person to ground—it trips the internal mechanism and cuts power. Kitchens have sinks, appliances with metal cases, and frequent cord handling, so ground-fault protection isn’t optional; it’s a critical layer of safety near water and conductive surfaces.
Good to know: GFCI and AFCI are different. AFCI mitigates arc faults that could lead to fire. Many kitchens today use breakers or receptacles that provide one or both protections depending on local code and panel setup.
Before You Start: Parts, Tools, and Safety Checks
Pick the right replacement
- Amperage: Match the circuit. Most kitchen small-appliance circuits are 20A. Use a 20A GFCI or a 15A GFCI on a 20A circuit only if the device has the straight 15A face and the circuit branch rules allow it. When unsure, replace like-for-like.
- Tamper-resistant (TR): Modern living areas typically require TR receptacles to protect children from probe insertion.
- Weather-resistant (WR): For outdoor and damp locations. In a typical indoor kitchen, TR is the key spec; WR isn’t required unless the outlet is actually in a damp or outdoor environment.
- Face color and style: Match your decor and wall plate. Choose a quality brand with clear
LINEandLOADmarkings.
Gather tools
- Non-contact voltage tester and a two-pole tester or multimeter
- Flat and Phillips screwdrivers, wire stripper/cutter, needle-nose pliers
- Flashlight or headlamp, electrical tape, new faceplate
- Labeling tape or marker for identifying cables
Safety checks
- Locate the correct breaker and turn it off. Tag it so nobody flips it on.
- Confirm the outlet is dead with both tester types. Verify hot, neutral, and ground are de-energized.
- If the box is metal, verify it’s grounded. If you see damaged or brittle insulation, call a pro.
Step-By-Step: Replace the Kitchen GFCI Safely
1) Switch off power and verify it’s dead
- Turn off the breaker serving the countertop receptacles. Many kitchens have two or more small-appliance circuits; confirm you found the right one.
- At the outlet, plug in a lamp or tester to confirm it went dark.
- Remove the faceplate. Check hot, neutral, and ground with a non-contact tester and a two-pole tester. Only proceed when readings show no voltage.
2) Remove the old device
- Back out the two mounting screws and gently pull the GFCI forward.
- Take a clear photo of the existing connections. It’s helpful if you need to match something later.
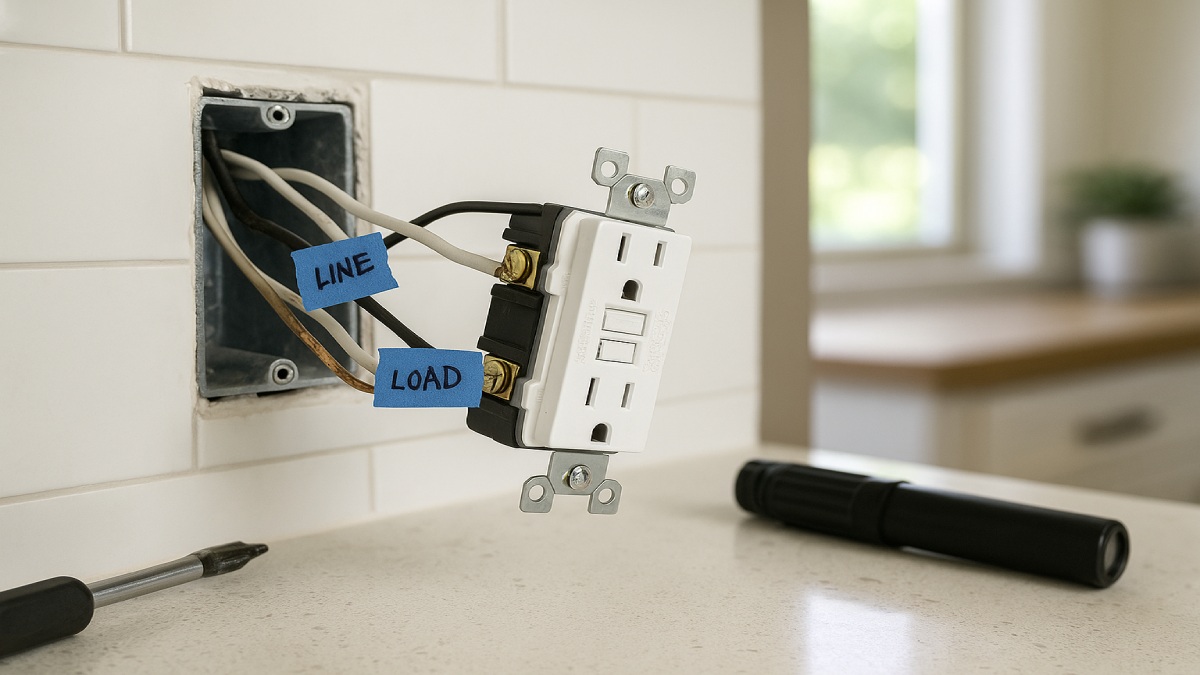
- Loosen terminal screws or release back-wired clamps. Label the cable that brought power LINE and the cable leaving to other outlets LOAD.
Tip: Don’t rely on wire color alone. Kitchens often have multiple cables and pigtails. Confirm which cable is energized by turning the breaker on briefly (device still hanging free), testing which cable goes live, then turning the breaker off again. Label the live one as LINE. If this feels advanced, call a pro.
3) Prep the box and conductors
- Straighten conductors with needle-nose pliers. Trim and re-strip ends to fresh copper (usually 5/8″ for clamp back-wire or to fit the binding screw loop).
- Create neat pigtails if the circuit continues past this box and you need to tie in grounds or neutrals properly.
- Check box fill. If conductors and the new device feel crammed, upgrade the box to a deeper “old-work” style.
4) Wire the new GFCI
Most GFCIs clearly mark terminals and include yellow tape over the LOAD screws. Remove that tape only if you will protect downstream outlets.
- LINE hot (usually black) → brass LINE terminal.
- LINE neutral (usually white) → silver LINE terminal.
- Ground (bare/green) → green ground screw on the device or metal box bond screw.
- If using LOAD to protect downstream outlets: connect the downstream hot to brass LOAD and downstream neutral to silver LOAD. Label those receptacles “GFCI Protected.”
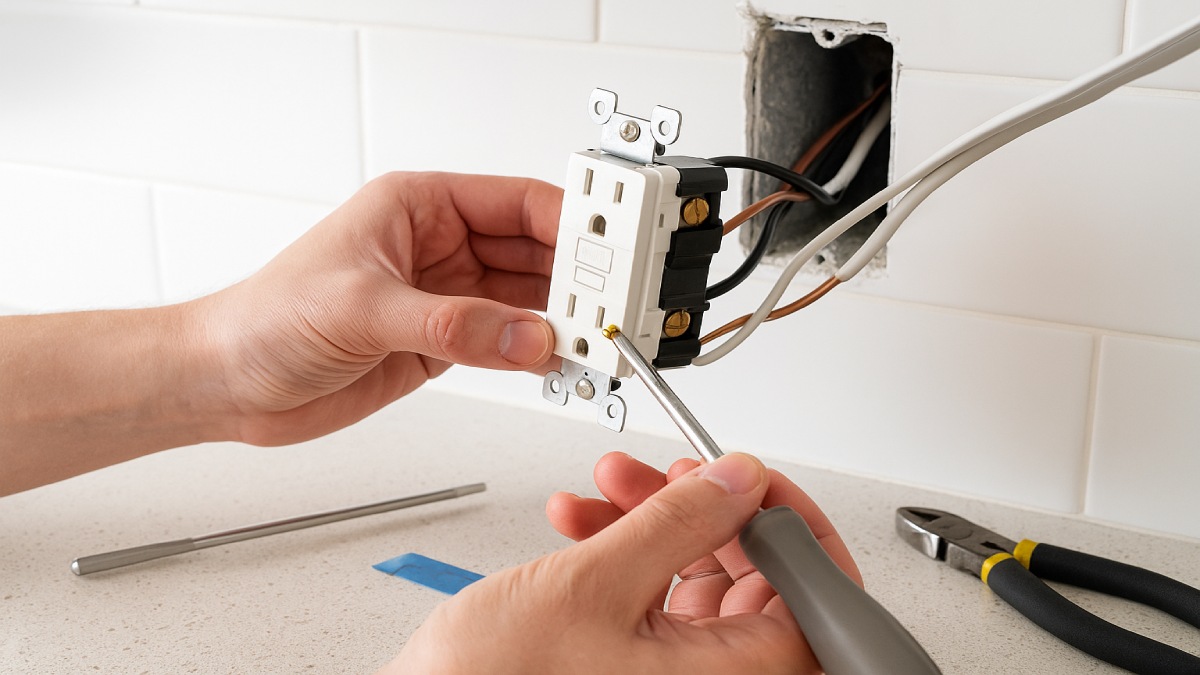
Tighten screws to the manufacturer’s torque spec. If the device supports clamp back-wire, insert stripped, straight conductors fully and tighten firmly. Avoid back-stab spring holes that don’t use a clamp—those are not the same as clamp back-wire and are less reliable.
5) Mount the device and tidy the box
- Fold wires accordion-style behind the device so it seats flat. Keep ground away from hot screws.
- Set the GFCI plumb with the wall. Snug the mounting screws without over-tightening.
- Install the new faceplate. If gaps show around the box, use a gasketed plate for a clean finish.
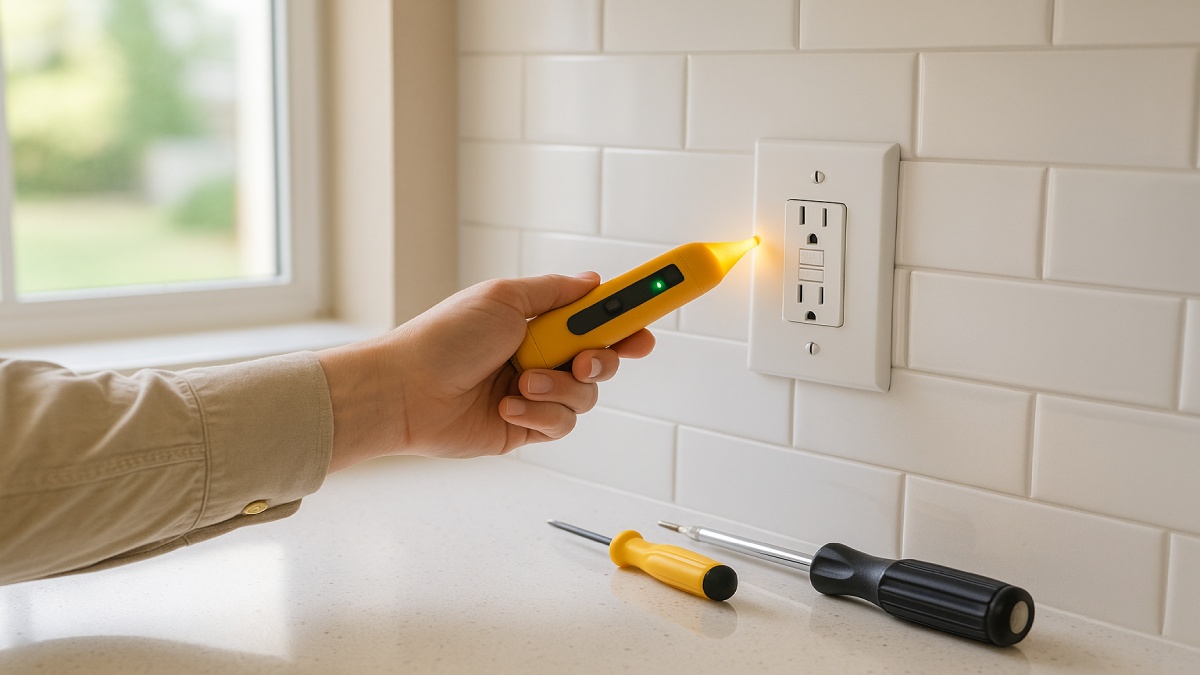
6) Restore power and test thoroughly
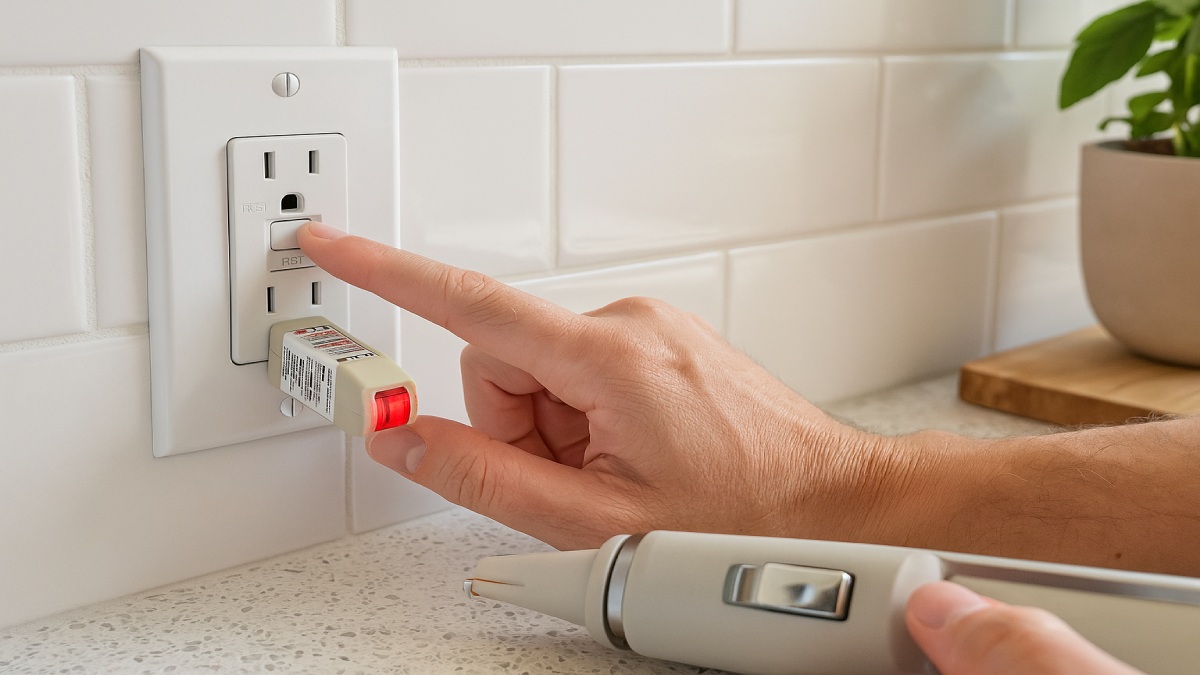
- Turn the breaker on. Press RESET on the GFCI to power the outlet.
- Press TEST. The outlet should trip and cut power. Press RESET again to restore.
- Use a plug-in GFCI tester. Confirm correct wiring, then press its test button; the device should trip.
- If you wired LOAD, test at the downstream outlets too. Apply “GFCI Protected” and “No Equipment Ground” labels where required.
Line vs. Load: How to Decide
LINE only: Quickest and often simplest. The GFCI protects itself; downstream outlets remain standard. This is acceptable when those downstream receptacles are not required to be GFCI-protected or are protected by another device.
LINE + LOAD: The single GFCI protects itself and downstream outlets on the same branch. This saves money and faceplate clutter. Use only when you’re confident which cable continues the run and that the kitchen layout meets protection requirements. Label protected downstream outlets.
Labeling matters: If the circuit extends to dining or pantry outlets, know the protection rules for those points. Label downstream devices as “GFCI Protected.”
Pick the Correct Amperage and Face
- 20A circuit, 20A receptacle: A T-shaped neutral slot indicates 20A face. Many kitchens use these on 20A appliance circuits.
- 20A circuit, 15A receptacle: Common and allowed when the branch uses multiple outlets, but always match the old device unless you’re sure of the rules in your jurisdiction.
- Faceplate style: Decora-style GFCIs are standard; slim bodies help in tight boxes.
Kitchen-Specific Best Practices
Keep box interiors neat
Messy splices and overtightened wirenuts cause headaches later. Trim and re-strip to equal lengths and keep conductor bends smooth to avoid stress at the device clamps.
Bond grounds correctly
If the box is metal, bond the ground to the box and to the device. Use approved green screws or ground clips and proper pigtails.
Respect small appliance circuits
Kitchen receptacles serving countertops typically sit on 20A circuits and must not be tapped for lighting or unrelated loads. Keep your wiring consistent with the branch design.
Troubleshooting After Installation
GFCI won’t reset
- Power may still be off or the breaker tripped. Confirm voltage at LINE with a two-pole tester.
- Hot and neutral may be reversed. A simple plug-in tester will point this out.
- LOAD and LINE could be swapped. Move conductors to the correct terminals.
- A downstream fault exists. Disconnect LOAD conductors, cap them, restore power, and test the GFCI alone. If it now works, troubleshoot the downstream run.
Faceplate won’t sit flush
- Wires may be bunching behind the device. Re-fold them to the sides and behind.
- The old work box may be shallow. Consider a deeper retrofit box to relieve crowding.
Nuisance trips
- Some appliances have leakage that sits close to trip thresholds. Try isolating loads on different outlets.
- Moisture in a nearby box can cause intermittent faults. Dry the area and reseal backsplash penetrations.
Pro-Level Tips for a Cleaner, Safer Install
- Use torque: Tighten terminals to spec. Under- or over-torque leads to heat and intermittent contact.
- Pigtail grounds and neutrals: Pigtails simplify future servicing and reduce stress on device screws.
- Label LOAD conductors: A simple tag prevents confusion at the next device down the line.
- Seal the backsplash: Caulk small cable penetrations so steam and splashes don’t enter the box cavity.
- Document the circuit: Update your panel directory with precise locations like “Kitchen east counter GFCI.”
FAQs
How often should I test a GFCI?
Test monthly. Press TEST; the outlet should trip. Press RESET to restore. Replace the device if it won’t trip or won’t reset.
Can I replace a standard outlet with a GFCI?
Yes, when the box and circuit are suitable. In kitchens, GFCI protection is required at countertop receptacles, so upgrading an old non-GFCI is a good move.
Do I need a 20A GFCI in the kitchen?
Match the existing setup and the circuit’s design. Many kitchen small-appliance circuits are 20A. If in doubt, replace like-for-like or consult an electrician.
What if the box has no ground?
A GFCI can still provide personal protection without a grounding conductor, but it must be labeled “No Equipment Ground.” Consult a pro about upgrading the grounding path.
When to Call a Licensed Electrician
Stop and get help if conductors are damaged, aluminum branch wiring is present, the box is undersized, the breaker won’t hold, or you can’t identify line versus load confidently. Kitchens often combine multiple code requirements; a pro can help you comply and avoid repeated trips.
Safety reminder: Working on energized circuits is dangerous. This guide assumes power is off and verified. When anything feels uncertain, bring in a licensed electrician.
Wrap-Up: Restore Protection and Peace of Mind
With careful testing, tidy wiring, and proper line/load placement, replacing a kitchen GFCI is a solid DIY upgrade. Your new device restores shock protection at the counter and sets a consistent baseline for the rest of the branch circuit. Finish with labels and a quick panel update so future you—and anyone else—knows exactly what’s protected.
If you plan to extend protection to other outlets, map your kitchen runs and decide where a single GFCI can cover the most ground. A little planning up front keeps your wiring clean and your family safer around sinks and small appliances.