Replace Worn Smoke Detectors and Test Them the Right Way
A practical, homeowner-friendly guide to retire aging smoke alarms, install reliable replacements, and verify that every device will alert your family when seconds count.
Smoke detectors don’t last forever. Sensors drift out of calibration, plastic housings yellow and become brittle, and batteries lose capacity even when you never hear a chirp. Most residential alarms need replacement every ten years or sooner if they fail tests, suffer damage, or live in harsh conditions. Swapping them out isn’t complicated, but doing it correctly matters. This guide walks you through the full lifecycle: identifying worn units, selecting the right replacements, installing both battery-powered and hardwired models, and testing them the right way so you can sleep easier.
You’ll also learn common placement rules, the difference between photoelectric and ionization sensing, when to pick a combination unit with carbon monoxide (CO) detection, and how to maintain a testing calendar that keeps the whole system dependable year-round.
Why Replacement Matters and When to Do It
Alarms fail silently as components age. A unit may power on, illuminate LEDs, and chirp during button tests while still losing sensitivity to actual smoke. Environmental contaminants such as grease, steam, dust, and aerosols accelerate this decline. Regular replacement restores factory sensitivity and adds modern features like sealed ten-year batteries, smart interconnects, and nuisance-resistant sensors.
Tell-tale Signs Your Alarms Are Past Their Prime
- Manufacture date older than ten years (printed on back of the alarm body).
- Persistent chirps even after installing a fresh battery or power cycling a hardwired unit.
- Frequent nuisance trips in steam-prone rooms or near kitchens that didn’t previously trigger.
- Discoloration, cracks, or soot indicating heat exposure or contamination.
- Failed functional tests using a listed aerosol smoke tester.
If an alarm is missing, damaged, or fails a functional test, replace it immediately. Do not wait for a remodel or seasonal checkup.
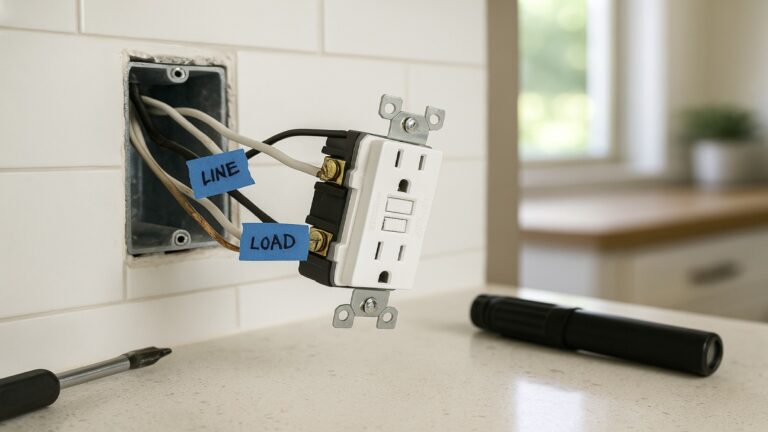
Pick the Right Replacement: Sensors, Power, and Features
Match each location with a detector that suits the room’s conditions while staying code-compliant. A balanced mix across your home reduces nuisance alarms and improves detection speed.
Sensor Technologies
- Photoelectric (PE): Reacts quickly to smoldering fires and tends to be more steam-tolerant for areas near bathrooms and kitchens.
- Ionization (ION): Responds faster to fast-flaming fires but can be more prone to nuisance trips near cooking. Many households prefer PE or dual-sensor setups.
- Dual-Sensor: Combines photoelectric and ionization sensing in one unit for broader coverage.
- Combination Smoke/CO: Essential near sleeping areas with fuel-burning appliances or attached garages. In all-electric homes, choose CO detectors where code requires or where recommended for future-proofing.
Power Options
- Sealed Ten-Year Battery: Simple, low-maintenance, ideal for retrofits. Replace the entire unit at end-of-life.
- Hardwired with Battery Backup: Continuous AC power with a failsafe battery. Most hardwired systems also interconnect alarms so all sound together during an event.
- Wireless Interconnect: Radio-linked alarms communicate without running new wires. Useful in finished spaces.
Features That Reduce Nuisance and Improve Usability
- Hush/Silence Button to quiet steam-related alerts without disabling protection.
- Escape Light that illuminates during an alarm to guide occupants.
- Voice Alerts specifying “Fire” or “Carbon Monoxide.”
- Smart Notifications via app or home-automation hub for remote status and history.
Where to Install Alarms for Reliable Coverage
Strategic placement saves lives. You want alarms that wake sleepers fast and notice smoke where it starts without triggering constantly from normal activity.
General Placement Rules
- Inside every bedroom and outside each sleeping area.
- On every level of the home, including basements and finished attics.
- On ceilings whenever possible. If you must mount on a wall, place the unit 4–12 inches down from the ceiling.
- Keep at least 10 feet from cooking appliances to reduce false alarms.
- Avoid corners, dead air spaces, HVAC vents, and windows where airflow distorts smoke movement.
In open floor plans, a combination of hallway, living area, and near-kitchen (photoelectric) alarms balances coverage with fewer nuisance trips.
Tools and Materials Checklist
- New smoke alarm(s) with mounting plates and hardware.
- For hardwired: compatible wiring harness or adapter pigtail.
- Drill/driver with appropriate bit, screwdriver set, wire stripper.
- Non-contact voltage tester and circuit breaker map.
- Ladder, safety glasses, dust mask for overhead work.
- Labeled sticky notes or tape for mapping interconnects.
- Aerosol smoke alarm tester for functional testing.
Safety Prep Before You Touch a Single Wire
- Open the replacement alarm and read the quick-start and data sheet.
- Confirm location and sensor type match the space.
- For hardwired circuits, switch off the correct breaker and verify no power with a non-contact tester at the existing device.
- Set up a stable ladder and clear the floor beneath your workspace.
- Keep pets and kids away until everything is reassembled and tested.
If your home uses aluminum branch wiring, knob-and-tube, or shows heat-damaged conductors, hire a licensed electrician. Don’t improvise with specialty connectors if you’re not trained.
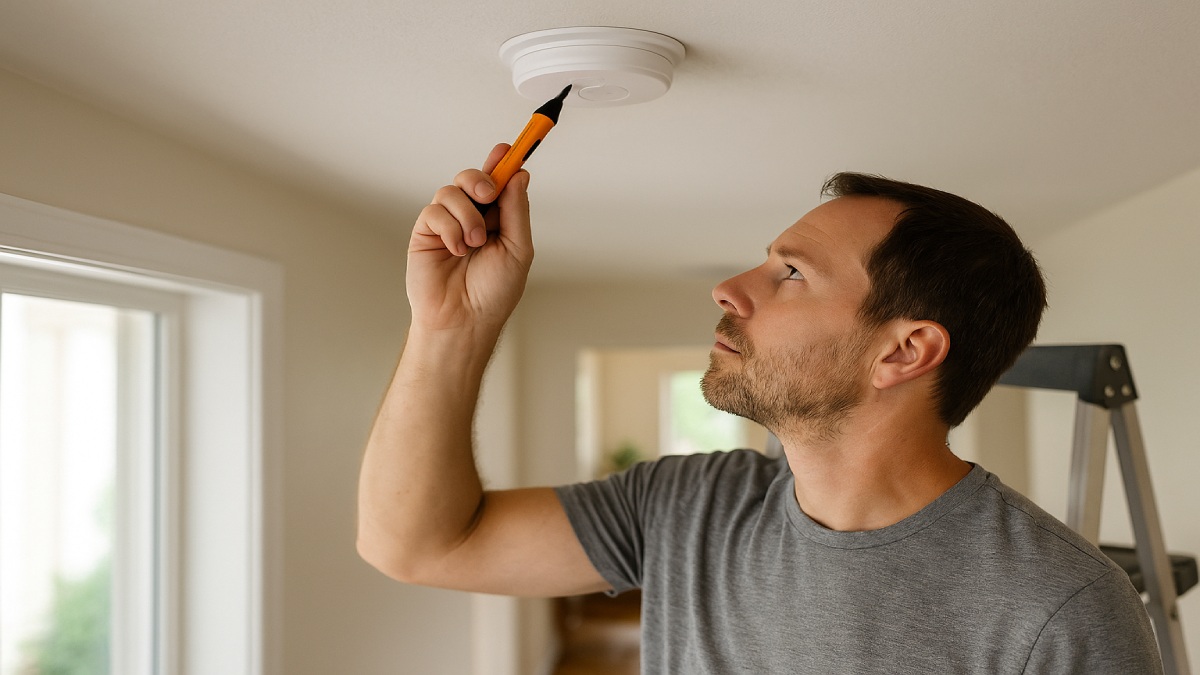
Replace a Battery-Powered Alarm: Step-by-Step
1) Remove the Old Unit
Twist the alarm counterclockwise to release it from the mounting plate. Note the brand and sensor type in case you’re standardizing the rest of the home.
2) Prep the New Alarm
Attach the fresh mounting plate to the ceiling or wall. Use anchors if you can’t hit a stud. Insert the battery or pull the activation tab for sealed units.
3) Mount and Initial Test
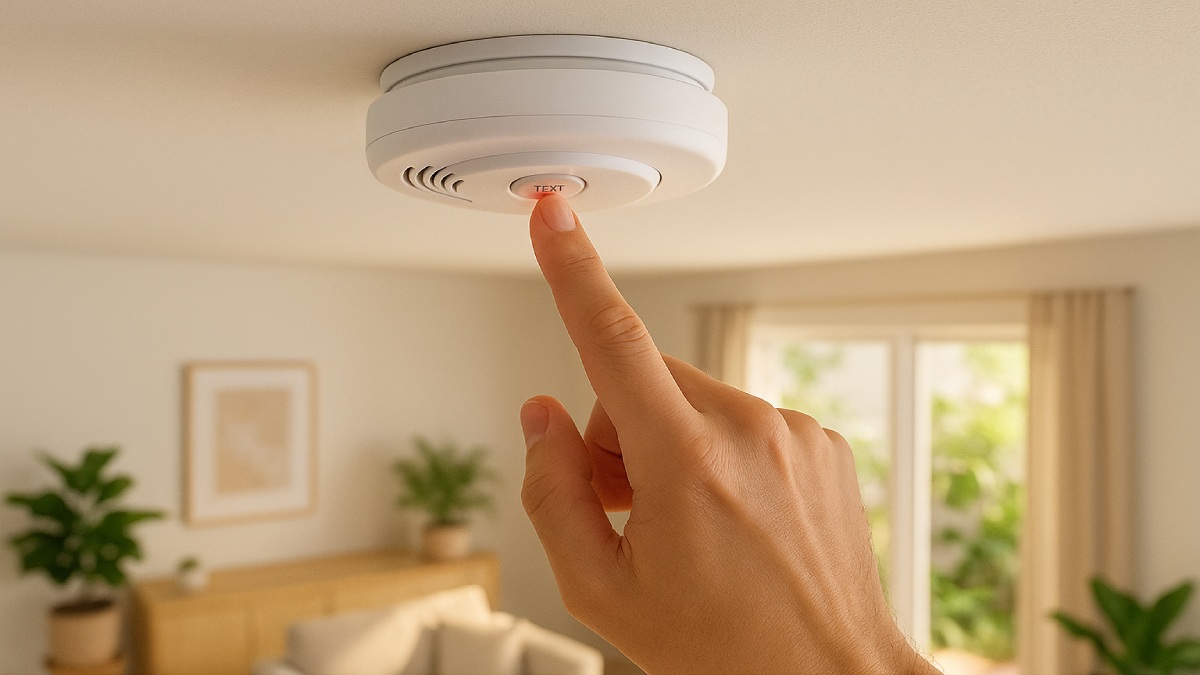
Twist the alarm onto its plate until it clicks. Press and hold the Test button for a few seconds. You should hear a loud, steady pattern and see the status LED sequence.
4) Record the Install Date
Write the month and year on the inside or underside with a fine marker. Add the alarm to your maintenance log.
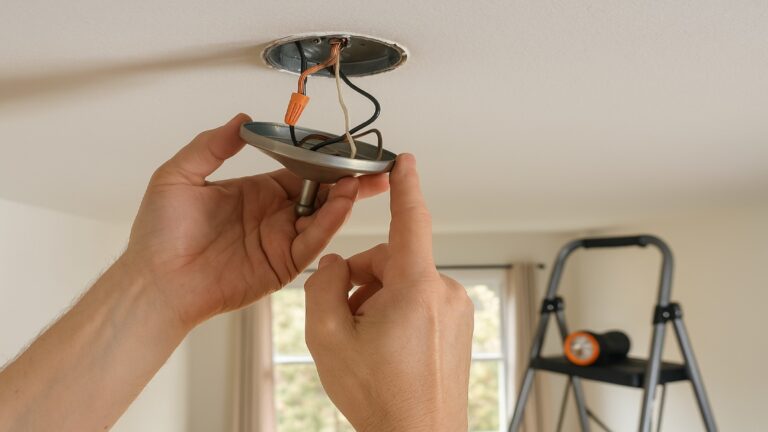
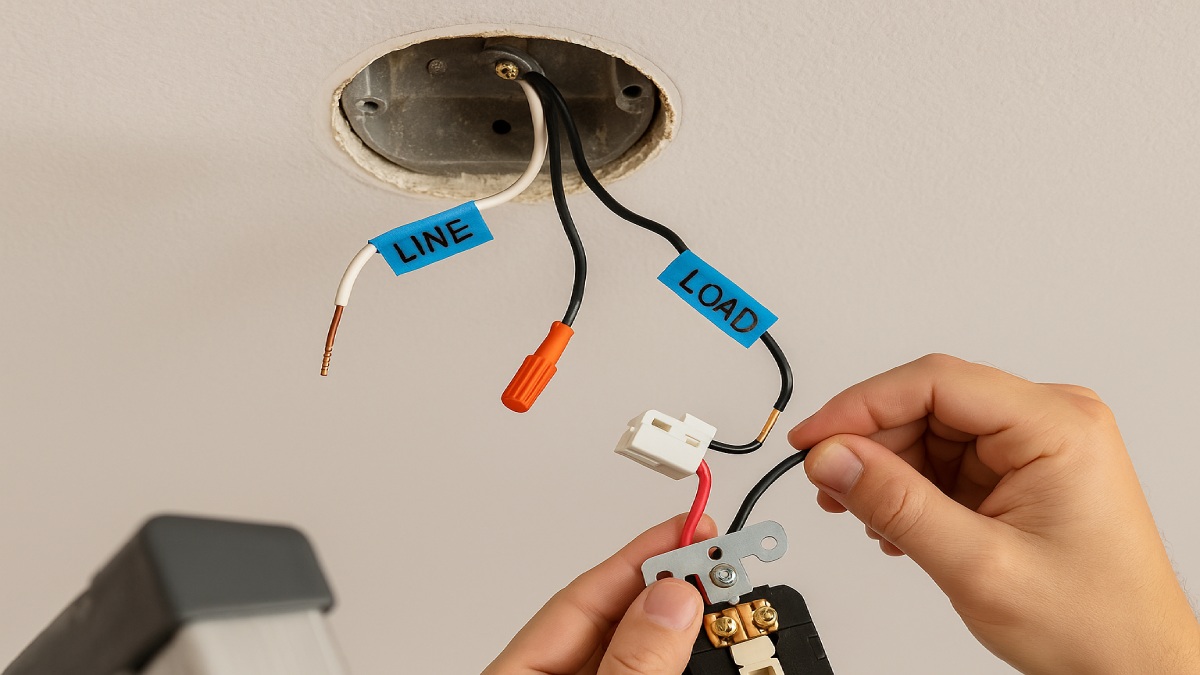
Replace a Hardwired Alarm: Step-by-Step
1) Kill Power and Verify
Turn off the breaker feeding the alarm circuit. Confirm with a non-contact tester at the ceiling box and on the alarm plug.
2) Remove the Old Alarm and Plate
Twist the alarm body free, unplug the harness, then unscrew the mounting ring. Inspect the box for heat damage or brittle insulation.
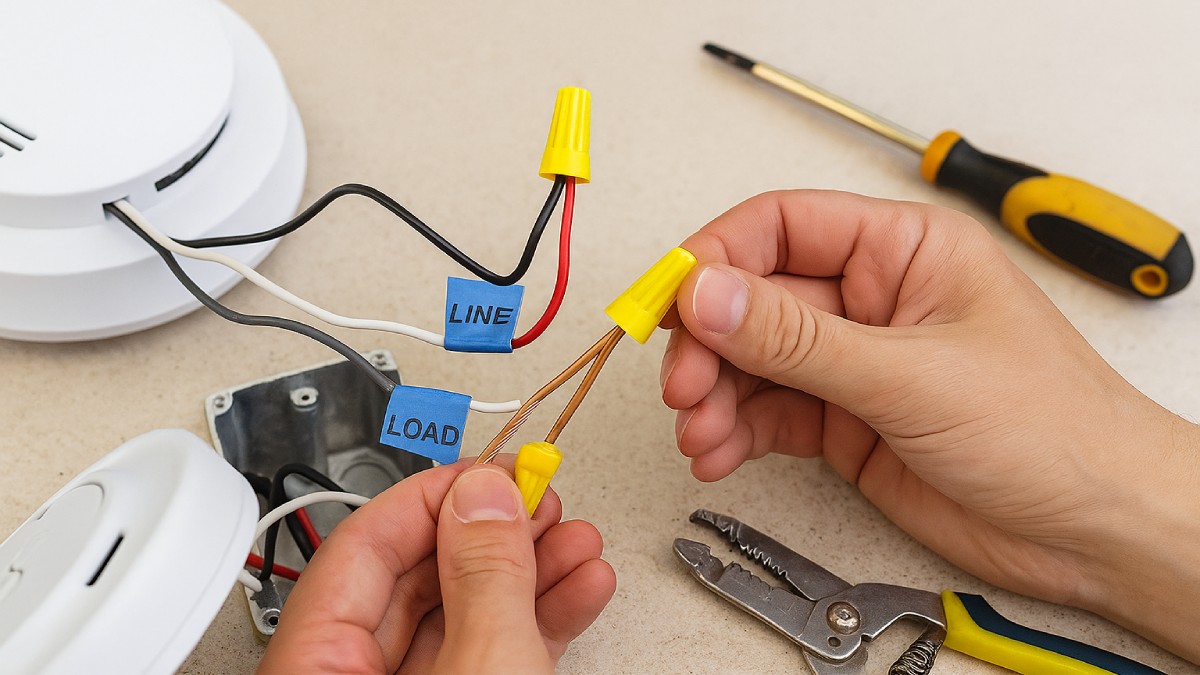
3) Adapt the Harness
Many brands include an adapter so you can plug the new alarm into the old harness. If you must re-terminate, match hot (black), neutral (white), and interconnect (usually red) using listed wire connectors. Ground the metal box if required.
4) Mount the New Plate and Connect
Attach the new plate to the box, plug the harness into the alarm, then twist the unit onto the plate until it locks.
5) Restore Power and Test
Flip the breaker on. Hold the Test button until the alarm sounds. If devices are interconnected, all compatible units should sound together. Confirm the status LED pattern matches the manual.
Don’t mix incompatible interconnect ecosystems. If one brand won’t link with another, either use a listed adapter or standardize the whole set.
Button Tests vs. Functional Tests (And How to Do Both)
Button Test
Press and hold the test button for several seconds. This checks power, sounder, and basic electronics. Run this quick test monthly or after any power outage.
Functional Smoke Test
- Use a listed aerosol smoke alarm tester. Do not use open flame, candles, or kitchen smoke.
- Spray in short bursts toward the alarm per the can’s direction from the recommended distance.
- Confirm the alarm triggers within the specified time and that interconnected units respond, if applicable.
- Ventilate the area after testing so lingering aerosol doesn’t cause re-alarms.
CO Alarm Functional Test
Most combination units rely on the built-in test routine. Only use CO test kits designed for detectors if allowed by the manufacturer. Never hold car exhaust or fuel gases near the device.
Create a quarterly routine: one month do button tests, next quarter add aerosol functional tests, and once a year review placement and dust the units with a vacuum brush.
Maintenance Calendar and Recordkeeping
- Monthly: Button test every alarm. Clear dust with a soft brush.
- Quarterly: Functional smoke test (and CO review for combo units).
- Annually: Inspect placement, confirm interconnects, check app notifications if using smart alarms.
- Every 10 Years: Replace smoke alarms. CO sensors often need replacement earlier depending on model; mark the dates.
Keep a simple spreadsheet or notebook with install dates, test results, and notes about nuisance trips or replacements. Documentation helps spot patterns and proves maintenance for insurance or landlord records.
Troubleshooting: Chirps, Nuisance Trips, and Silent Alarms
| Symptom | Likely Cause | Fix |
|---|---|---|
| Single chirp every 30–60 seconds | Low battery or end-of-life indicator | Replace battery or the entire unit if at end-of-life |
| Frequent nuisance alarms near kitchen | Steam/cooking aerosols reaching sensor | Relocate 10+ ft from cooking or switch to photoelectric with hush feature |
| Hardwired alarm dead after replacement | Wrong harness, tripped breaker, loose neutral | Match harness or re-terminate correctly; verify breaker and neutral continuity |
| Interconnect not triggering all units | Brand incompatibility or miswired red interconnect | Use compatible models or listed adapters; validate the interconnect conductor path |
| Unit fails aerosol functional test | Aged sensor, contamination, or defective device | Replace alarm; review placement and maintenance routine |
Special Cases: Hearing Impairment, Rentals, and Renovations
Accessibility Upgrades
Pair compatible alarms with bed shakers, strobe lights, or smart notifications for occupants with hearing loss. Interconnected systems ensure alerts propagate to sleeping rooms even if a door is closed.
Landlords and Tenants
Owners typically supply working alarms. Tenants should report chirps, missing devices, or failed tests in writing and request prompt replacement. Keep dated photos after each test.
During Remodels
Use the opportunity to standardize models and add hardwired interconnects where permitted. If walls are open, run cabling now—wireless interconnect works, but copper remains robust in the long term.
Time and Cost: What to Expect
- Battery alarm replacement: 10–15 minutes per unit once the ladder is set.
- Hardwired swap: 20–30 minutes per unit, plus time to verify the circuit and interconnect behavior.
- Typical prices: $20–$35 for basic battery models, $25–$60 for hardwired with backup, $35–$100 for combo smoke/CO or smart features.
Budget for a full-home refresh all at once so every alarm shares the same age and maintenance cycle. Buying multi-packs often lowers the cost per unit.
Disposal and Recycling
Follow the manufacturer’s disposal guidance. Some ionization alarms include a tiny radioactive source and require special handling. Many municipalities accept smoke alarms on household hazardous waste days. Sealed-battery units get recycled through e-waste programs where available.
Quick Answers to Common Questions
How often should I test alarms?
Do a button test monthly and a functional aerosol test quarterly. Mark a recurring reminder on your calendar.
Do I need CO alarms if everything is electric?
If you have an attached garage or use fuel-burning tools, yes. CO can enter from vehicles or portable equipment.
Can I mix brands on an interconnected circuit?
Some brands work together; many don’t. When in doubt, standardize on one ecosystem or use listed adapters recommended by the manufacturer.
Are smart alarms worth it?
Remote alerts and event history help when you travel or manage properties. If you prefer simple maintenance, sealed ten-year alarms without apps are still excellent.
The Takeaway
Plan your replacement, choose the right sensors for each room, and install with care. Finish with proper testing so you know every device will sound when smoke or CO threatens your home. Set a maintenance calendar and you’ll keep protection strong long after the new plastic smell fades.
Disclaimer: Home safety and electrical work carry risks. If you’re unsure about wiring, interconnect compatibility, or code compliance, consult a licensed electrician.