Repair a Bent Window Frame After Heavy Storm Damage Safely
Storms can flex and rack window openings, twist metal cladding, and crush soft wood fibers—leaving sashes sticky, latches misaligned, and energy bills creeping higher. If you’ve discovered a bent window frame after severe weather, acting methodically will restore smooth operation and improve weather resistance without making the damage worse. This guide walks you through safe assessment, careful straightening, durable reinforcement, and smart prevention—so you can fix today’s problem and harden your home for the next big blow.
You’ll learn how to tell structural racking from cosmetic dents, which tools work best on wood versus vinyl versus aluminum, and when to call a pro. We’ll also cover glazing checks, flashing and sealant refreshes, and simple alignment tricks that make a stubborn sash glide like new. Keep reading for a clear, confidence-building plan that respects both safety and finish quality.
Safety First: Know Your Limits
Windows sit inside openings that can telegraph broader building movement. A frame that’s visibly racked may indicate sheathing shifts, compromised fasteners, or water intrusion that weakened surrounding framing. Respect these safety rules before you lift a tool:
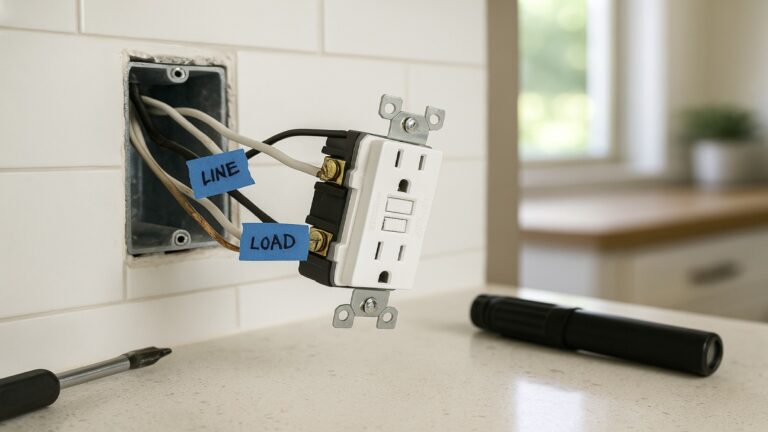
Electrical & reach hazards: Use a stable ladder, keep metal tools away from live circuits near motorized blinds or outlets, and wear cut-resistant gloves and eye protection. If the glass is cracked or bowed, tape it with painter’s tape in a grid to reduce shatter risk.
- Stop immediately if the wall is bowed, the header has sagged, or the frame shifts as you press—those are structural red flags.
- Avoid prying against insulated glass edges; point loads can crack the seal.
- For upper stories, use a harness or work with a spotter when working near open sashes.
Identify the Frame Type and Damage Pattern
Repair strategy changes with materials. Pinpoint your frame type and how the storm deformed it.
Wood Frames
- Typical damage: Compression dents, racking at corners, loosened fasteners, hairline splits.
- Response: Gentle clamping, blocking, and re-fastening; fillers for shallow dents; epoxy for splits.
Vinyl Frames
- Typical damage: Heat-formed bends, distorted channels, popped clips.
- Response: Warm-water softening and gradual re-shaping; replace deformed sash tracks or clips.
Aluminum Frames
- Typical damage: Sharp creases, cosmetic dings, fastener looseness causing rack.
- Response: Backer-blocking and slow counter-bending; replace creased covers if appearance matters.
Composite/Fiberglass
- Typical damage: Minor racking, fastener pullout, finish scuffs.
- Response: Re-square with shims, re-fasten to studs, finish touch-ups.
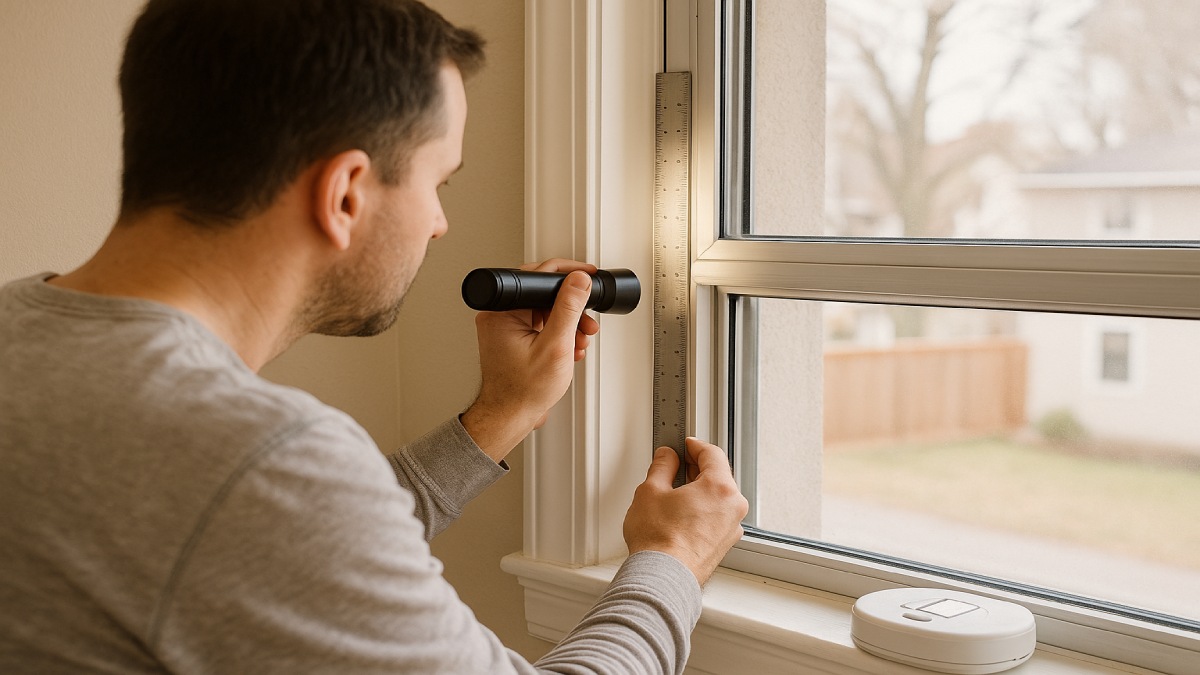
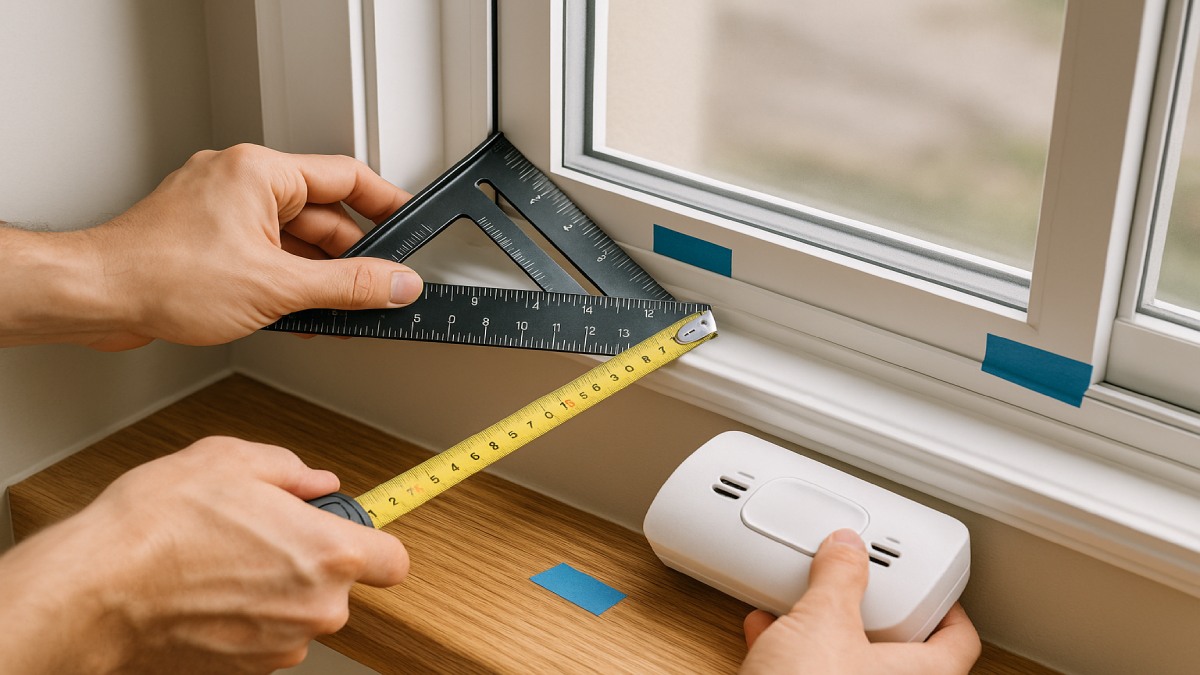
Document and Measure Before You Touch Anything
Good notes make quick, accurate repairs. Capture the current state so you always know where you started.
- Photos & marks: Shoot each corner and the latch side. Use painter’s tape to mark high/low spots and gaps.
- Baseline measurements: Record diagonal measurements of the frame interior. A difference greater than 3–5 mm indicates racking.
- Reveal checks: Close the sash and look at the spacing between sash and frame; consistent reveal = square.
- Latch engagement: If the lock won’t meet or needs force, you likely have rack, not just a latch issue.
Tools & Materials for a Clean, Controlled Repair
Gather what you need once, then work slowly. The right tool prevents collateral damage.
- Inspection: Straightedge, feeler gauges or business cards, small flashlight, moisture meter (optional).
- Correction: Soft-jaw clamps, wood shims, rubber mallet, heat gun or hot water (vinyl only), pry bar with protective blocks.
- Fastening: Exterior-grade screws (#8–#10), finish nails where appropriate, drill/driver, countersink bit.
- Weathering: Paintable acrylic-latex caulk, backer rod, flashing tape (if trim is removed), quality exterior paint/touch-up.
- Finishing: Two-part wood epoxy (for wood splits), lightweight filler (cosmetics), sanding sponges (220–320 grit).
- Safety: Gloves, eye protection, dust mask if sanding, drop cloths.
Step-by-Step: Re-Square and Straighten the Frame
1) Loosen What Needs to Move
To let the frame relax back to square, free the components that are locking it out of alignment.
- Remove interior casing carefully (if required): score paint lines, then pry against a wide block to prevent wall dents.
- Back off fasteners on the most compressed corner(s) just enough to allow micro-movement—typically ¼–½ turn.
- Support the sash so weight isn’t fighting you. For double-hung, lock one sash and work the other; for casement, keep it closed and latched during initial squaring.
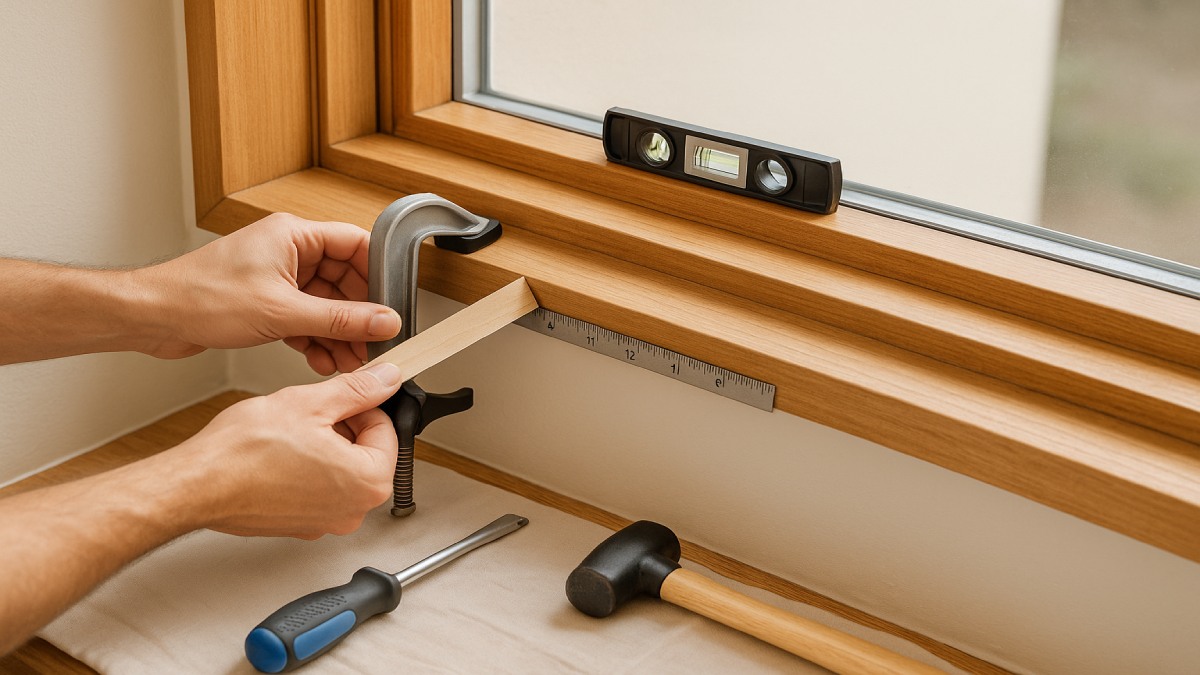
2) Correct Racking with Shims and Clamps
Think diagonally. Racking is a parallelogram problem—push one diagonal long, pull the other short.
- Shim opposite corners: Insert thin wood shims near the frame-to-stud fasteners on the “short” diagonal.
- Clamp gently: Use soft-jaw clamps across the “long” diagonal to nudge the frame toward square. Tighten in small increments and re-measure often.
- Check reveals: Close and reopen the sash to see if rub points disappear. Aim for uniform gaps from top to bottom.
3) Material-Specific Straightening
For Wood
- Micro-adjust: Tap shims with a mallet to fine-tune. Re-drive or replace fasteners into solid studs (use longer screws if previous ones spun).
- Repair fibers: For compression dents or splits, consolidate with two-part epoxy, sand flush, and touch up paint.
For Vinyl
- Warm and reshape: Apply gentle heat (or pour hot—not boiling—water on a cloth) to the bent vinyl, then hand-form it with a padded block. Hold position as it cools.
- Replace deformed tracks: If the sash channel is warped, replacement is faster and cleaner than fighting a permanent bend.
For Aluminum
- Counter-bend with backing: Place a padded wood backer behind the dent and apply even pressure on the face to lift the low spot. Avoid sharp lever points.
- Cosmetics: Light body filler can hide shallow dings under paint; replace creased snap-covers when aesthetics matter.
Re-Fasten, Seal, and Reinforce for Durability
Re-Fasten to Structure
- Into studs: Anchor through the jambs into framing with corrosion-resistant screws spaced 10–12 inches from corners and 16–24 inches along the run.
- Pre-drill & countersink: Prevent splits in wood and keep heads flush for casing reinstallation.
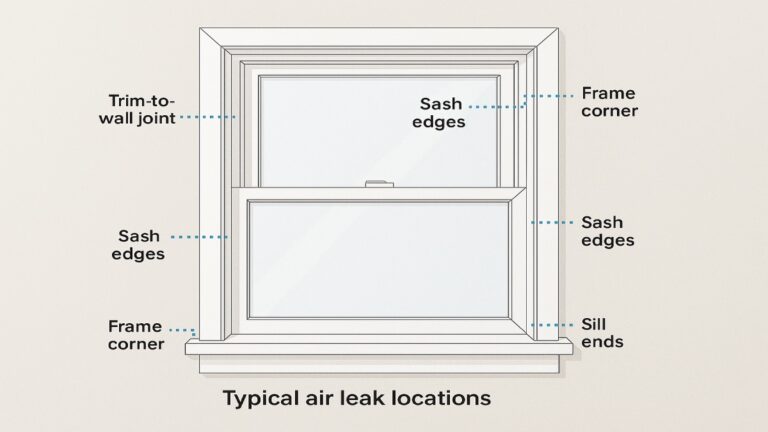
Restore Weather Management
- Flashing: If you removed exterior trim, add self-adhesive flashing tape that laps shingle-style from sill to head.
- Sealant: Use backer rod in gaps deeper than ⅜″, then tool a paintable acrylic-latex bead for clean edges.
- Weep paths: Ensure factory weep holes remain open—never seal them.
Tune the Operable Parts
- Hardware alignment: Adjust strike plates and latches after the frame is square, not before.
- Balance/hinge health: Replace worn balances on double-hung windows or tighten/realign casement hinges as needed.
- Lubrication: Use a dry PTFE spray on tracks and locks; avoid oily lubricants that collect dust.
Confirm Square, Function, and Airtightness
Five-minute QA routine:
- Measure diagonals again—aim for < 2–3 mm difference.
- Open/close the sash 10 times; it should glide without rub or rebound.
- Latch and perform a paper test on all four sides—paper should resist pullout but not tear aggressively.
- Shine a flashlight from outdoors at night—look for light leaks around seals.
- Spray a fine mist of water on exterior (never pressure-wash) and check for moisture ingress.
When to Call a Pro
Some damage reaches beyond a DIY scope. Bring in a window specialist or contractor when you see:
- Structural movement: Bowed studs, cracked drywall radiating from the opening, or a sagging header.
- Glazing failure: Fogged insulated glass, cracked panes, or a de-bonded spacer.
- Severe metal creasing: Aluminum with hard creases that won’t lift without distorting neighboring profiles.
- Mold or rot: Soft, dark wood around the sill or jamb needs remediation and possibly partial reframing.
Cost & Time Expectations
Every window and storm is different, but these ranges help you plan:
- DIY supplies: $40–$150 (shims, screws, caulk, filler, small flashing tape, touch-up paint).
- Tool rentals: $20–$40/day (heat gun, additional clamps if needed).
- Pro service calls: $150–$450+ for assessment and basic re-square; $300–$900+ if glazing or major parts need replacement.
- Time: 2–4 hours for minor racking; a day for deeper repairs including repainting and curing.
Finish Quality: Make It Look New Again
Beyond structure and operation, take time to restore the visual details that sell the repair.
- Surface refinement: Lightly sand filled spots to feather edges; use a tack cloth before paint.
- Paint strategy: Prime repairs; then two thin topcoats. For aluminum/vinyl, use compatible coatings per manufacturer guidance.
- Casing & caulk lines: Mask carefully and tool caulk with a damp fingertip or flexible spatula for a uniform bead.
- Hardware refresh: Clean or replace handles and locks; a small upgrade modernizes the whole elevation.
Prevent a Repeat: Weather-Hardening Tips
Most storm damage compounds existing weaknesses. Shore up these details now:
- Keep drainage clear: Clean weep holes and sills each season so wind-driven rain exits quickly.
- Maintain sealants: Inspect perimeter caulk annually; touch up micro-cracks before water gets in.
- Trim vegetation: Keep branches from striking glass and frames during wind gusts.
- Upgrade fasteners: Where allowed, replace corroded screws with stainless or ceramic-coated equivalents.
- Storm protection: Consider removable storm panels or impact film in high-risk regions.
FAQs
Can I fix a bent frame without removing the window?
Often, yes. Minor racking can be corrected by loosening selective fasteners, shimming, and re-fastening. If the unitized frame is severely distorted, removal may be required to re-square in a controlled setting.
Will a bent frame always affect energy efficiency?
Even small misalignments degrade weatherstripping contact, increasing drafts. Restoring square and refreshing seals typically improves comfort and utility costs.
Is heat safe for vinyl straightening?
Moderate, localized warmth can help vinyl relax for micro-adjustments. Avoid high heat that can warp profiles; never heat insulated glass edges.
What if the sash still scrapes after re-squaring?
Confirm strikes and keepers are aligned, replace worn balances or hinges, and lightly true paint drips or burrs along the contact path.
Summary: A Calm, Methodical Fix Wins
Storms can rack frames just enough to bind a sash and leak air. By diagnosing the deformation, relieving stress with shims and soft clamping, and re-fastening to solid structure—then sealing, finishing, and testing—you return the window to smooth operation and resilient weather performance. Tackle small bends confidently and call a pro for structural or glazing issues.
Quick Reference Checklist
- Photo and mark reveals; measure diagonals.
- Loosen only what must move; support the sash.
- Shim and clamp diagonally in small increments.
- Re-fasten to studs; restore flashing and sealant.
- Tune hardware, test operation, verify weathertightness.
- Finish surfaces; plan seasonal inspections to prevent repeats.