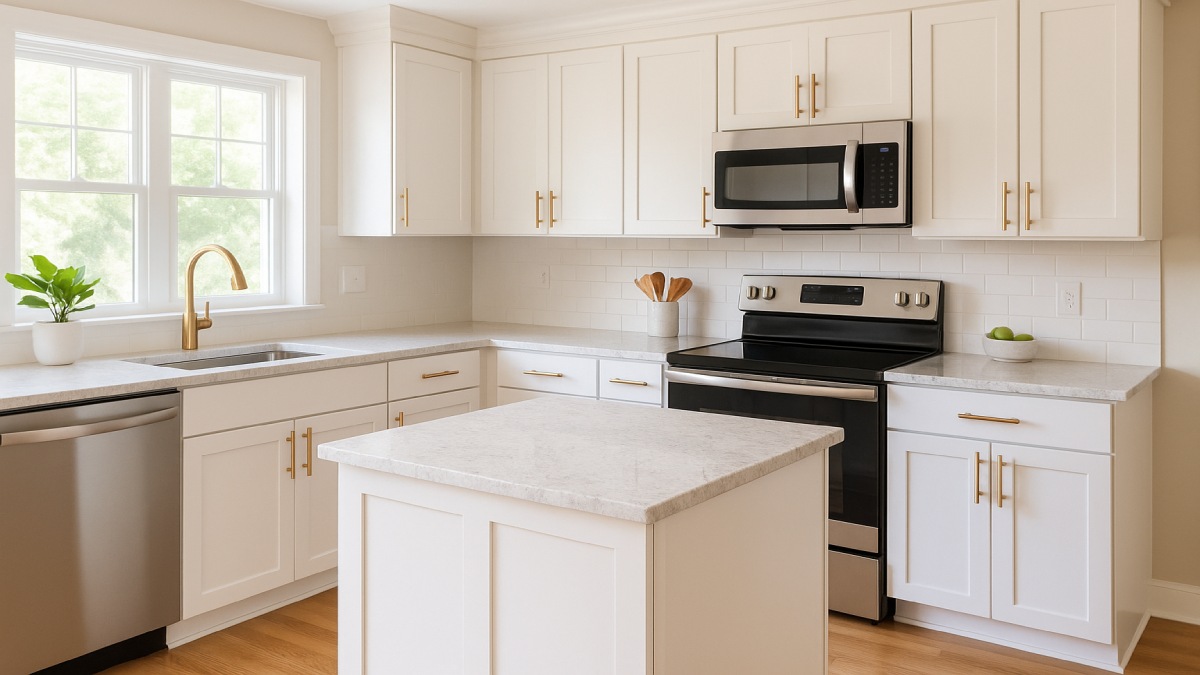
Paint Kitchen Cabinets to Save Big on Remodeling Costs
Renovating a kitchen can easily become one of the most expensive home improvement projects. Yet, many homeowners overlook one simple and affordable way to breathe new life into their space — painting kitchen cabinets. Instead of replacing or refacing, painting offers an impressive transformation at a fraction of the cost. With the right materials, techniques, and preparation, your cabinets can look like they rolled straight out of a high-end showroom.
This guide covers everything you need to know — from cost savings and preparation steps to pro-level painting methods and maintenance tips. Whether you’re a weekend DIYer or simply looking to stretch your remodeling budget, this article will help you create a kitchen that feels fresh, modern, and professionally finished.
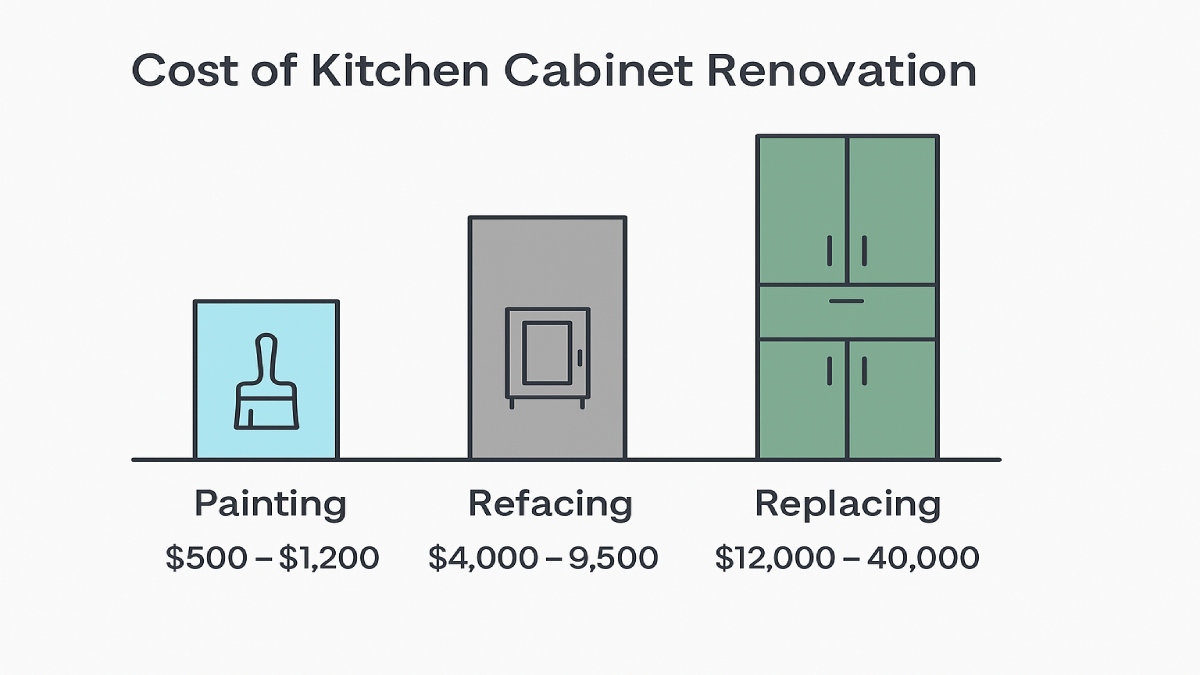
The Real Cost Comparison – Painting vs. Refacing vs. Replacing
Before you pick up a paintbrush, it’s important to understand how much you can actually save. On average, repainting kitchen cabinets costs between $200 and $600 for DIY projects, or $2,000 to $6,500 for professional services. In contrast, refacing can cost around $8,000 to $13,000, and a full replacement can exceed $20,000 to $40,000 depending on materials and layout changes.
Painting: The Budget Champion
Painting wins in affordability and flexibility. A high-quality paint job can rejuvenate solid cabinet boxes and doors, giving them the look of brand-new installations. Beyond the visual upgrade, repainting allows customization with trending hues like navy, forest green, or crisp white, without a huge financial commitment.
Refacing: A Mid-Range Upgrade
Refacing involves replacing the cabinet doors and applying a veneer over the existing boxes. It’s a great choice if your boxes are structurally sound but outdated in style. While it delivers a more uniform finish than painting, it also costs significantly more.
Replacing: For When Cabinets Are Beyond Repair
Complete cabinet replacement is usually the last resort, ideal for those changing the kitchen’s layout or dealing with water damage and rot. The cost can easily soar, especially with labor and materials. Painting remains the smarter, eco-friendlier alternative for most kitchens.
Planning and Preparation – The Key to a Flawless Finish
Proper preparation determines whether your paint finish will last years or peel within months. Dedicate time to cleaning, sanding, and priming before painting to ensure long-term durability.
Evaluate Cabinet Condition
Inspect your cabinets closely. Solid wood cabinets are ideal for repainting, while MDF or laminate surfaces may require specialized bonding primers. If doors show signs of delamination or structural damage, repair those areas first.
Gather Materials and Tools
- Degreaser (like TSP or Krud Kutter)
- Sandpaper (180–220 grit)
- Painter’s tape and drop cloths
- High-quality primer and enamel paint
- Brushes, foam rollers, or HVLP paint sprayer
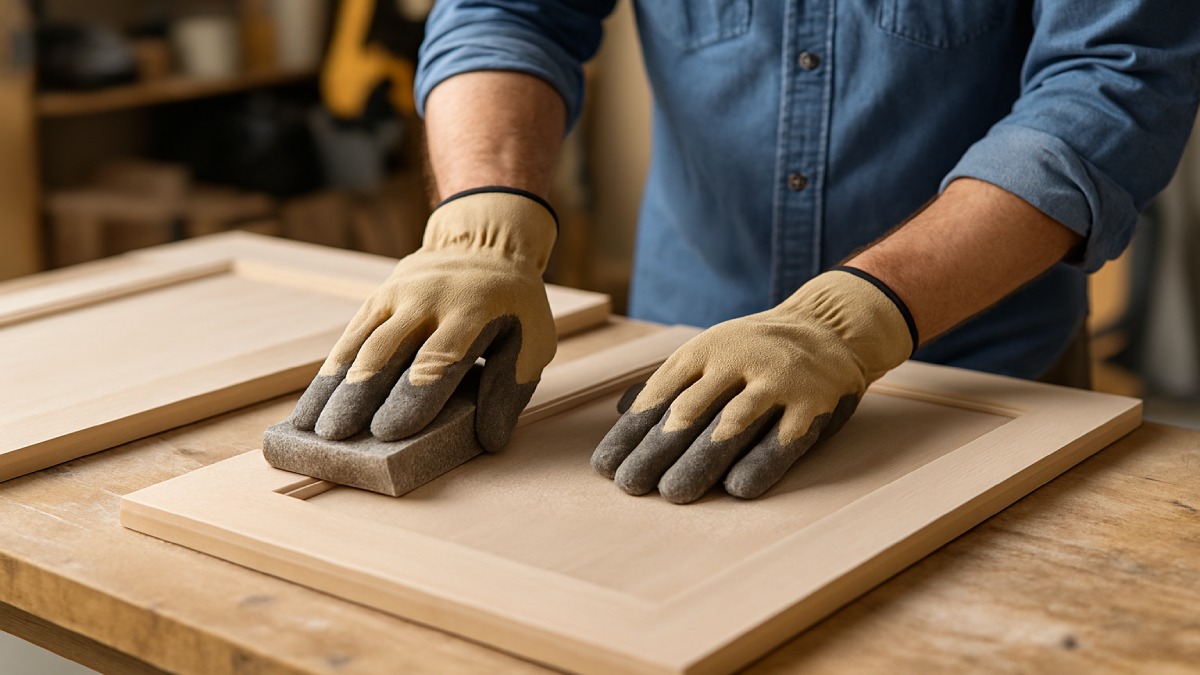
Degrease and Sand Thoroughly
Kitchens accumulate grease and residue over time. A degreaser ensures paint adhesion. After cleaning, lightly sand to scuff the surface, not strip it. This step gives primer something to grip onto.
Priming for Adhesion and Durability
Primer is the foundation of a long-lasting paint job. Use a shellac-based or bonding primer like Zinsser BIN or INSL-X Stix for the best adhesion. Allow the primer to cure completely before painting.
Choosing the Right Paint – The Science Behind a Durable Finish
Not all paints are created equal. When it comes to cabinets, durability, hardness, and washability matter most. Modern hybrid paints combine the easy cleanup of latex with the hardness of oil-based finishes.
Waterborne Alkyd vs. Urethane Enamels
Professional painters recommend waterborne alkyd enamels such as Benjamin Moore ADVANCE or Sherwin-Williams Emerald Urethane. They self-level beautifully and cure to a strong, smooth surface resistant to chips and stains.
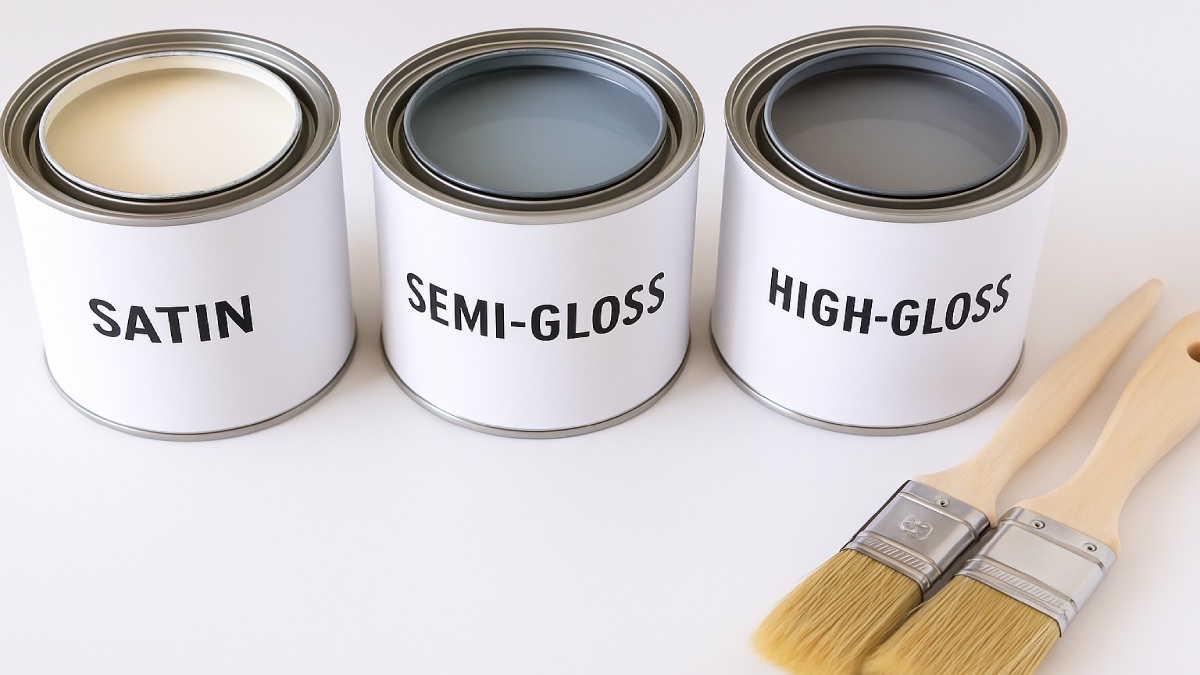
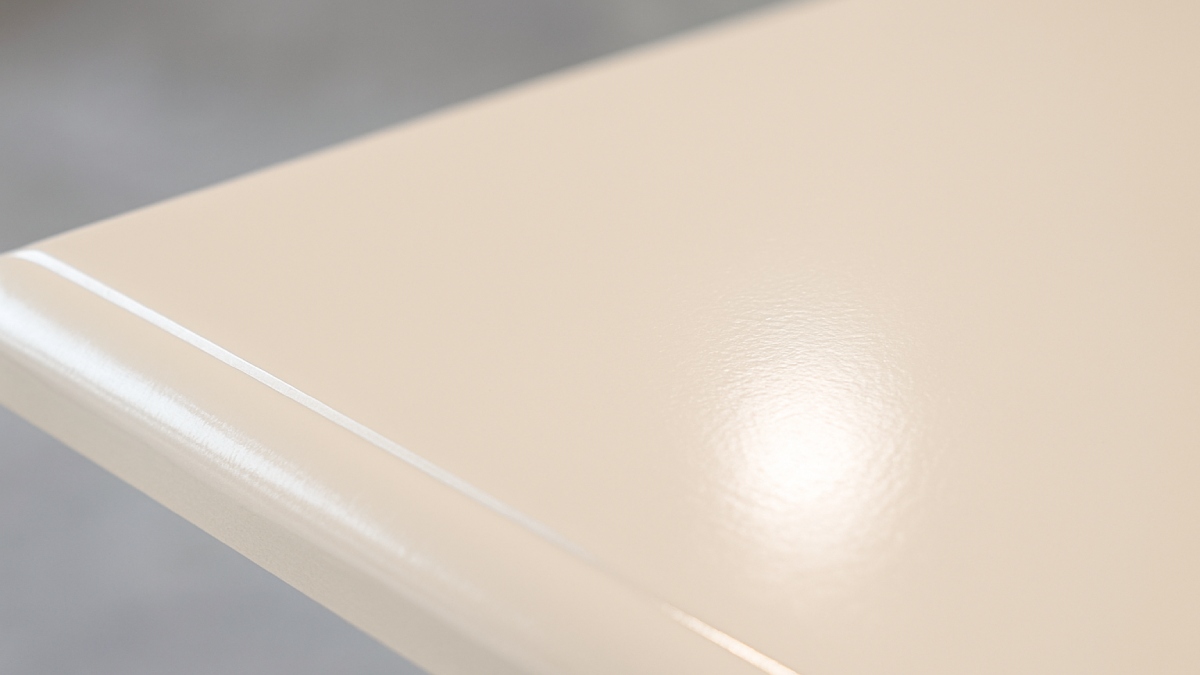
Finish Sheen and Durability
For kitchen cabinets, satin and semi-gloss finishes strike the right balance. They are easy to clean and reflect just enough light to highlight the details of your cabinetry.
Eco and Health Considerations
Always opt for low- or zero-VOC paints. These formulas minimize odor and air pollution while providing a durable, long-lasting surface — essential for indoor environments like kitchens.
Painting Process – Step-by-Step to a Professional Look
Here’s a simple, detailed workflow that mirrors what professional painters follow. Each stage builds on the last, ensuring a smooth, long-lasting finish.
Step 1 – Label and Remove Everything
Remove all doors, drawers, and hardware. Label each piece using painter’s tape to make reassembly easy. Clean all surfaces again to eliminate dust before priming.
Step 2 – Apply Primer Properly
Apply a thin, even coat of primer using a sprayer or foam roller. Avoid heavy layers that cause drips. Let the primer dry fully according to the manufacturer’s directions.
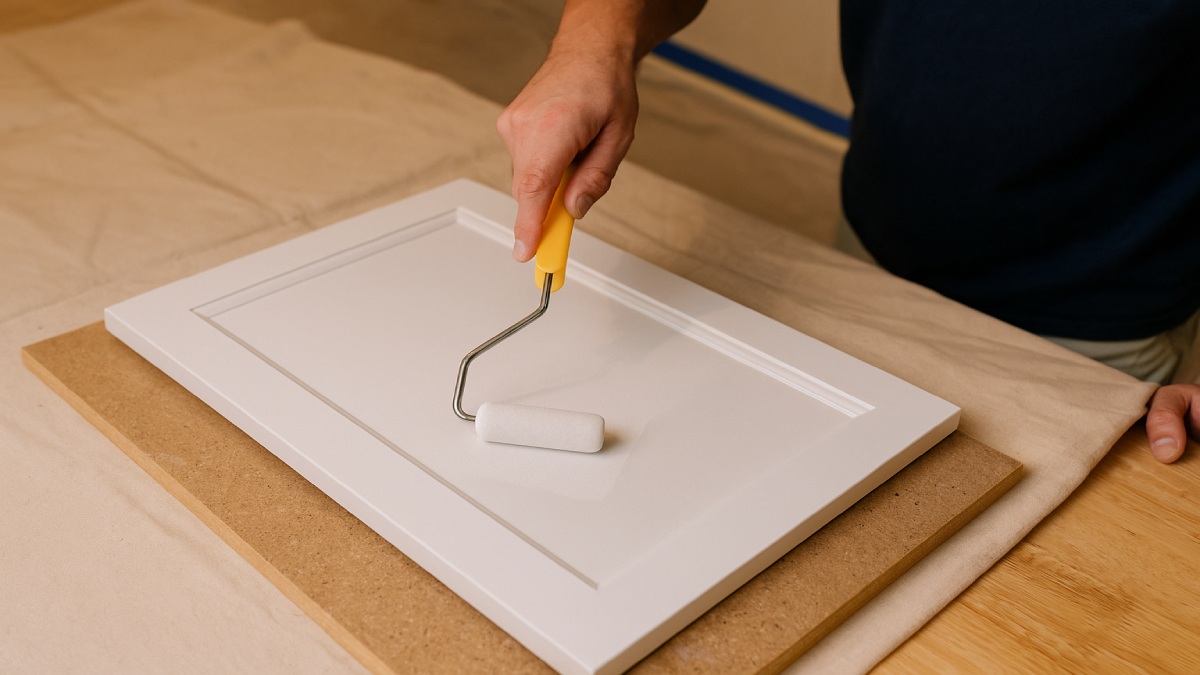
Step 3 – Paint Application Techniques
Use high-density foam rollers for flat areas and angled brushes for edges. For a flawless finish, lightly sand between coats and maintain a wet edge while working. Two to three thin coats will outperform one thick coat every time.
Step 4 – Curing and Reassembly
After your final coat, let the paint cure for at least 7 days before reassembling doors or replacing hardware. Full curing ensures hardness and prevents sticking or smudging.
Pro Tips and Common Mistakes to Avoid
Top Mistakes Homeowners Make
- Skipping the degreasing or sanding step.
- Using regular wall paint instead of enamel.
- Applying thick coats or rushing between layers.
- Painting in humid or cold environments.
Insider Tips for a Flawless Finish
- Maintain consistent temperature (65–75°F) and low humidity.
- Sand lightly between coats for a professional-grade smoothness.
- Add a hardener or topcoat for extra durability on high-use areas.
- Test your chosen color in natural and artificial light before committing.
Real-Life Cost Example and ROI Breakdown
Let’s break down the savings clearly. A standard 10×10 kitchen with 20 linear feet of cabinets might cost:
- Painting (DIY): $400–$700
- Professional Painting: $2,500–$6,000
- Refacing: $8,000–$13,000
- Replacing: $20,000–$40,000+
That’s up to 90% savings compared to full replacement. Painted cabinets can also deliver an ROI of 70–80% at resale, especially when paired with modern hardware and lighting.
Maintenance and Long-Term Care
Maintaining your painted cabinets is simple if you follow the right cleaning routine and keep an eye on wear over time.
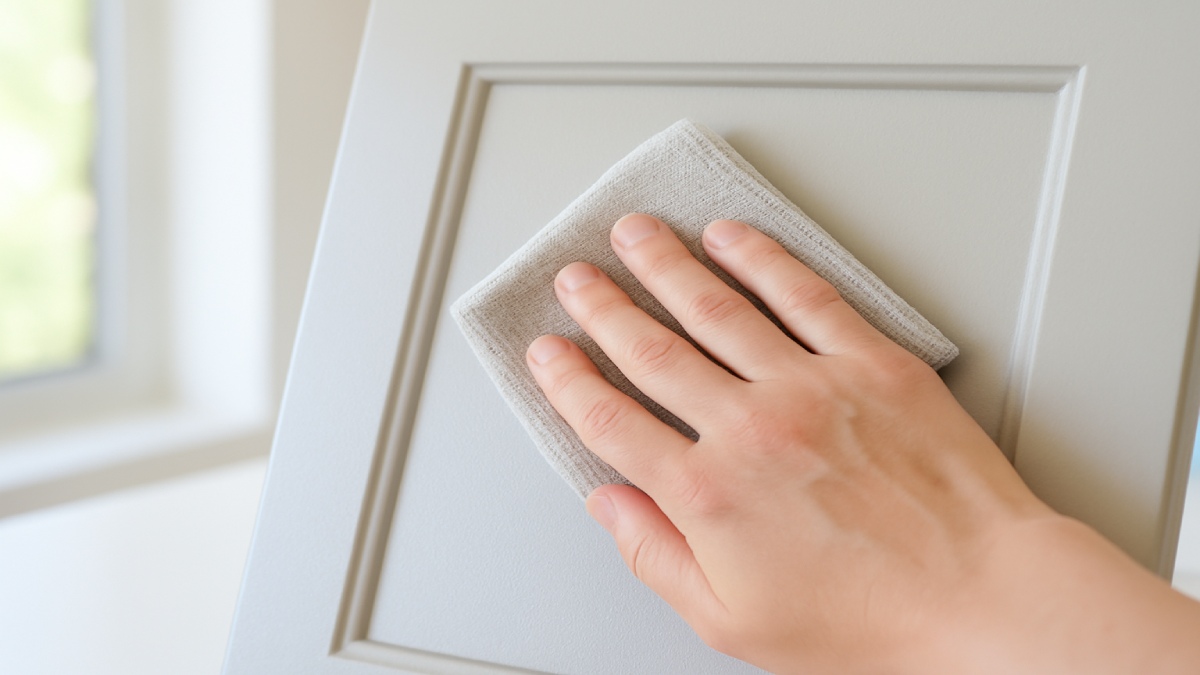
Cleaning Routine
Wipe cabinets with a soft cloth and mild soap solution. Avoid harsh chemicals or abrasive sponges that can scratch the surface. Dry immediately after cleaning to prevent streaks or watermarks.
When to Repaint or Refinish
With proper prep and quality paint, your cabinets can last 8–10 years before needing a touch-up. Common signs it’s time to repaint include chipping on high-touch areas or fading near heat and sunlight.
FAQs About Painting Kitchen Cabinets
Can I paint over laminate cabinets?
Yes, but you’ll need a bonding primer designed for slick surfaces. Lightly sand first to improve adhesion.
Is it worth hiring professionals?
If your kitchen is large or you prefer a factory-grade finish, professionals can save you time and ensure consistency. For smaller spaces, DIY can achieve excellent results with patience.
How long before I can use my kitchen again?
You can typically reinstall cabinets after 7 days, but allow a full 2 weeks for the paint to fully cure before heavy use.
What color trends look best for resale?
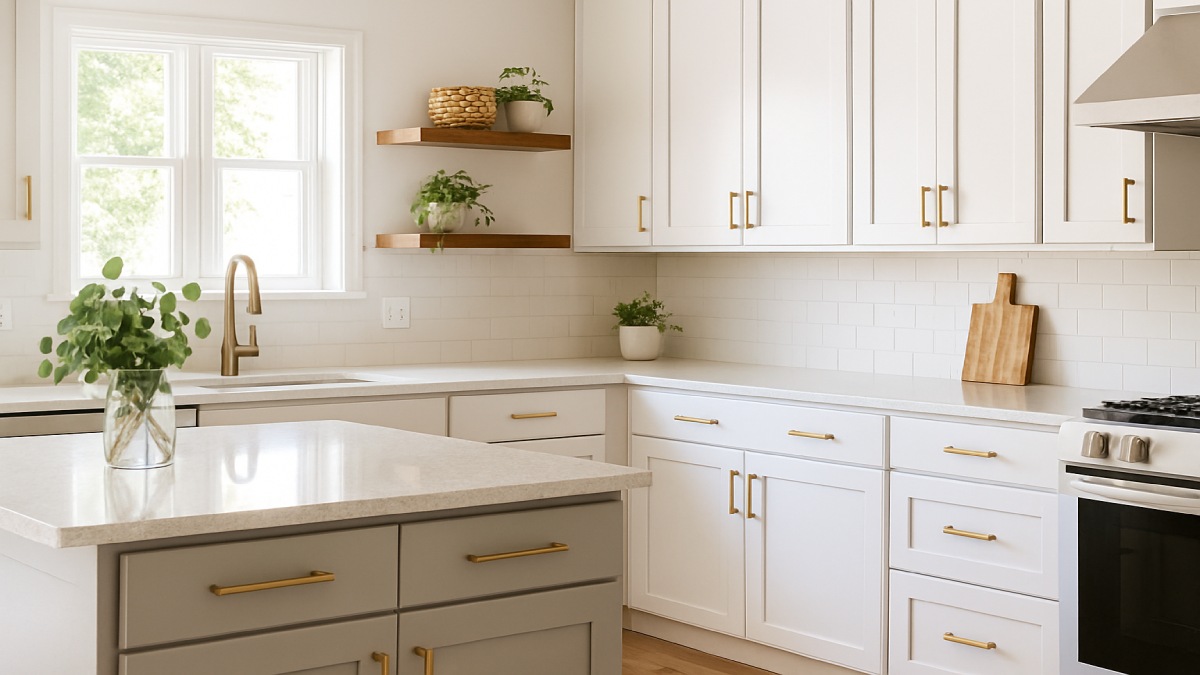
Timeless shades like white, soft gray, navy, and sage green remain the most popular and help boost resale value.
Conclusion – A Budget-Friendly Path to a New Kitchen
Painting kitchen cabinets is one of the most cost-effective ways to achieve a stunning remodel without overspending. With thoughtful preparation, high-quality materials, and the right technique, your existing cabinets can look brand-new and withstand years of daily use.
By investing your time wisely, you can transform your kitchen into a modern, inviting space that feels completely refreshed — all while saving thousands of dollars compared to refacing or replacement.