Keep Garden Tools Rust-Free and Sharp Year-Round
Well-tuned garden tools save time, protect your plants, and make every chore feel lighter. When metal stays clean and sharp, blades slice stems instead of crushing them, and fasteners loosen easily without drama. The secret is not expensive gear—it’s a simple routine that blocks moisture, removes grit, and preserves factory edges.
This guide distills a pro-level maintenance plan you can follow in minutes each week. You’ll learn quick cleaning methods, the right abrasives and oils, smart storage upgrades, and seasonal checklists. The payoff is real: tools that glide through soil, pruners that make crisp cuts, and a shed that smells like cedar oil instead of rust.
Spot Trouble Early: A 60-Second Diagnosis
Before you scrub or sharpen, scan each tool for the most common issues. Look for orange specks at joints and rivets, sticky sap along blades, gritty handles, and wobble at the hinge or ferrule. A quick test cut or scoop tells you everything. If the tool drags, squeals, or leaves ragged cuts, it needs attention.
- Surface rust: Orange bloom, powdery to the touch. Treat fast before pitting forms.
- Gummy residue: Sap and resin collect on pruners, loppers, and saws. Clean to restore a slick stroke.
- Loose hardware: Handle ferrules, hinge bolts, and socket rivets loosen under load. Tighten and lock.
- Dull edges: Blades reflect light along the bevel. A sharp edge looks dark and even.
Cleaning Is Non-Negotiable: Dirt Off, Metal Dry
Rust feeds on moisture and salts. Your first defense is fast cleanup after use. Knock off soil while it’s fresh, then dry the metal. Keep a “dock” by the door—a bucket with a brush, rag, and spray bottle—so you never skip the basics.
Daily Post-Use Routine (3–5 Minutes)
- Brush: Use a stiff nylon or brass brush to clear soil from blades, sockets, and treads.
- Wipe: Dampen a rag with water and a drop of dish soap for resin and sap. Rinse lightly.
- Dry: Towel thoroughly. Compressed air helps around springs and screws.
- Protect: Mist a thin coat of light oil (mineral oil for food-adjacent tools; camellia or machine oil for general use).

For Stubborn Sap and Resin
Sticky build-up increases friction and traps grit. Use isopropyl alcohol or citrus-based cleaner on a cloth to dissolve sap. Avoid soaking wooden handles; wipe them damp, then dry.
Remove Rust Without Harming the Temper
Surface rust lifts easily with the right abrasive. Work gently. You’re polishing steel, not grinding it away. Keep strokes in one direction along the blade, following the bevel when you reach the cutting edge.
Select the Right Abrasive
- Brass brush: Best for hinges, springs, and serrations. Non-marring and fast.
- Scouring pad (fine): Great for spades, hoes, and trowels. Removes bloom without scratches.
- Sandpaper (400–800 grit): For spots that resist brushing. Move up to 1000–1500 for a satin finish.
- Rust eraser or fine abrasive block: Erases freckles on pruner blades without flattening edges.
After rust removal, neutralize with a light solvent wipe, then apply a thin oil coat. If pitting appears, feather the edges with 800–1000 grit so dirt doesn’t lodge in craters.
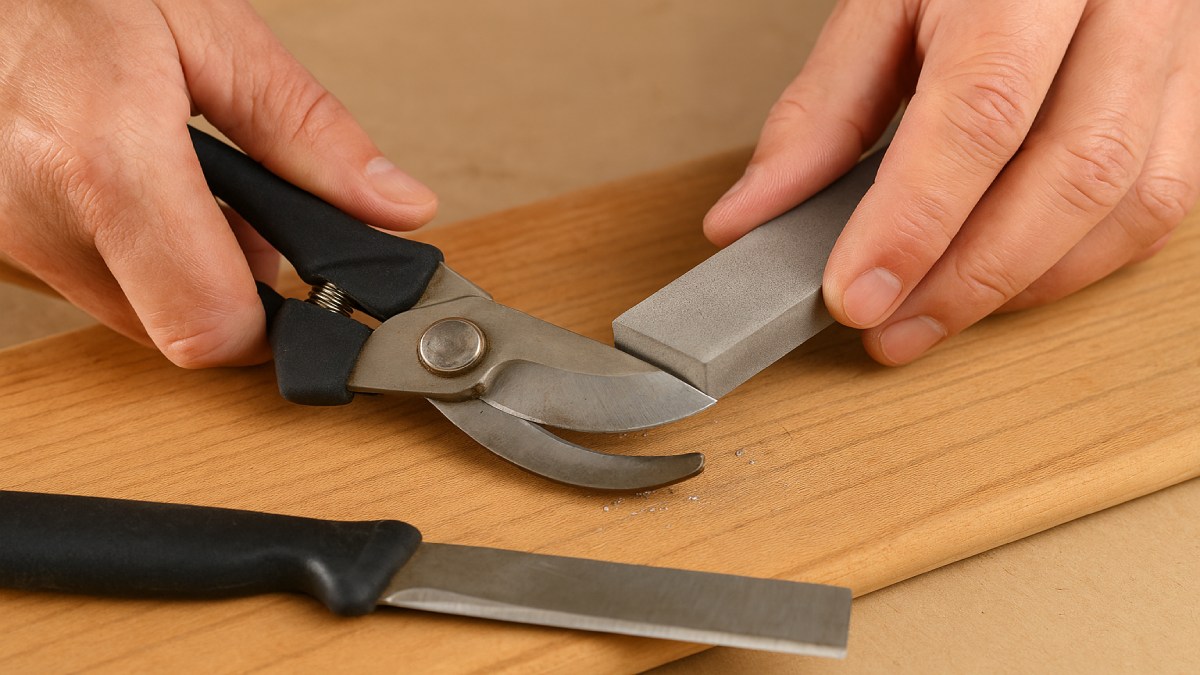
Sharpen Like a Pro: Faster Cuts, Safer Hands
Sharp edges reduce force and protect plant tissue. You can restore a durable edge with a diamond card, a whetstone, or a file. Always secure the tool, keep the angle consistent, and finish with a burr removal pass on the flat side.
Pruners and Loppers
- Disassemble if possible. Clean, dry, and mark the bevel angle with a marker for reference.
- Use a fine diamond plate (300–600 grit). Stroke from heel to tip, matching the bevel.
- Flip and flat-pass once to remove the burr. Reassemble, then oil the pivot and spring.
Hoes, Spades, and Edgers
Clamp the tool. With a mill file, set a 30–35° bevel. Use smooth, even strokes in one direction. For a polished edge that resists rust, follow with a fine stone and a quick oil wipe.
Hand Saws
Replace dull blades on impulse-hardened saws. For traditional saws, a saw file and simple set tool restore bite. Keep teeth uniform and avoid over-filing.
Lubricants and Coatings That Actually Work
A slick, protective film blocks oxygen and keeps joints moving. Select the product to match the task and material, and apply sparingly to avoid dust build-up.
Smart Picks for Garden Tools
- Light machine oil or camellia oil: Everyday blade protection and hinge lubrication.
- Dry PTFE/silicone spray: Low-residue glide for stainless steel or telescoping poles.
- Food-safe mineral oil: Safe for harvest knives and tools used on edibles.
- Paste wax (beeswax/carnauba): Rub on shovels and hoes to shed wet clay and reduce drag.
Wipe away excess. The thinnest film protects best and attracts the least grit.
Wood and Fiberglass Handle Care
Comfortable handles prevent blisters and help you work longer. Smooth, sealed wood resists splinters and repels water. Fiberglass stays strong with simple cleaning.
Wood Handles
- Sand lightly with 220 grit to remove raised grain.
- Rub in boiled linseed oil or tung oil. Let it soak, then wipe the excess.
- Finish with a light paste wax for a satin, water-shedding surface.
Fiberglass Handles
Wash with mild soap and water. Inspect for cracks near the ferrule. Replace if fibers show or flex increases under load.
Hardware, Springs, and Pivots: Tight, True, and Quiet
Small parts make tools feel new again. Hinges should rotate without play. Springs should open pruners smoothly. Fasteners should sit snug but not crush the joint.
- Hinges: Clean, oil, and cycle the pivot. Replace worn bushings on premium models.
- Springs: Keep a spare. If opening force weakens, swap it out.
- Bolts and rivets: Tighten hardware. For sockets, peen loose rivets or replace with through-bolts and locking nuts.
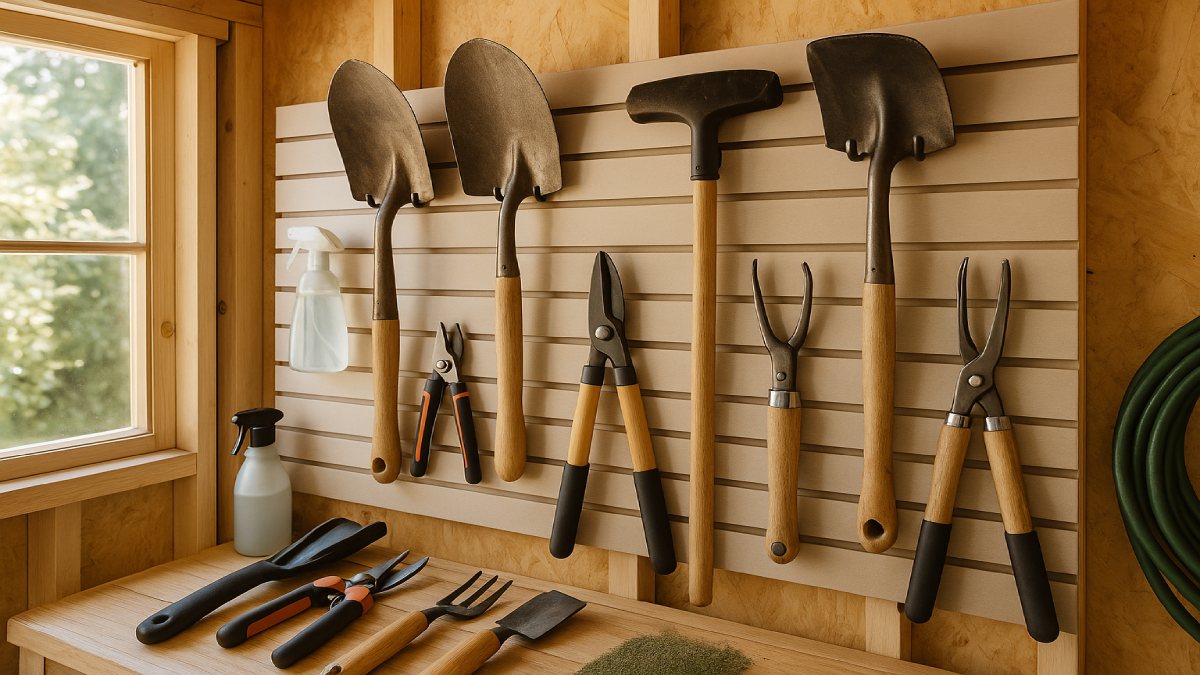
Rust-Safe Storage: Airy, Ordered, and Off the Floor
Moisture and clutter defeat good maintenance. Store tools where air circulates, blades stay protected, and nothing wicks water into metal parts. Build a system once, and daily care becomes automatic.
Wall and Rack Ideas
- Magnetic strip + blade guards: Instant access for pruners and snips without drawer humidity.
- French cleats or slat wall: Adjustable hooks keep long-handled tools separated and upright.
- Ventilated bin for small tools: Wire baskets prevent condensation puddles.
Humidity Control
Add passive airflow, desiccant tubs near drawers, and door vents in tight sheds. Avoid fabric sheaths that hold moisture. Leather looks great but needs drying time and occasional conditioning.
Seasonal Checklists That Keep Tools Ready
Small, scheduled tasks beat big overhauls. Use these micro-lists to time maintenance with the gardening calendar.
Spring Prep
- Deep clean and de-rust after winter storage.
- Sharpen pruners, loppers, hoes, and spades.
- Replace worn grips and cracked handles now, not mid-season.
Summer Touch-Ups
- Weekly wipe-down and oil film after heavy harvest days.
- Spot sharpen high-use blades to keep cuts crisp.
- Rinse off fertilizers or soil amendments that increase corrosion.
Fall Reset
- Remove sap with alcohol; polish and wax shovels.
- Sharpen and label edges (date and grit used).
- Check fasteners before winter to avoid spring surprises.
Winter Storage
- Final clean, oil, and wax. Hang tools off concrete floors.
- Loosen pruner springs slightly to rest the metal.
- Cover power equipment and charge batteries to storage level.
Choose Materials That Resist Rust From the Start
Good steel still rusts, but some alloys and finishes fight it longer. Buy once, maintain always, and you’ll own heirloom tools.
Steel Types and Finishes
- High-carbon steel: Takes a razor edge, needs diligent oiling.
- Stainless steel: Slower to rust, slightly harder to sharpen; great for trowels and transplanting spades.
- Protective finishes: Black oxide or powder coat reduce surface oxidation on non-cutting parts.
Handle Materials
- Hickory/ash: Classic feel and resilience with oil care.
- Fiberglass: Weather-resistant and strong; lighter for all-day use.
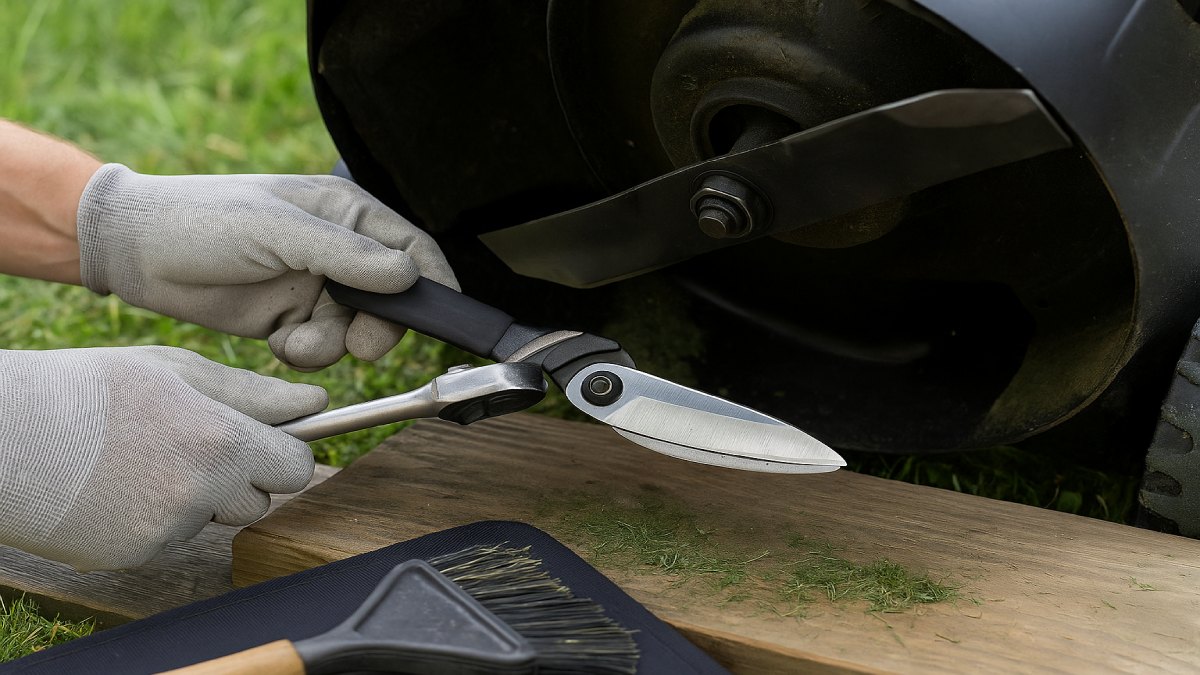
Power Tool Care: Trimmers, Hedge Cutters, and Mower Blades
Electric and gas tools stay safer and more efficient with quick attention after each use. Always disconnect power or battery before you touch a blade.
String Trimmers and Hedge Trimmers
- Brush off clippings and sap. Wipe blades with alcohol, then oil lightly.
- Inspect cords and battery terminals. Keep vents clear of dust.
- Replace trimmer line before it welds onto the spool under heat.
Mower Blades
Remove the blade safely, mark orientation, and sharpen with a file or bench tool to a uniform bevel. Balance the blade to reduce vibration. Reinstall to manufacturer torque.
The Compact Field Kit: Care Anywhere
Toss this kit into a tote and you’ll fix problems on the spot. Small tools prevent big damage from building up.
- Folding diamond stone (coarse/fine)
- Brass brush and small nylon brush
- Isopropyl alcohol wipes and citrus cleaner
- Light oil in a needle-tip bottle; mini paste-wax tin
- Microfiber cloth, paper towels
- Spare springs, bolts, and locking nuts for favorite tools
Safety First: Smart Habits That Prevent Injuries
Maintenance should never put you at risk. Secure tools before filing, wear cut-resistant gloves for blade work, and keep eyewear on when brushing rust. Disconnect batteries and power cords before handling cutting parts. Work slowly and keep the edge pointed away from you.
Quick Fixes: Common Problems and Fast Solutions
Orange bloom returns overnight Humidity is high or oil film is too heavy. Improve airflow, wipe again, and use a thinner coat. Pruners still crush stems Check the anvil alignment and pivot tension. Sharpen the blade and tighten the center bolt. Spade drags in clay Polish the blade with 800–1000 grit and add a paste-wax coat. Reapply after muddy tasks. Hinge squeaks after oiling Grit remains in the joint. Flush with solvent, brush, dry, then re-oil lightly.
Cleaner Chemistry: Eco-Conscious Maintenance
Choose low-VOC cleaners, plant-based oils where they perform well, and rags you can launder and reuse. Capture sanding dust and dispose of solvent wipes responsibly. A greener bench still delivers a crisp edge.
The Five-Minute Post-Gardening Plan
- Brush off soil and rinse sap.
- Dry thoroughly, especially around rivets and springs.
- Inspect edges; spot-sharpen if the blade reflects light.
- Wipe a thin oil film or paste-wax coat, depending on the tool.
- Hang to dry with space between tools for airflow.
Do this after each session and your seasonal overhauls shrink to a pleasant hour with tea and a radio, not a full weekend with rust remover.
The Payoff: Tools That Work as Hard as You Do
Great gardens grow from sharp, smooth, dependable tools. Keep metal dry, edges keen, and moving parts oiled, and you’ll feel the difference from the first cut to the last wheelbarrow. A clear routine protects your investment and turns maintenance into a calming ritual. Start tonight with a brush, a cloth, and a drop of oil—tomorrow’s work will feel lighter.