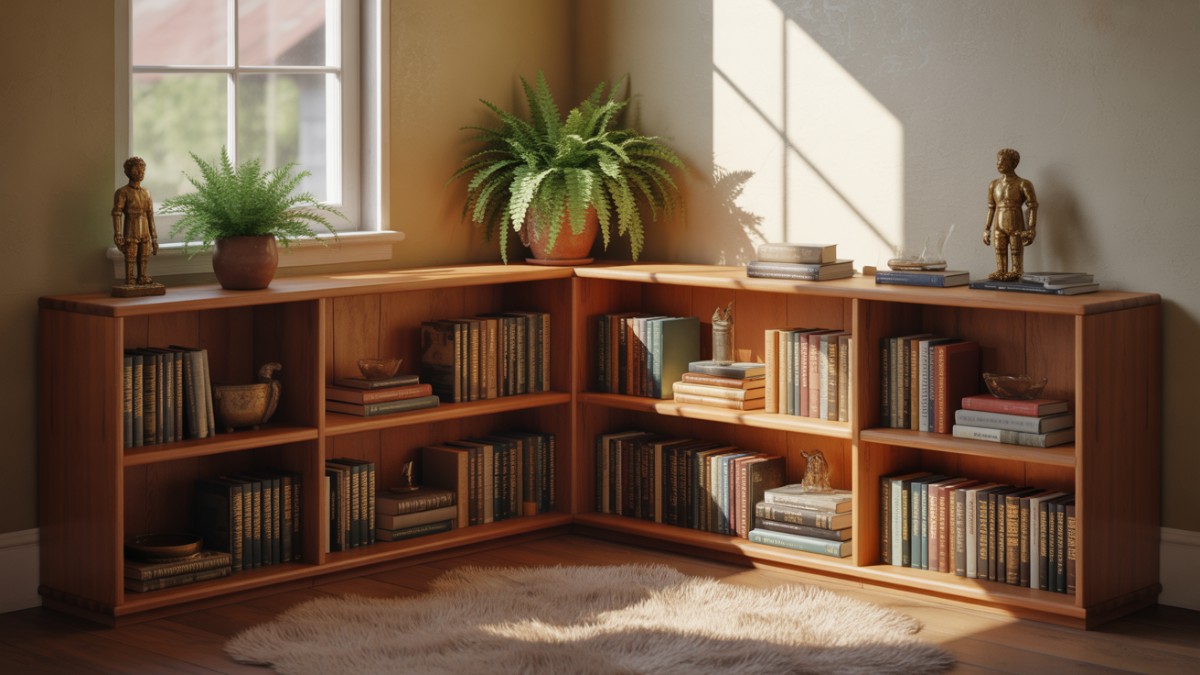
How to Build a Simple Bookshelf for Living Room Corners
Empty corners in your living room can do more than collect dust — they can become functional, beautiful spaces with the right design. A simple corner bookshelf not only adds storage but also brings personality, organization, and charm to your home. Whether you’re looking to display your favorite novels, décor items, or plants, this project blends creativity and craftsmanship into one weekend build.
This detailed guide walks you through every stage — from planning and materials to cutting, assembling, and finishing. It’s written for beginners but includes professional tips to help your shelf last for years. Let’s turn that unused corner into a practical showpiece you’ll be proud to say you built yourself.
Planning the Perfect Corner Bookshelf
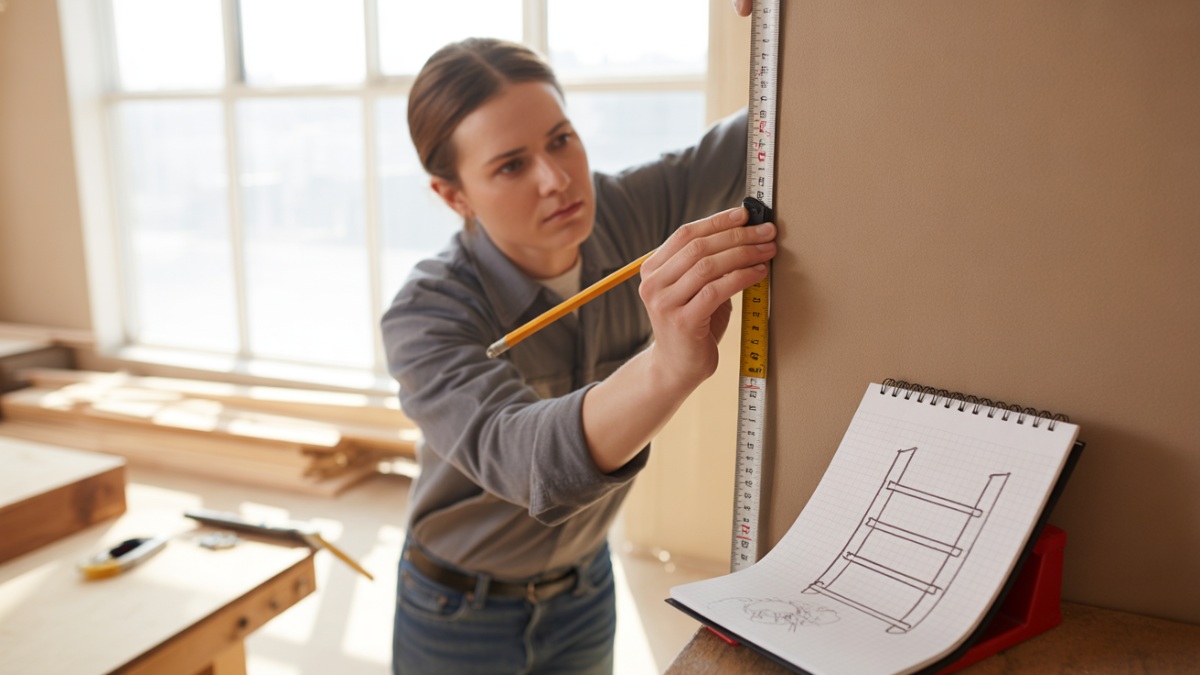
Great DIY projects start with smart planning. Before picking up any tools, take time to visualize where your bookshelf will go and how you’ll use it. A well-thought-out plan prevents wasted materials, uneven cuts, or design regrets later.
Measure and Map Your Space
Begin by measuring your corner from floor to ceiling, then note both wall lengths. Corners aren’t always perfectly square, so use a carpenter’s square to check angles. Identify outlets, vents, and trims that may interfere with your design. If your floor isn’t level, plan to shim or adjust the base later.
Decide on Design and Function
Your bookshelf’s design should fit your lifestyle and aesthetic. Do you want a tall, narrow piece for books or a shorter, wider unit for décor and plants? Modern floating shelves look sleek and minimalist, while traditional face-framed units offer a classic furniture feel. Match your design to the rest of your room’s style and color palette.
Plan Shelf Spacing and Depth
Standard shelf spacing for books ranges between 10–13 inches. For art books or baskets, increase it to 14–16 inches. A shelf depth of 10–12 inches is ideal for most living room items. Keep frequently used shelves between waist and eye level for comfort. Mark all these measurements in a simple sketch or digital plan before cutting any wood.
Choosing the Right Materials and Tools
Your bookshelf’s stability and appearance depend on the materials you select. Balancing durability, aesthetics, and budget will help you achieve a professional look even as a beginner.
Plywood, MDF, or Solid Wood — What’s Best?
Plywood (¾-inch) is the top choice for DIY shelves — strong, lightweight, and easy to paint or stain. MDF creates a smooth painted finish but can sag under heavy loads. Solid wood offers beauty and natural grain but may warp with humidity changes. For most living rooms, plywood provides the best blend of strength and affordability.
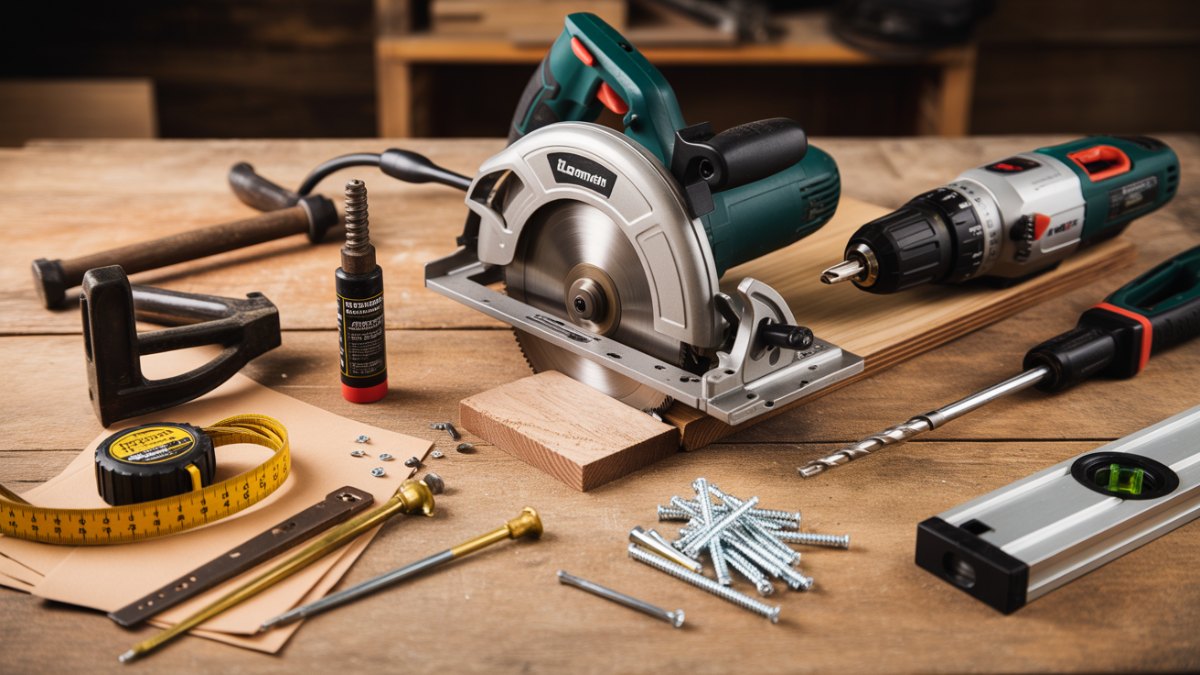
Essential Tools and Supplies
Gather everything before you start to avoid interruptions mid-project. You’ll need a circular saw or table saw, drill, clamps, pocket hole jig, level, and sandpaper. Other helpful materials include wood glue, edge banding, brad nails, and primer or polyurethane for finishing. For tall bookcases, include an anti-tip kit for wall anchoring.
Designing for Durability and Safety
Preventing Shelf Sag
Bookshelves fail most often because of sagging. Use a span calculator such as Sagulator to estimate deflection before cutting. Limit shelf spans to 30–32 inches for books. Reinforce longer shelves with a center divider or 1-inch hardwood nosing glued to the front edge. This small detail dramatically improves stiffness and visual appeal.
Anchoring and Anti-Tip Protection
Safety matters, especially in homes with kids or pets. Attach your bookshelf to studs using metal L-brackets or dedicated anti-tip straps. The U.S. Consumer Product Safety Commission (CPSC) recommends anchoring all tall furniture to prevent accidents. Always double-check your wall type — use toggle bolts for drywall, masonry anchors for brick, or wood screws into studs.
Step-by-Step Construction Guide
Step 1 – Cut and Label All Panels
Lay out your plywood sheet and mark cuts using a straight edge. Label every part — sides, top, bottom, and shelves. To reduce waste, plan cuts so grain direction stays consistent. Sand each cut lightly to remove splinters.
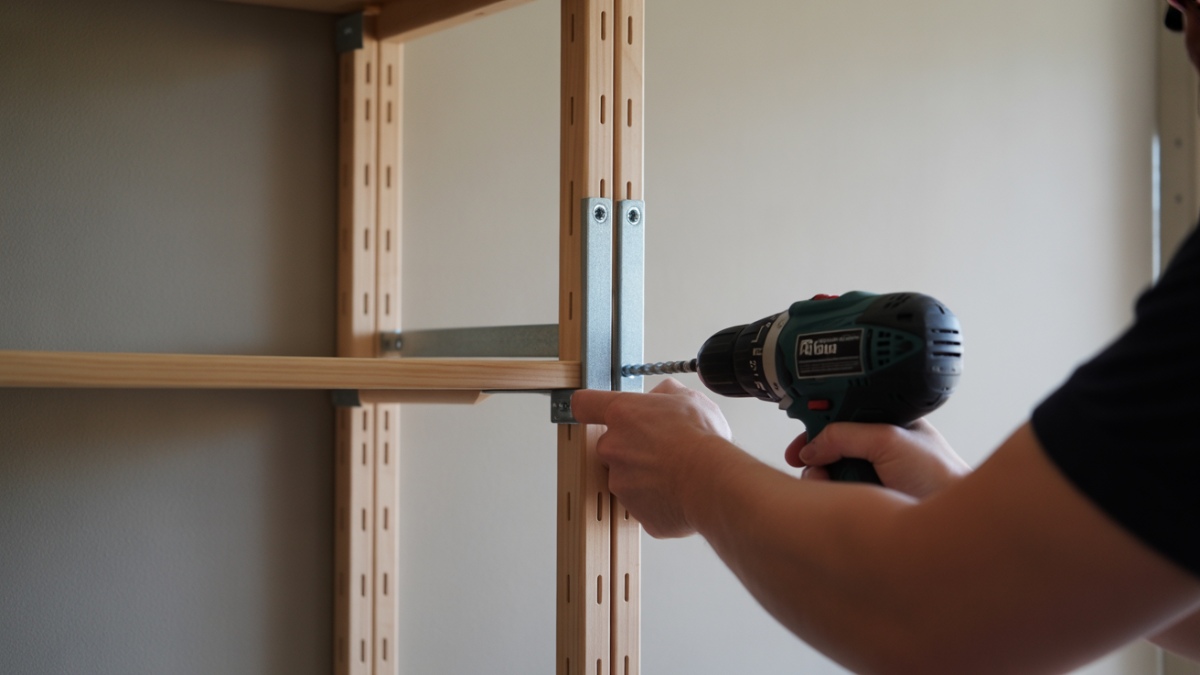
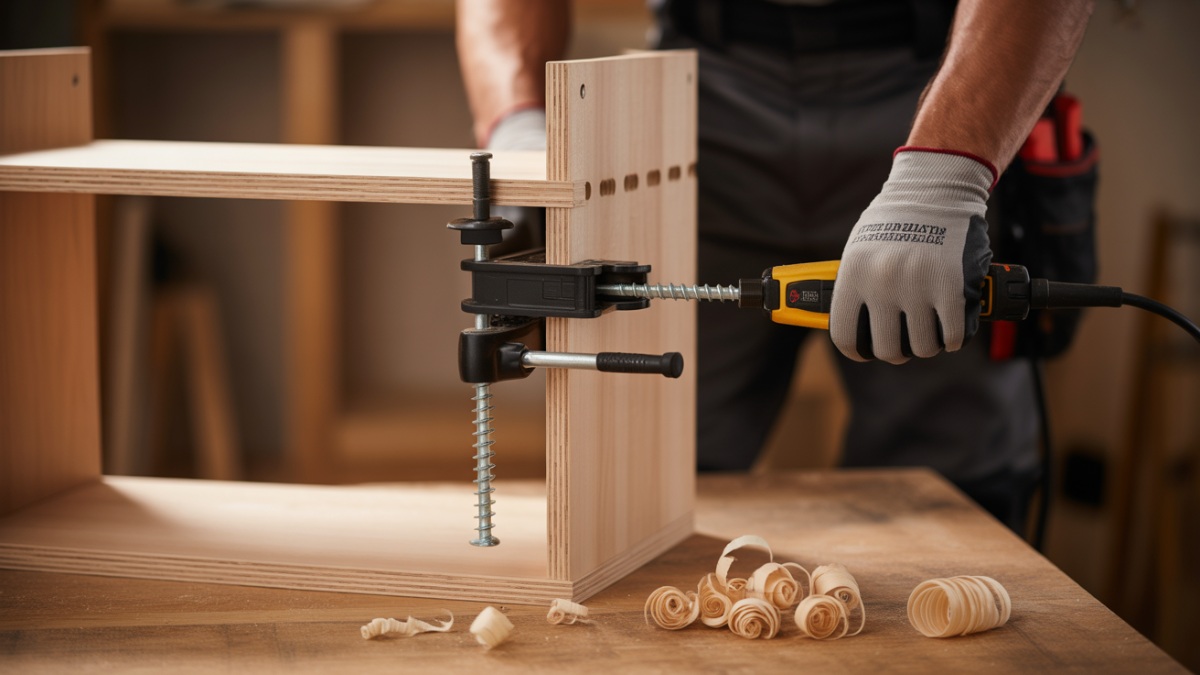
Step 2 – Assemble the Frame
Attach the top and bottom panels to the sides using pocket screws or dowels. Keep everything square with clamps as you drill. Apply wood glue at joints for added strength. If you prefer a back panel, use ¼-inch plywood secured with brad nails and glue for rigidity.
Step 3 – Fit and Test Shelves
Dry-fit each shelf before securing. Use shelf pins, cleats, or dado joints depending on your skill level. For uneven walls, use a scribing tool to trace the shape of the wall edge onto the shelf and trim accordingly for a perfect fit.
Step 4 – Sanding and Surface Prep
Start sanding with 120-grit sandpaper, then move to 220 for a silky surface. Wipe off dust with a tack cloth before finishing. Smooth edges prevent splinters and help paint or stain adhere evenly.
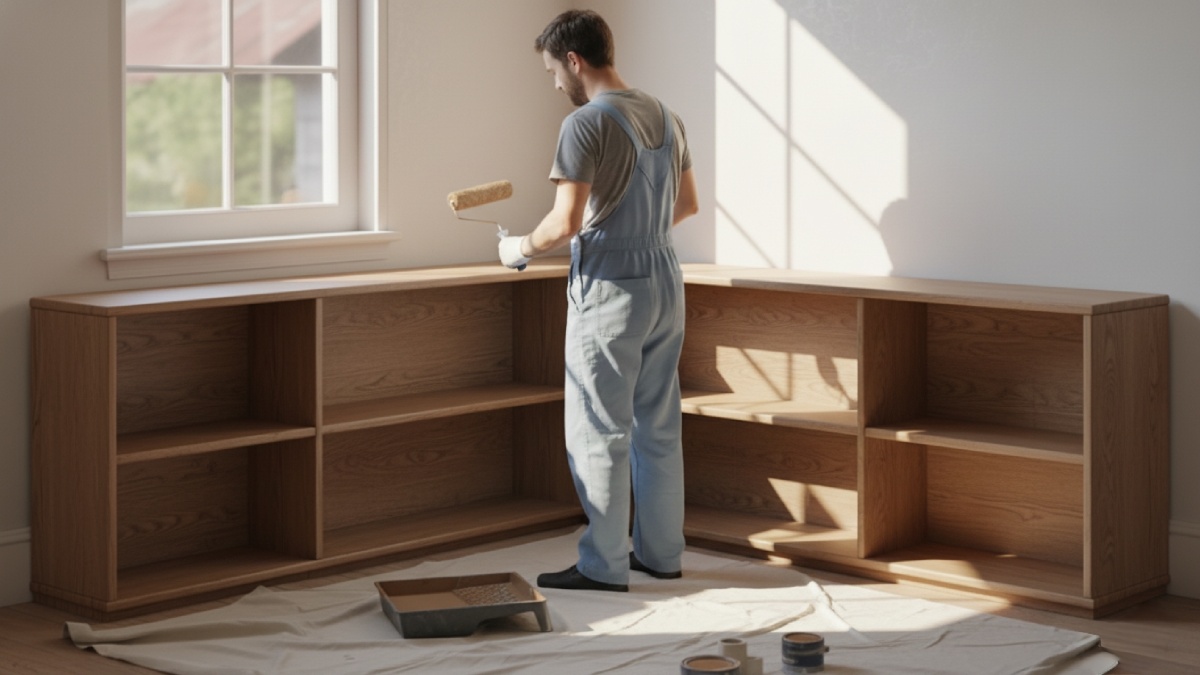
Step 5 – Finishing Touches
For paint-grade projects, apply primer first, then two coats of latex or water-based paint. Seal with clear polyurethane for extra protection. For stained finishes, use pre-stain conditioner, apply the stain evenly, and top with satin varnish. Edge banding hides raw plywood and gives a polished, furniture-quality look.
Installing in the Corner
Wall Positioning and Leveling
Position your bookshelf where both walls meet and check for level in all directions. Adjust with shims if your floor slopes. Minor gaps can be hidden later with trim or caulk for a built-in appearance.
Anchoring to Wall Studs
Mark stud locations, pre-drill holes, and drive 2½-inch screws through the back cleat or top rail. Tighten until the frame feels secure but avoid overdriving screws into drywall. For plaster or brick walls, use appropriate anchors to distribute the load evenly.
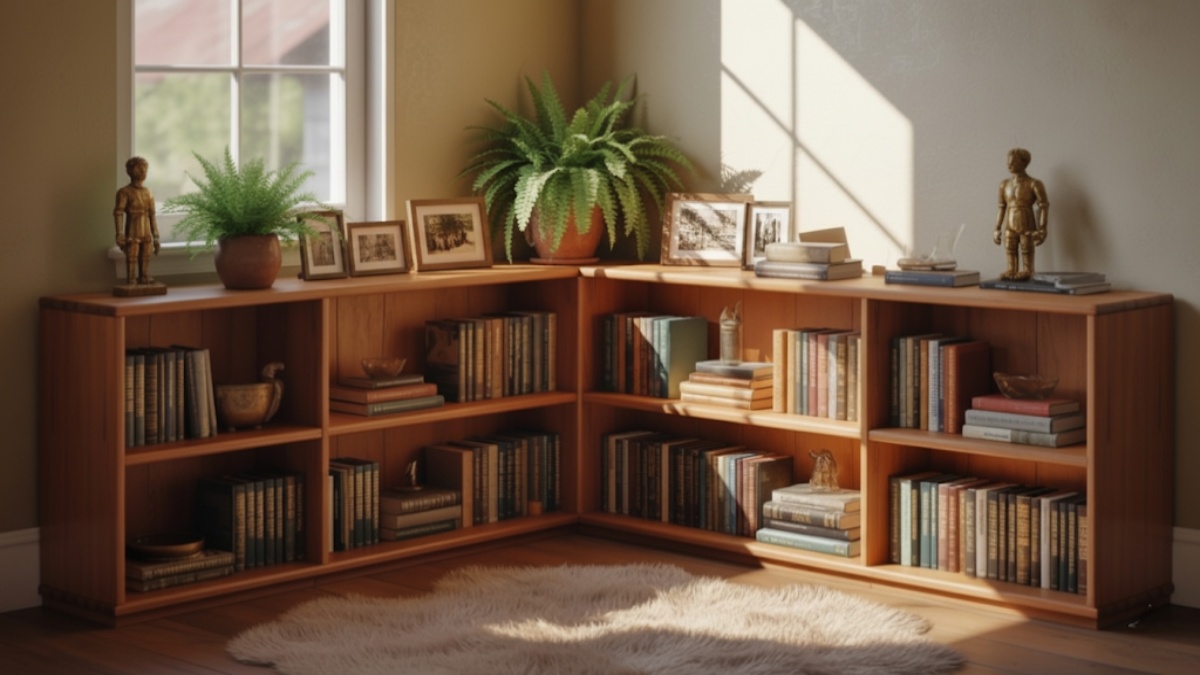
Blending Into Room Design
To integrate the bookshelf into your décor, match its finish to baseboards or crown molding. Mix books with framed photos, potted plants, and small sculptures for a layered visual appeal. Consider LED strip lights under each shelf for soft evening illumination.
Advanced Customization Ideas
Built-In Look with Trim
For a custom furniture effect, add molding along the top and sides. Match your existing baseboards for continuity. Fill seams with paintable caulk and repaint to blend the shelf into the wall, giving it a seamless, high-end look.
Modular or Floating Corner Options
If floor space is tight, consider two modular cases that meet at a 90° angle, or go for floating corner shelves supported by cleats. Hidden brackets provide clean lines and modern appeal while saving valuable space.
Maintenance and Longevity Tips
To keep your bookshelf looking fresh, dust it weekly using a microfiber cloth. Avoid placing extremely heavy objects on long shelves. Redistribute weight periodically to prevent sag. Check anchor straps annually to ensure they remain tight. Refresh finishes every few years to keep surfaces smooth and resistant to scratches.
Common Mistakes to Avoid
DIYers often overlook small but crucial details. Avoid these pitfalls for a flawless build:
- Skipping wall measurements and assuming all corners are square.
- Using overly long shelf spans without reinforcement.
- Forgetting to pre-drill screw holes — this can split wood and weaken joints.
- Neglecting protective finishes, which shortens the life of your project.
Conclusion – A Lasting DIY Addition to Your Living Room
A simple corner bookshelf does more than organize your books — it transforms unused space into something functional and personal. With accurate measurements, sturdy materials, and a clean finish, you can create a piece that fits your home’s style perfectly. The best part? Every time you look at it, you’ll see a blend of craftsmanship, design, and satisfaction — all built by your own hands.
Take pride in your work, share your build with friends, and let your bookshelf tell its story — one shelf at a time.