Clean and Seal Wooden Decks for Long-Term Durability at Home
Your deck takes a beating all year—UV rays fade color, rain drives moisture deep into the grain, and foot traffic grinds in grit. A smart yearly routine restores beauty and protects the wood so it lasts. This friendly homeowner guide shows you exactly how to clean and seal a wooden deck the right way. You’ll learn safe washing techniques, the role of brighteners, sanding and moisture checks, and how to apply stain or sealer for a finish that stands up to sun and storms.
Everything here is written for real weekends and real budgets. We’ll map out each step with simple tools and practical tips, explain the differences between water-based and oil-based products, and help you choose semi-transparent or solid color finishes without second-guessing. Follow the plan and you’ll finish with a deck that looks great now and stays protected longer.

Why Cleaning and Sealing Your Deck Matters
Wood is strong, but it’s still vulnerable outside. Sunlight breaks down lignin near the surface and turns boards gray. Moisture swells fibers, then heat dries them out. That cycle loosens coatings and lifts splinters. Dirt and mildew speed up the damage and leave blotches that won’t rinse away. A yearly routine—gentle cleaning, pH brightening, correct drying, then stain or sealer—stops that spiral. You’ll reduce cracking, hold color longer, and keep the surface smooth under bare feet.
Benefits You’ll Notice Right Away
- Better water resistance: Rain beads on top instead of soaking in.
- UV protection: Coatings slow fading and keep color closer to new.
- Safer surface: A clean, sealed deck sheds slime, mildew, and grit.
- Fewer repairs: Protected boards resist rot, raised grain, and split ends.
Step 1 — Prepare the Deck for Cleaning
Good results start before any cleaner hits the boards. Five patient prep moves will save you hours later and prevent damage you can’t sand away.
Inspect and Clear the Surface
- Remove furniture, rugs, and planters. Check the underside of items for trapped moisture rings.
- Look for popped nails or raised screws. Replace with exterior screws where needed.
- Flag soft spots, dark stains, or wobbly rails. Fix structural issues before washing.
Sweep and Pre-Rinse
Sweep with the grain to lift grit from between boards. A quick pre-rinse pushes fines out of gaps so your brush or sprayer doesn’t grind them into the surface. If the deck sits under trees, lift leaves with a rake first—wet leaves stain fast.
Pick a Cleaner That Fits the Job
- Oxygenated cleaners (sodium percarbonate): Great for gray weathering, pollen, and light mildew. They’re plant-friendlier when used as directed and won’t leave harsh residues.
- Degreasers: Useful near grills or where sunscreen and food oils collect.
- Avoid straight household bleach on bare wood: It’s harsh on fibers and hardware. If you must treat stubborn mildew, follow label directions, dilute correctly, and rinse thoroughly.
Safety and Site Care
- Wet nearby landscaping before and after cleaner use. Cover delicate shrubs if needed.
- Wear gloves, eye protection, and a respirator when mixing powders or using brighteners.
- Protect siding, glass, and metal with plastic or a careful, low-pressure spray angle.
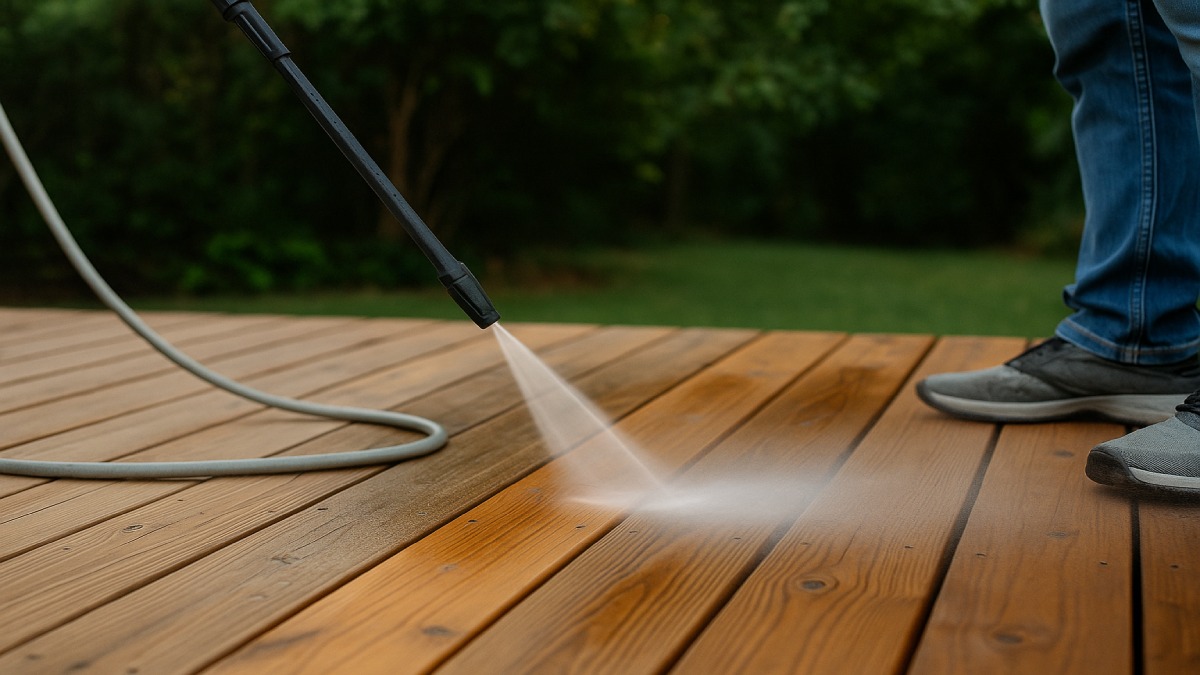
Step 2 — Safe Pressure Washing
Pressure washing can help when used gently. The goal is to lift dirt and dead fibers without scarring the surface. Start with the lowest effective pressure and a wide fan tip. Keep the wand moving with the grain and maintain a steady distance to avoid “zebra stripes.”
Dial in PSI and Nozzle
- Softwoods (cedar, pine): ~500–1,000 PSI with a 25°–40° tip. Keep 6–12 inches from the surface.
- Denser woods (redwood, some hardwoods): up to ~1,200–1,500 PSI if needed, still with a wide fan tip.
- Never use a pinpoint tip: It concentrates energy and carves the grain.
Technique That Protects the Grain
- Work from the house outward so dirty water moves away from siding.
- Overlap passes slightly and move at a consistent pace to avoid tiger striping.
- Rinse railings and posts downward so streaks don’t dry on vertical faces.
- Wash shaded areas or work on overcast days to slow flash drying.
Soft-Wash Alternative
For older decks or heavy mildew, a low-pressure “soft wash” with cleaner in a pump sprayer works well. Spray, dwell 10–15 minutes out of direct sun, scrub with a stiff deck brush, then rinse with a garden hose. It’s slower than power washing, but gentler on fragile fibers.
Step 3 — Brighten and Neutralize for Better Adhesion
Cleaners often leave the surface slightly alkaline. A wood brightener based on oxalic acid resets pH, lifts metal and tannin stains, and brings back fresh color. This step also improves stain or sealer bonding, which means longer life between re-coats.
How to Apply a Brightener
- Pre-wet plants and nearby soil. Keep them wet during application.
- Mix per label directions. Apply with a garden sprayer from rail to floor for even coverage.
- Let it dwell 10–15 minutes, then rinse thoroughly until runoff runs clear.
Tips for Stains You Thought Were Permanent
- Rust and metal marks: Brightener helps lift them without heavy sanding.
- Dark leaf stains: A second brightener pass can lighten deep organic marks.
- Blotchy color after cleaning: Brightening often evens it out before sanding.
Step 4 — Dry, Sand, and Check Moisture
Water left inside the boards is the fastest way to ruin a stain job. After rinsing and brightening, give the deck real time to dry. Sun and breeze help, but shaded decks need patience. A moisture meter tells the truth when your eyes can’t.
Drying Targets
- Plan on 48–72 hours of dry weather after washing before you sand or coat.
- Use a moisture meter to confirm the surface is at or under 12–15% before finishing.
- Dry longer if mornings are dewy or the deck sits in heavy shade.
Sanding for a Smooth, Absorbent Surface
- Knock down raised grain and splinters with 60–80 grit on a pole sander or random orbit sander.
- Finish passes at 100–120 grit so stain can still penetrate. Over-polishing above 150 grit can block absorption.
- Feather edges where old finish remains to avoid telegraphed lap lines.
Weather Window for a Better Finish
- Ideal temperatures sit around 50–90°F. Too hot and coatings flash dry; too cold and they won’t cure.
- Target 40–70% humidity. High humidity slows cure; bone-dry air can cause lap marks.
- Work out of direct sun to keep a wet edge and avoid shadows that telegraph through pigment.
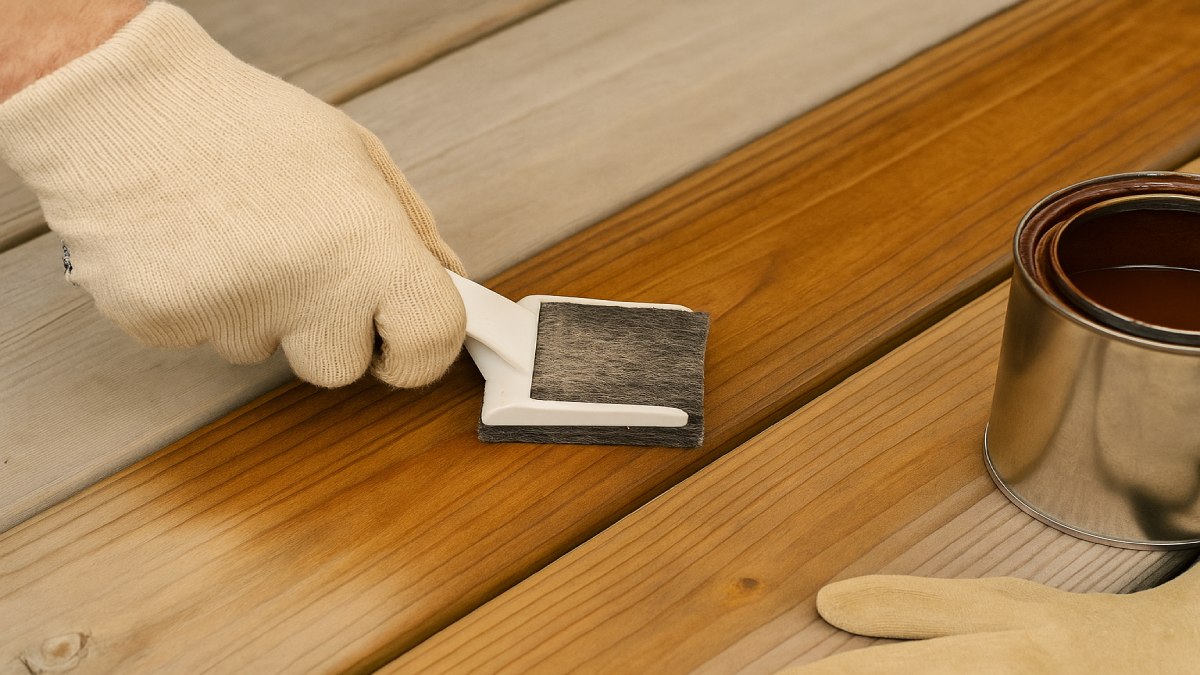
Step 5 — Seal or Stain the Deck
This is the fun part—color returns and grain pops. The best product for you depends on your look target, climate, and local VOC rules. Read the label, stir thoroughly, and apply thin coats for an even sheen and longer durability.
Sealer vs. Stain: What’s the Difference?
- Clear sealer: Transparent protection that highlights natural tone. Strong water resistance, modest UV defense. Great for newer, attractive lumber.
- Semi-transparent stain: Adds color plus a UV barrier while keeping visible grain. Excellent balance of beauty and protection.
- Solid (opaque) stain: Maximum color uniformity and UV shielding. Hides prior patchwork and weathering. Longest maintenance cycle, least visible grain.
Oil-Based vs. Water-Based
- Oil-based: Deep penetration and rich tone; slower drying and stronger odor. Performs well on older wood and in wet climates.
- Water-based: Faster dry, easy cleanup, and often lower VOC. Good choice near strict air-quality rules and for warm, humid summers where fast recoat helps.
Application That Looks Pro
- Stir, don’t shake. Shaking traps bubbles that show up as pinholes. Stir frequently so pigments stay even.
- Start with the rails and balusters. Cut in tight spots with a sash brush. Wipe runs before they dry.
- Use a stain pad or brush for deck boards. Work two to three boards at a time from end to end, keeping a wet edge.
- Apply thin coats. Two light passes beat one heavy one. Heavy coats skin over and stay tacky.
- Watch end grain. Dab extra on cut ends, steps, and exposed board edges—they drink the most.
Common Mistakes to Avoid
- Coating wood that’s still damp—the finish will blotch or peel early.
- Working in direct sun—lap lines and roller flash will show for years.
- Skipping label cure times—rushing furniture back onto soft film leaves dents.
Step 6 — Dry, Cure, and Maintain the Finish
Once the last coat goes down, patience is your friend. Dry time and cure time aren’t the same. Most finishes dry to the touch within hours, yet need days to harden fully. Respect that window and your coating will last longer through summer parties and winter snow.
Dry and Cure Timeline
- Foot traffic: Often safe after 24 hours in mild weather; confirm with the label.
- Heavy use and furniture: Wait 48–72 hours to avoid dents in soft film.
- Rugs: Hold off a week. Trapped moisture under fabric can ghost the finish.
Simple Care That Extends Life
- Sweep weekly. Dirt acts like sandpaper under shoes.
- Rinse quarterly. A garden hose clears pollen and food acids before they stain.
- Deep clean annually. A mild cleaner and soft brush keep mildew from taking hold.
- Trim shrubs and raise planters. Airflow keeps boards dry and discourages decay.
When to Recoat
- Try the water-drop test: If drops soak in quickly instead of beading, it’s time.
- Semi-transparent: Expect a 2–3 year cycle in average conditions.
- Solid color: Often stretches to 4–5 years with normal wear.
Pro Tips, Safety, and Compliance
The right habits protect both your project and your health. A few low-effort checks keep the job clean and compliant in every region.
Application Smarts
- Keep a “clean hand” and a “wet hand.” One handles the can and rag; the other holds the brush or pad.
- Use painter’s pyramids or scrap blocks to lift small furniture pieces when sealing them to match.
- Write the product name, color, date, and weather notes on painter’s tape and stick it under the railing for next time.
Safety Essentials
- Wear eye protection and gloves. Many cleaners and brighteners irritate skin and eyes.
- Use a respirator when sanding and when applying solvent-rich coatings.
- Dispose of oil-soaked rags in a metal container filled with water; lay flat to dry outdoors before trashing. This prevents spontaneous combustion.
Environmental and VOC Notes
- Check your local air-quality rules before buying coatings. In some counties, low-VOC water-based products are required.
- Contain rinse water where possible and keep cleaners off bare soil.
- Rinse plants before and after brightener use to avoid leaf burn.
Frequently Asked Questions
How long should I wait after cleaning to seal my deck?
Plan on 48–72 hours of dry weather after washing and brightening. Confirm with a moisture meter. If the reading sits at or under 12–15%, you’re clear to coat.
Do I need to sand before sealing every time?
Not always. Light sanding is smart when fibers stand up after washing or when old finish is patchy. If the surface is smooth and the existing coating is sound, a thorough clean and brightener may be enough.
Can I apply sealer in direct sunlight?
It’s better to work in shade or on overcast days. Direct sun speeds drying and creates lap lines. Work small sections and keep a wet edge for an even finish.
Which lasts longer: semi-transparent or solid color?
Solid color stains usually outlast semi-transparent by a year or two because they carry more pigments and UV blockers. Semi-transparent products showcase wood grain but need more frequent refresh.
Oil-based vs water-based—which should I pick?
Oil-based stains penetrate deeply and bring rich tone; they dry slower and carry more odor. Water-based products dry fast, clean up with soap and water, and often meet stricter VOC rules. Your climate, schedule, and local regulations tip the balance.
How do I know it’s time to recoat?
Sprinkle water on clean, dry boards. If it beads, you’re protected. If it darkens the wood and soaks in, plan a light clean and recoat soon.
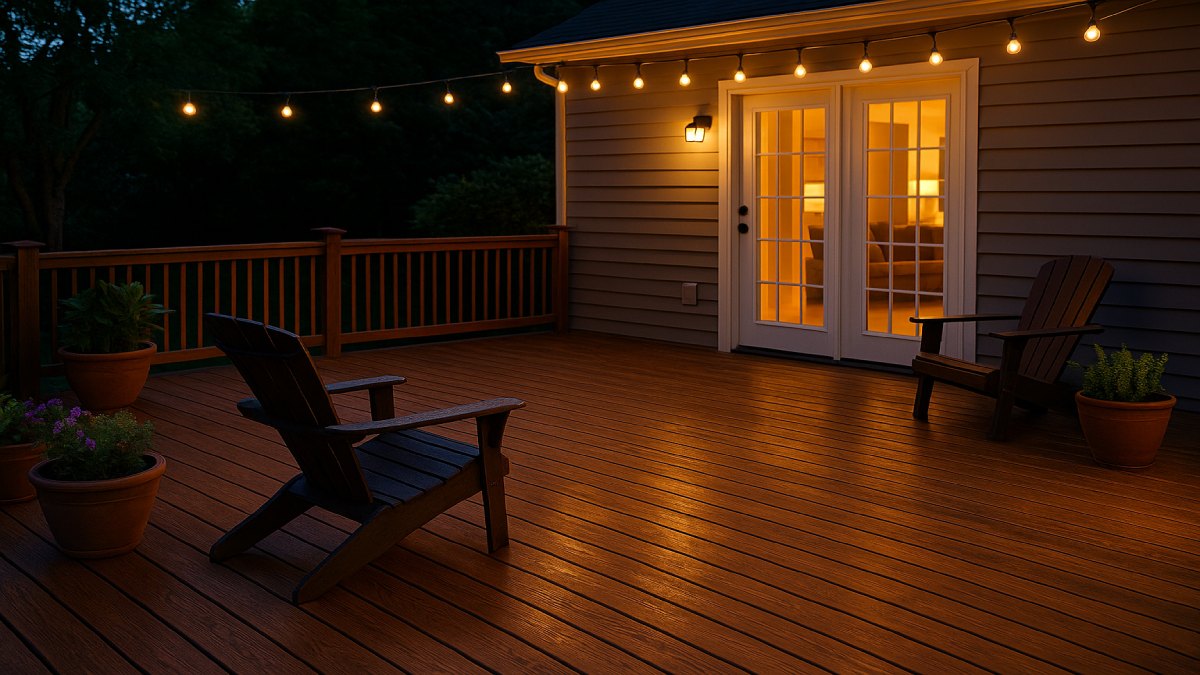
Conclusion: A Weekend That Pays Off for Years
A clean, sealed deck looks great, feels safe, and lasts. The steps are straightforward: prep well, wash gently, brighten to reset pH, dry and sand to an absorbent surface, then apply thin even coats in the right weather window. Follow a simple care routine—sweep, rinse, and test water beading—and you’ll stretch time between big projects. Your deck will stay the favorite room of the house from the first warm day of spring to the final fire-pit night in fall.