Build a Simple Backyard Pond With Liner and Pump
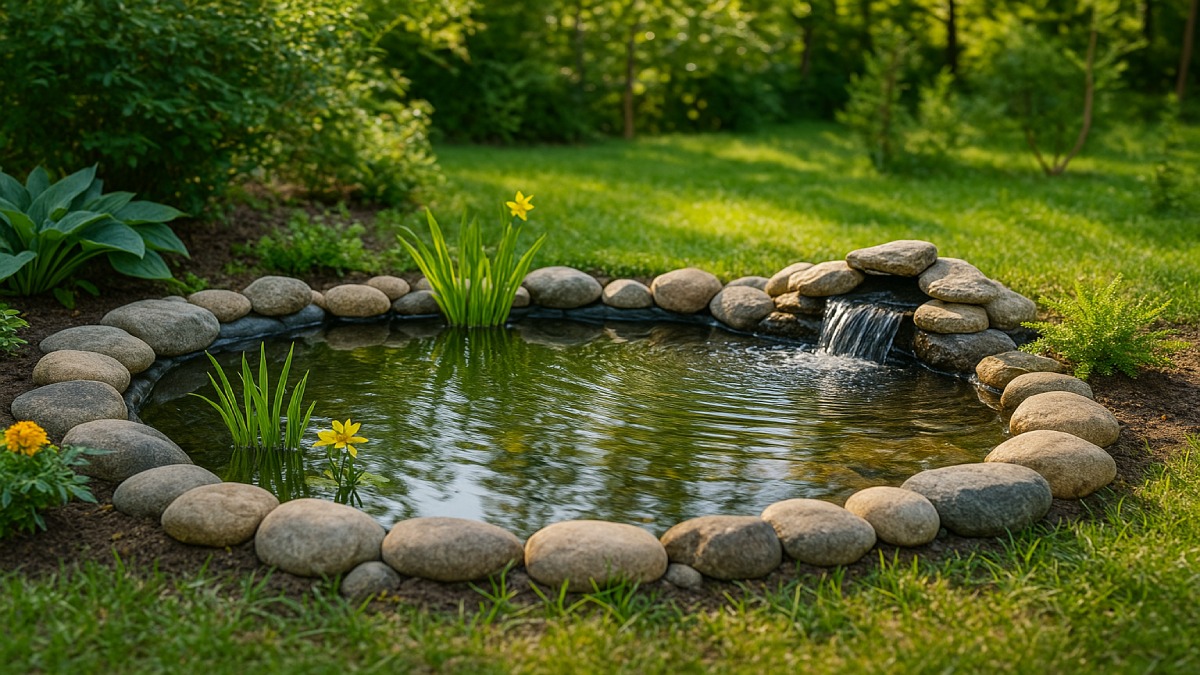
Transforming a quiet corner of your yard into a small pond is one of the most rewarding weekend projects you can take on. A backyard pond adds movement, sound, and life to your landscape while attracting birds, butterflies, and other wildlife. You don’t need a crew or a large budget — just a liner, a reliable pump, and a bit of patience. This guide walks you through everything from design and digging to installing the pump and maintaining crystal-clear water all year long.
Why Build a Backyard Pond?
Beyond its beauty, a pond changes how you experience your yard. The gentle sound of water softens outdoor noise and creates a natural focal point. It invites wildlife and helps balance your garden’s ecosystem. Small ponds with liners are simple to maintain and can fit nearly any landscape — from a corner patio feature to a full garden centerpiece. With the right setup, your pond will stay clear, oxygenated, and easy to manage year-round.
Plan the Perfect Spot
Location is everything. Place your pond where it catches a few hours of sunlight but avoids harsh afternoon rays that encourage algae. Pick a visible area from your patio or kitchen window so you can enjoy it every day. Keep it at least 10 feet from large trees to prevent root damage and falling leaves. Choose level ground with a nearby power source for your pump — extension cords should never run across the yard permanently.
Design Considerations
- Shape: Natural, irregular shapes look most organic. Use a garden hose to outline before digging.
- Depth: For a simple liner pond, aim for 18–24 inches in the deepest section to keep water cool.
- Plant shelf: A shallow ledge (8–12 inches deep) allows aquatic plants to thrive.
- Edge design: Mix stones, gravel, or flagstone for a natural border and easy maintenance.
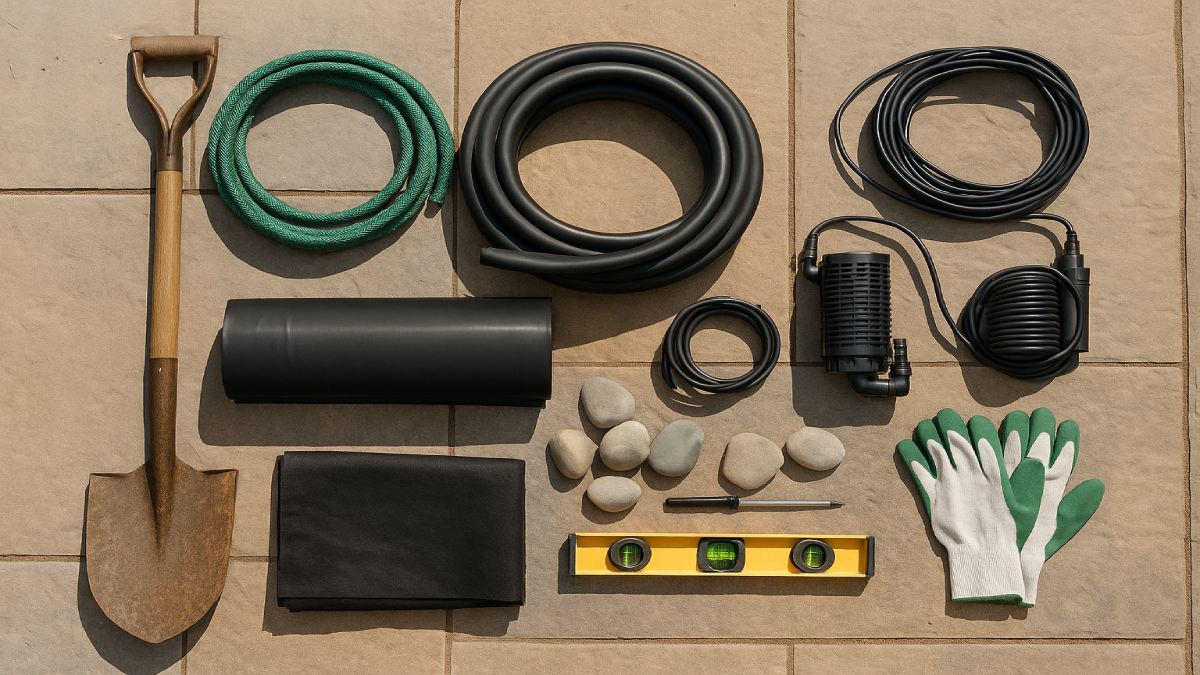
Materials and Tools
| Category | Items | Details |
|---|---|---|
| Tools | Shovel, spade, level, garden hose, utility knife, wheelbarrow | Used for digging, shaping, and leveling pond base |
| Liner Materials | EPDM or RPE liner, underlayment (sand, fabric, or old carpet) | Flexible liner conforms to shape and prevents leaks |
| Pump & Plumbing | Submersible pond pump, tubing, hose clamps, outlet-safe cord | Pump circulates water to keep it clear and aerated |
| Stone & Gravel | River rocks, flat stones, pea gravel | Creates edging and hides liner for natural appearance |
| Plants | Water lilies, cattails, iris, oxygenating submerged plants | Add color, oxygen, and balance to the pond ecosystem |
| Optional | Small waterfall kit or filter box, LED pond lights | Enhances movement and nighttime ambiance |
Step 1: Mark and Outline the Pond Shape
Use a garden hose or rope to outline the pond shape directly on the ground. Stand back and view it from different angles to confirm the design complements your landscape. Once satisfied, mark the final outline with spray paint or flour for a clear dig guide.
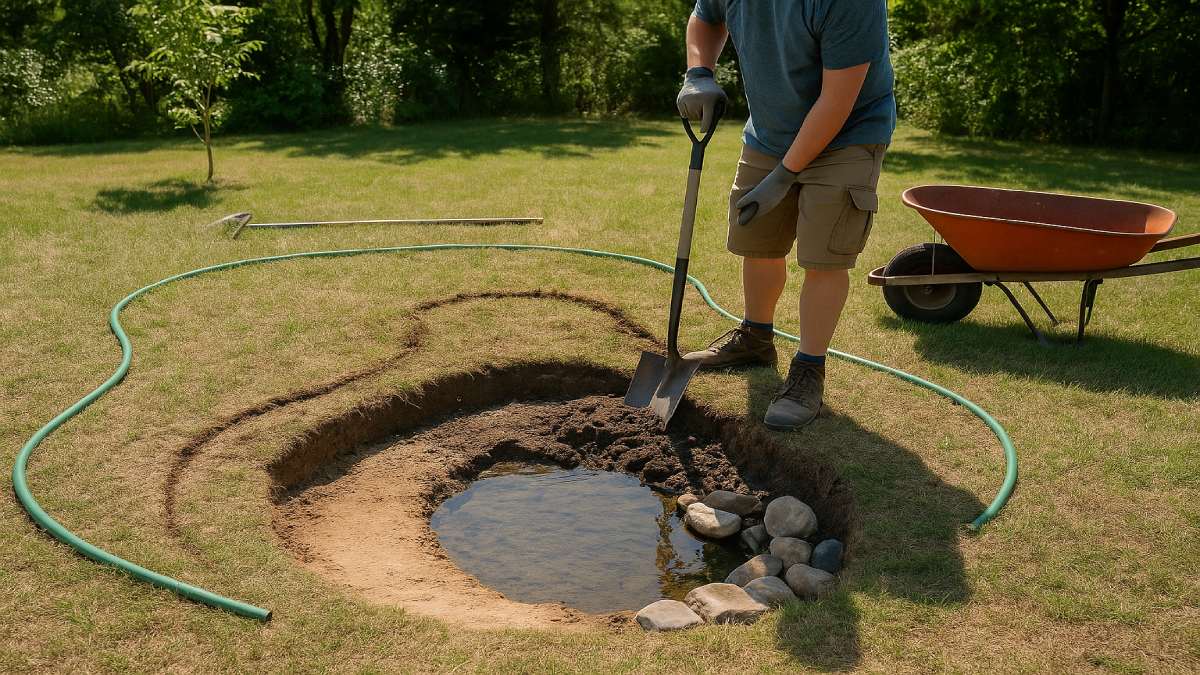
Step 2: Dig in Tiers
Start digging along your outline. Create the plant shelf first, about 8–12 inches deep, then slope down to your final depth of around two feet. Shape smooth curves rather than sharp corners, and keep the bottom level so the liner sits evenly. Remove sharp stones and roots as you dig.
- Tip: Save the removed soil for backfilling around the edges later.
- Check level: Use a long board and level across several points — uneven edges cause visible liner folds.
Step 3: Add Underlayment and Liner
Before laying the liner, cushion the pond base to protect against punctures. A 1-inch layer of sand or a piece of old carpet works perfectly. Roll out your liner and center it loosely across the pond, allowing generous overlap (at least 12–18 inches around the perimeter).
- Press the liner gently into corners and shelves, avoiding tight stretches.
- Weigh edges temporarily with smooth rocks.
- Begin filling with water — the liner will settle naturally under weight.
- As it fills, smooth wrinkles by hand and adjust edges as needed.
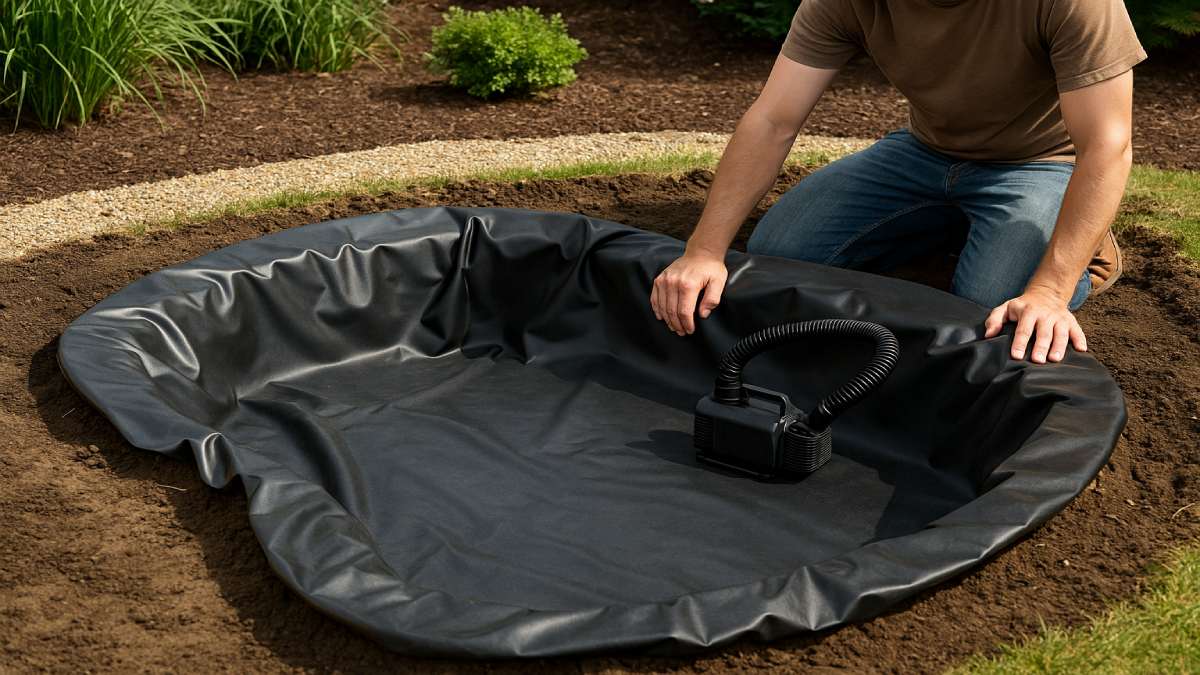
Step 4: Install the Pump and Tubing
A pond pump keeps water circulating, oxygenated, and clean. Choose a submersible pump rated for your pond’s volume. For a simple setup, use flexible tubing to return water to the surface or connect it to a small waterfall feature.
- Place the pump on a flat rock at the pond’s bottom to reduce debris intake.
- Attach tubing securely with hose clamps and route it up the side under rocks.
- Plug into a GFCI-protected outlet and test the flow — aim for gentle surface movement, not turbulence.
For visual interest, route the tubing to a short spillway or stacked rock waterfall. Waterfalls help oxygenate the pond and sound beautiful in quiet gardens.
Step 5: Trim and Finish the Edges
Once filled, trim the excess liner with a utility knife, leaving 8–10 inches beyond the rim. Tuck this edge under soil or flat rocks. Use a mix of large and small stones for natural variation, and add a thin layer of gravel inside the pond to weigh down the liner bottom.
- Pro tip: Use irregular stone sizes to mimic nature — avoid straight, uniform borders.
- Backfill soil gently behind outer stones for a stable, finished edge.
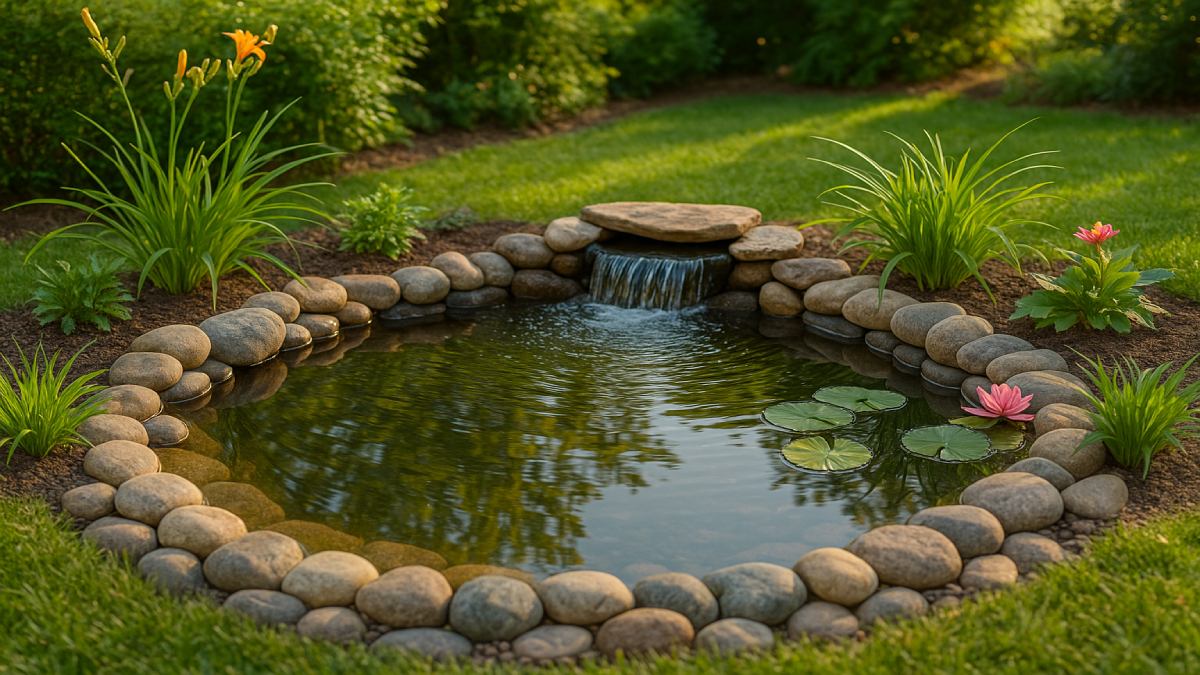
Step 6: Add Plants and Finishing Touches
Plants bring your pond to life. They filter water, provide shade, and attract wildlife. Arrange taller species near the back and floating types toward the center.
- Floating plants: Water lilies, hyacinth, duckweed
- Marginal plants: Iris, cattail, pickerel rush
- Oxygenators: Hornwort, anacharis
Let the pond sit for 48 hours before introducing fish to stabilize temperature and chlorine levels. Small goldfish or shubunkins are great beginner species. Avoid overstocking — one inch of fish per 10 gallons is a good rule of thumb.
Maintenance and Care
Keeping your pond clear and healthy takes minutes a week. Remove fallen leaves and check water level regularly, topping up during dry spells. Clean the pump’s filter sponge once or twice a month to maintain steady flow.
- Spring: Deep-clean and restart pump once frost risk passes.
- Summer: Watch for algae growth; add barley straw or UV clarifier if needed.
- Fall: Net leaves before they decay; trim dead foliage.
- Winter: In cold climates, remove the pump or elevate it slightly to prevent ice damage.
Pump and Liner Troubleshooting
If water drops quickly, inspect the liner for punctures near the edge. Sometimes a misplaced rock traps a fold that channels water out. For weak pump flow, check for clogs or adjust hose height — higher waterfalls need more power. Always unplug before servicing the pump.
Eco-Friendly Tips
- Collect rainwater in a barrel to top up your pond naturally.
- Use solar-powered pumps if your pond is far from outlets.
- Add beneficial bacteria to keep water clear without chemicals.
- Encourage frogs and dragonflies; they control mosquito larvae naturally.
Cost and Time Breakdown
| Item | Estimated Cost | Notes |
|---|---|---|
| Liner & underlayment | $60–$120 | Depends on size and material (EPDM or RPE) |
| Pump & tubing | $50–$100 | Choose flow rate suited to your pond volume |
| Rocks, gravel, edging | $40–$80 | Locally sourced stone keeps cost low |
| Plants & accessories | $30–$60 | Choose hardy varieties for your region |
| Total (typical) | $180–$350 | Affordable weekend project for most yards |
Final Setup and Enjoyment
Once complete, sit back and let nature take over. The sound of moving water transforms even a small backyard into a retreat. Your new pond will become a habitat for visiting birds and butterflies, and a peaceful spot to unwind after long days. As the light reflects off the rippling surface and the pump hums quietly beneath, you’ll know the weekend was well spent.
HomeFettle — Crafting Homes with Heart and Hands.