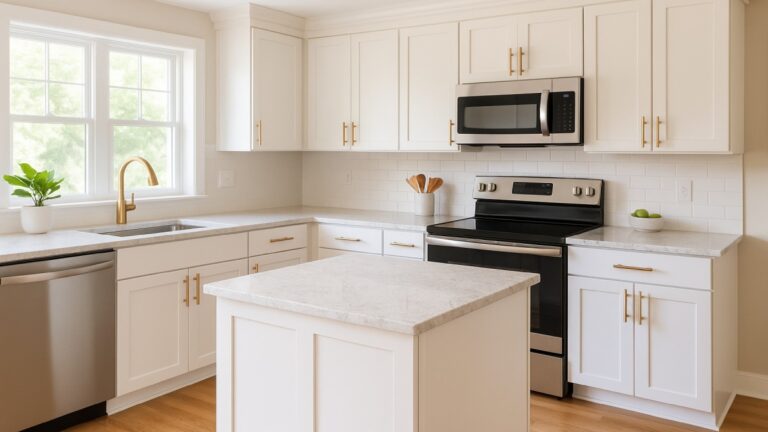
Build a Kitchen Island With Storage and Seating
A kitchen island can transform how your home feels and functions. It becomes more than a work surface — it’s a space for conversation, casual meals, and creative storage. With thoughtful planning, you can design and build an island that adds comfort, value, and style to your kitchen without breaking your budget.
This guide walks you through every stage — from measuring the right clearances and designing storage to choosing materials and building the frame. Whether you’re adding seating for family breakfasts or extra drawers for cookware, the goal is to create an island that blends function and beauty while standing up to everyday life.
Why Build a Kitchen Island With Storage and Seating
Homeowners are spending more time in the kitchen than ever, and the island has become the social centerpiece. Beyond style, it delivers serious functionality — adding both workspace and storage while giving family and guests a place to gather.
Expands Functionality and Flow
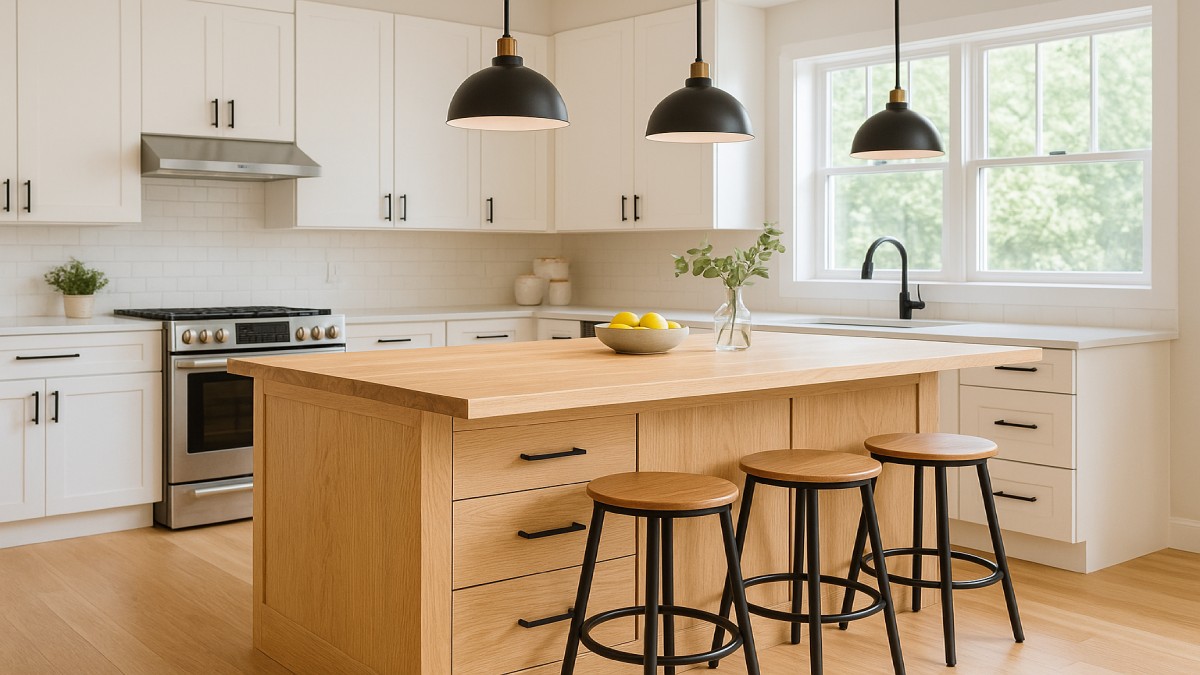
A kitchen island provides extra prep area, keeps cooking essentials close, and offers flexible dining options. It divides open spaces naturally, creating a sense of structure without closing off the room. Islands of seven feet or longer are now common in remodels, offering room for multiple cooks or family activities like homework and baking.
Increases Home Value and Utility
Adding an island is one of the most requested kitchen upgrades in the U.S. Real estate data consistently shows that homes with functional islands sell faster and appeal to modern buyers. Storage drawers, seating, and outlets boost usability and value while keeping the layout sleek and uncluttered.
Customizable Design for Any Home
No two kitchens are alike, and that’s the advantage of building your own island. You can tailor cabinet depth, countertop style, and seating arrangement to match your lifestyle. Freestanding islands suit smaller kitchens, while built-ins offer a seamless, permanent look with integrated power and plumbing.
Step 1 — Plan Your Space and Layout
Every great kitchen island starts with accurate measurements. Think about how you move around the kitchen, where appliances open, and how people flow through the space. The layout you choose will determine comfort, safety, and efficiency for years to come.
Measure and Map Your Kitchen Area
Start by marking the potential island footprint with painter’s tape. Walk around it to simulate daily movement. Leave at least 42 inches of space between the island and surrounding counters for a single cook. For two or more people, widen that to 48 inches. These clearances keep the kitchen functional and prevent collisions around the stove and sink.
Determine the Ideal Island Size
Typical island dimensions range from 2 to 4 feet deep and 4 to 7 feet long. Aim for proportions that fit your kitchen shape. A compact galley layout may handle a 4×2-foot island, while open plans can support larger designs. Always confirm appliance door swings before finalizing placement.
Plan for Traffic and Comfort Zones
Behind each stool, allow enough space for people to slide or walk through. At minimum, keep 32 inches clear behind seating if there’s no traffic, 36 inches for sliding past, and 44 inches for walkways. Each diner should have at least 24 inches of counter width and 12–15 inches of kneespace depending on counter height. These details make the island feel natural and comfortable for everyday use.

Step 2 — Design for Storage Efficiency
Once your space is mapped, focus on storage. The best islands act as a command center, organizing cookware, utensils, and even small appliances. Smart internal design prevents clutter while keeping essentials within easy reach.
Maximize Every Inch Below the Counter
Think beyond basic cabinets. Deep drawers work better for pots and pans, while narrow pull-outs can hold spices or cutting boards. Add vertical dividers for baking sheets and trays. Include a hidden trash pull-out to keep the kitchen tidy. If budget allows, soft-close hardware and full-extension glides bring quiet and convenience.
Mix Open and Closed Storage
Combine drawers for daily tools with open shelves for display or quick-grab items. Many modern islands feature one side with enclosed cabinetry and the other with open niches for baskets or décor. This creates depth and balance while showing off your personal style.
Plan Utility Access Points Early
If you plan to include outlets, plumbing, or a small beverage fridge, rough in your utilities before securing the base cabinets. New electrical codes require outlets to be placed on or above the countertop, not on the sides. Consider pop-up outlets or discreet power strips to keep charging easy without visible cords.
Step 3 — Add Comfortable Seating
Seating transforms an island from a prep zone into a welcoming hub. Whether for morning coffee or casual dinners, comfort depends on the right height, overhang, and stool spacing.
Choose the Right Counter Height
Standard counter height is 36 inches, perfect for most family use. Bar-height designs rise to 42 inches, offering a more elevated, social feel. If you’re combining both, use a tiered design — lower for prep, higher for seating — to define zones naturally.
Calculate Overhangs and Support
For counter-height seating, aim for a 12-inch overhang. Bar-height tops can work with slightly less, around 10–12 inches. Deep overhangs need support brackets, corbels, or concealed steel braces to prevent stress on the countertop. As a rule, avoid leaving more than 30% of the top unsupported.
Choose Comfortable Stools
Match stool height to your counter: 24–26 inches for standard counters and 30 inches for bar tops. Leave 24 inches of space per stool for elbow room. Swivel stools or models with backrests make long meals or work sessions more relaxing while maintaining a cohesive look.
Step 4 — Select Durable Countertop and Finishes
The countertop defines the island’s personality. It must endure daily chopping, spills, and heat while looking beautiful. Choose a surface that fits your routine and your willingness to maintain it.
Material Options for Durability
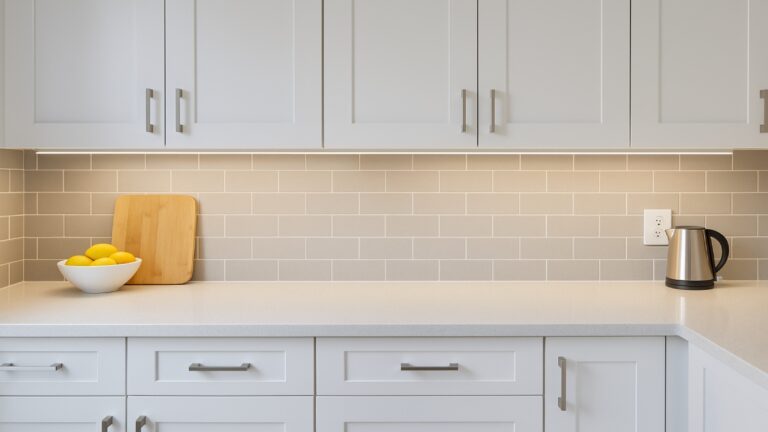
Quartz remains the top pick for durability and low maintenance. It resists stains and scratches but can’t handle high heat directly — always use trivets. Butcher block adds warmth and character, ideal for rustic or farmhouse kitchens, but needs sealing every few months. Granite is timeless and tough, offering heat resistance with minimal care. For something new, porcelain and compact surfaces are trending for their eco-friendliness and ultra-hard finish.
Coordinate Color and Texture
Contrast adds life to the kitchen. Light quartz tops with dark bases feel modern; natural oak with white cabinets creates a soft, classic mood. Waterfall edges or matte finishes bring a clean, high-end touch. Match tones to your flooring and lighting for a cohesive feel.
Lighting and Edge Design
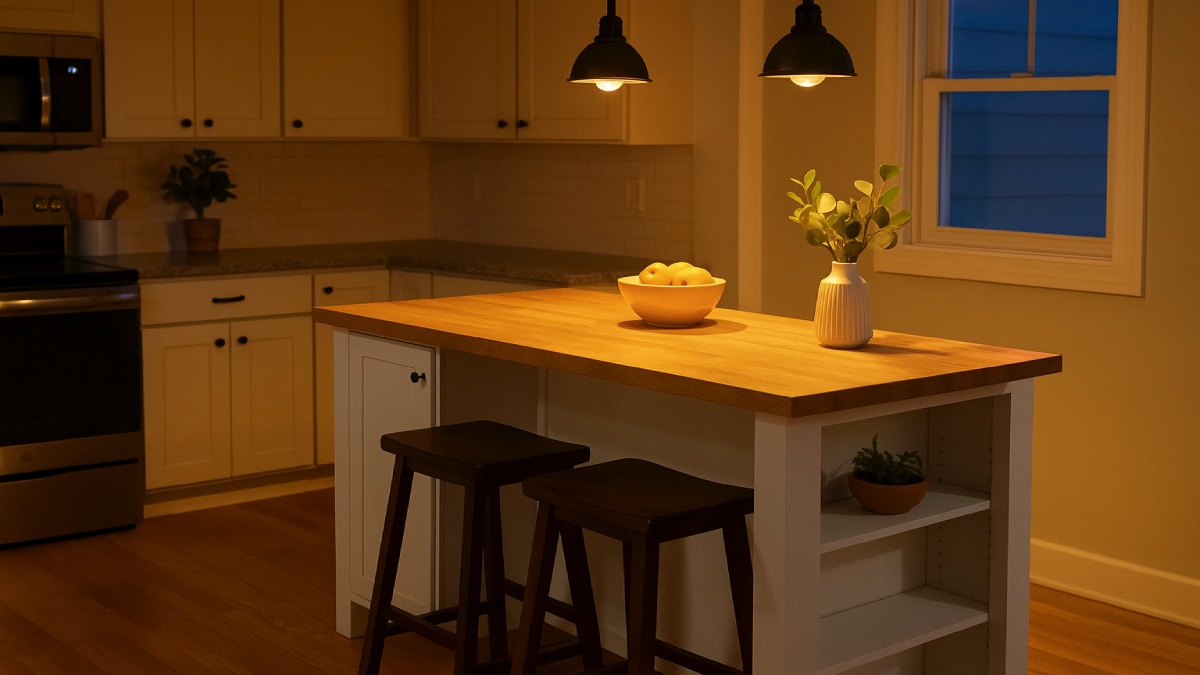
Good lighting elevates design and function. Install pendant lights 30–36 inches above the counter for balanced illumination. Consider LED strips under the counter lip for subtle accent lighting. Edge styles — eased, beveled, or waterfall — influence how the island blends with your kitchen theme.
Step 5 — Build and Assemble the Island
With the design finalized and materials ready, it’s time to build. Whether you use pre-made cabinets or custom frames, accuracy and support are key. Work slowly, measure twice, and keep everything square for professional results.
Frame and Cabinet Base Assembly
Begin by positioning your cabinet boxes. Use a level to ensure even height across the base. Anchor built-in islands to the floor using screws and brackets. If you’re creating a freestanding design, secure cabinets to each other instead. Reinforce corners with angle braces to support countertop weight and prevent shifting.
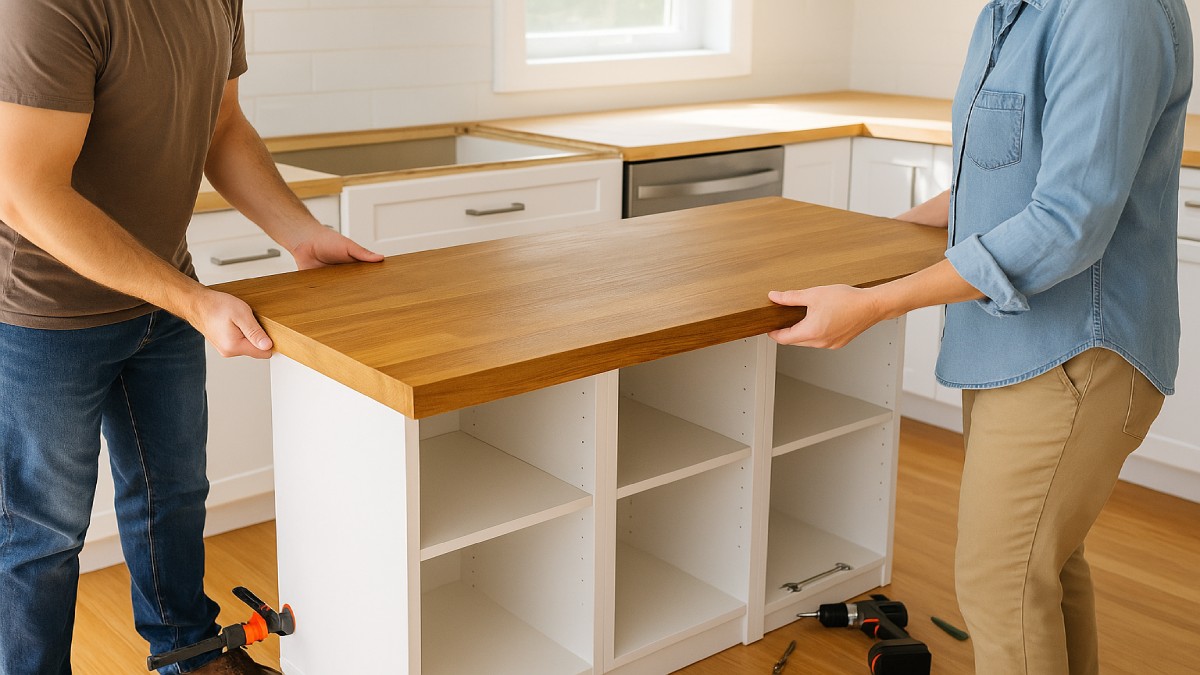
Secure the Countertop
Place the countertop onto the base and check alignment. Apply adhesive beads where the cabinets meet the surface. Avoid visible screws through the top — use hidden clips or brackets underneath. Let adhesive cure for 24 hours before placing heavy items or appliances on the surface.
Install Outlets, Trim, and Finish Details
Install electrical boxes according to your local code, usually on the inside or upper face of the island. Add end panels, molding, and toe-kicks for a seamless, built-in look. Once complete, open and close all drawers to confirm smooth movement and even spacing.
Step 6 — Style and Personalize Your Kitchen Island
Once built, your island becomes the visual heart of the kitchen. Personal touches make it feel warm, inviting, and uniquely yours. Mix textures, colors, and small décor items to create balance without clutter.
Blend Function With Personality
Use open shelves for cookbooks or wicker baskets. Add metal hooks for towels or utensils. Combine function with subtle color — a navy base with brass handles feels contemporary, while white cabinets with butcher block read timeless and clean.
Coordinate Materials and Finishes
Match your metal finishes for harmony — brushed nickel or matte black both pair well with wood tones. Pendant lights and stools in the same tone pull the space together visually. Keep the color palette to two or three main hues for a cohesive look.
Accessorize Smartly
Keep surfaces open for everyday use. A small planter, fruit bowl, or a ceramic tray for condiments adds warmth without clutter. Layer lighting — pendant fixtures above and ambient LEDs below — to shift from practical prep space to relaxed dining area.
Step 7 — Safety, Maintenance, and Longevity Tips
A kitchen island built with care can last decades. Regular cleaning, quick repairs, and smart habits will keep it strong and beautiful for the long run.
Regular Upkeep
Wipe counters daily with a gentle cleaner suitable for your surface type. Avoid harsh chemicals that can dull finishes. For wood tops, reapply oil or sealant every few months. Check brackets and screws yearly to ensure nothing loosens over time.
Heat and Moisture Protection
Use trivets under hot pans to protect quartz or laminate. For islands with sinks, caulk joints carefully to prevent moisture damage. Adequate ventilation helps wood and finishes resist warping. Always use coasters or mats under small appliances.
Long-Term Flexibility
Design your island with adaptability in mind. Use modular base units or casters for mobility. If trends change, repaint cabinets or swap stools for a quick update. The best islands evolve with your family’s needs.
Common Questions About Kitchen Islands
How much space do I need for a kitchen island?
Leave at least 36 inches of clearance around all sides. For a shared workspace or multi-cook setup, 42–48 inches ensures safe, easy movement.
How many people can sit at my island?
Each stool requires about 24 inches of counter width. A six-foot island fits three seats comfortably, while larger designs can fit four or more.
What’s the best countertop material?
Quartz offers low maintenance and durability. Butcher block provides warmth and character, while granite delivers timeless elegance and heat resistance.
Do islands need electrical outlets?
Yes, most building codes require at least one accessible outlet on or above the countertop. This makes small appliances and charging easier while staying compliant.
How much does it cost to build one?
DIY islands can start under $1,000 using stock cabinets and laminate tops. Custom installations with stone countertops and built-in utilities typically range from $4,000 to $6,000.
Conclusion
A kitchen island is more than just furniture — it’s the heart of modern living. It gives your kitchen structure, adds storage, and creates a welcoming place to connect. With thoughtful planning, durable materials, and a touch of creativity, your island can balance practicality with warmth. Whether you build it yourself or customize a pre-made base, the result will elevate your kitchen for years of everyday comfort and gatherings.