How to Calibrate a Laser Level for Perfect Accuracy — Guide
Accurate laser levels make projects faster and cleaner. A misaligned unit can waste material, create rework, and cost time. Calibration keeps your laser accurate so layouts, tile lines, and framing stay true.
This guide shows field tests, step-by-step calibration checks, adjustment techniques for user-serviceable models, and a clear protocol for when to send the unit for professional calibration. Follow these methods to maintain millimeter-level accuracy on job sites and at home.
Why Calibration Matters
Laser levels deliver precision across jobs that span short walls and long distances. Calibration confirms that the laser’s internal optics and pendulum align to the manufacturer’s specifications. Over time and after impacts, many units drift. That drift shows up as slight offsets that can multiply across a long run.
For trades like tiling or cabinetry, a few millimeters of error translate to visible gaps or misaligned joints. Contractors keep calibration records because small errors cause expensive rework. Homeowners get cleaner results and avoid wasted paint, tile, or trim when they check accuracy before critical layouts.
Understanding Accuracy Specs
Laser accuracy is usually stated in millimeters at a given distance, for example ±2 mm at 20 m. That value means the beam should remain within two millimeters of true level over twenty meters. Always read your device’s spec sheet before testing. If you measure an offset larger than the stated tolerance, the instrument needs adjustment or service.
Accuracy specs also differ by model and function. Cross-line lasers have different tolerances than rotary lasers. Some cheap line lasers state broader tolerances. Higher-tier brands provide tight specs and often include calibration documentation.
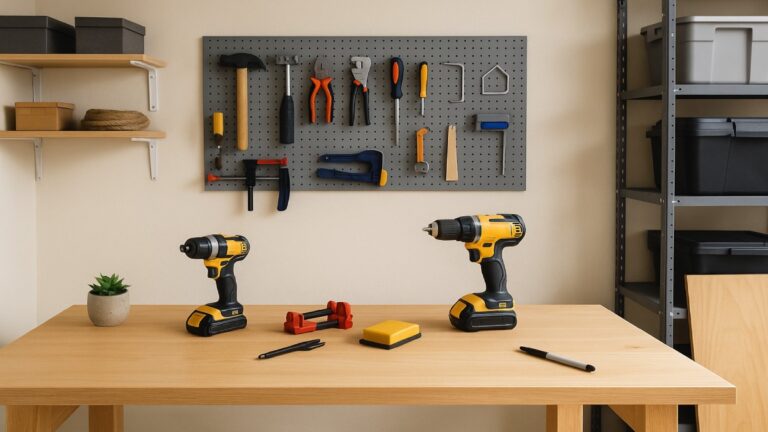
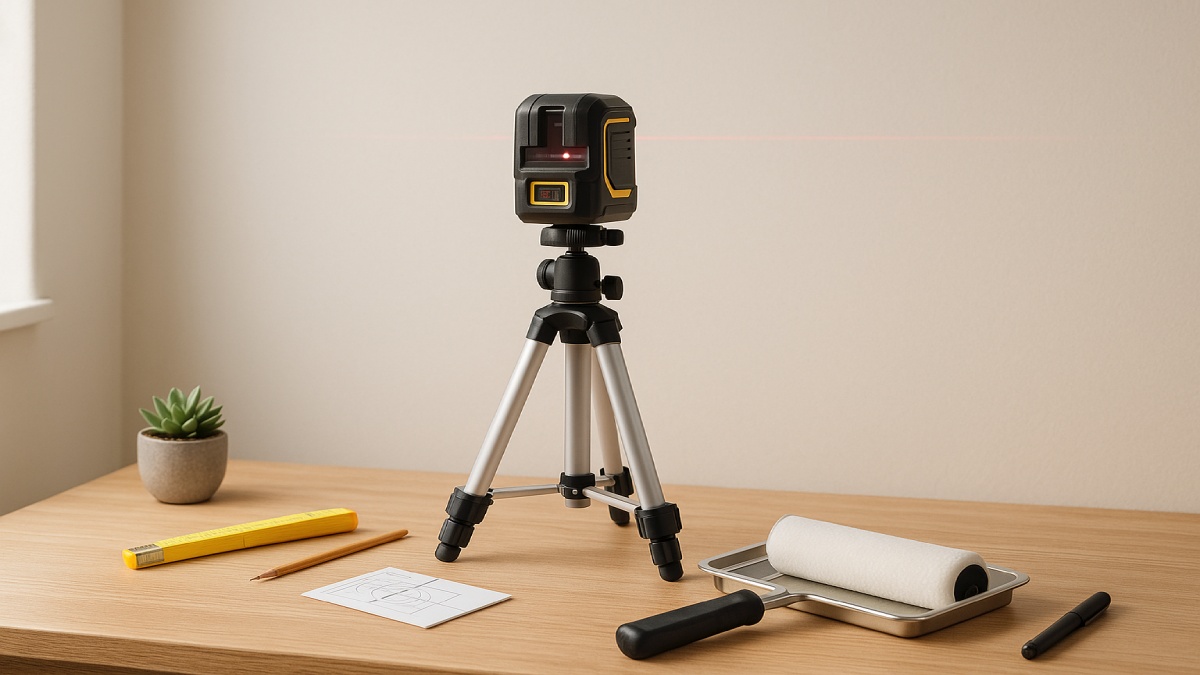
Tools and Setup You’ll Need
Prepare the following before starting any calibration routine:
- Stable tripod or flat, vibration-free surface
- Measuring tape with millimeter graduations
- Fine pencil or marker
- Target board or smooth wall
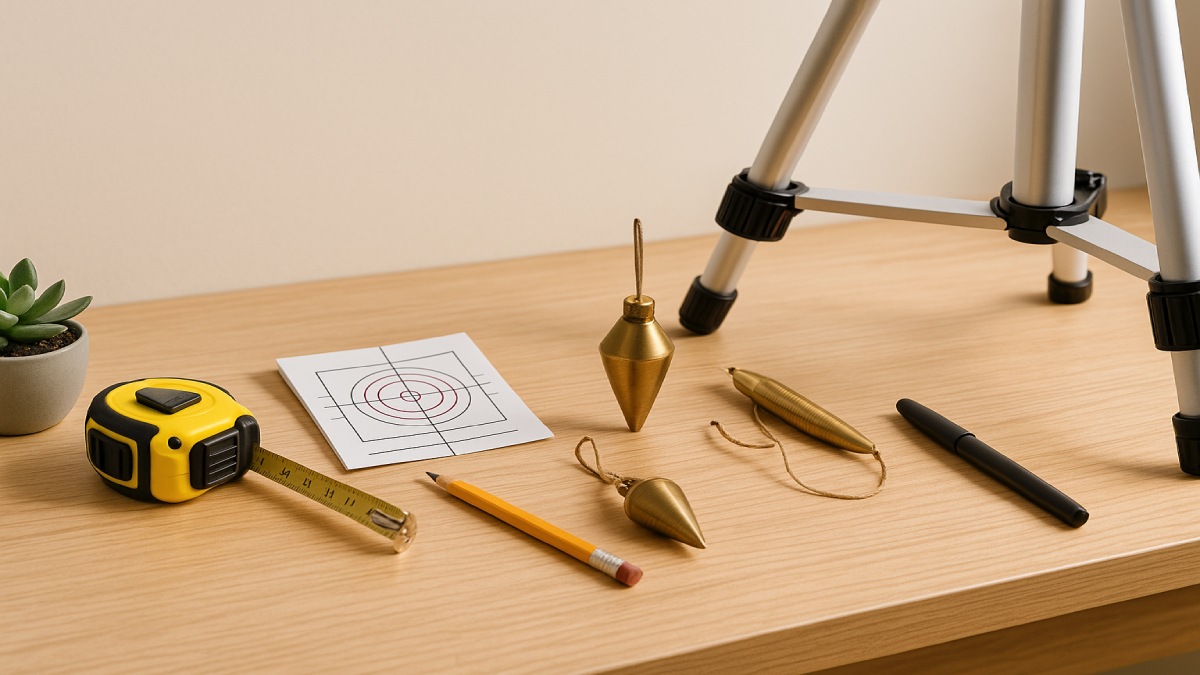
- Plumb bob (for plumb checks) or vertical reference
- Manufacturer manual and accuracy tolerance values
Pick an indoor space with minimal air flow and stable temperature. Thermal shifts and drafts can make readings less repeatable. Allow the laser to warm up and the pendulum to settle for a few minutes before you mark anything.
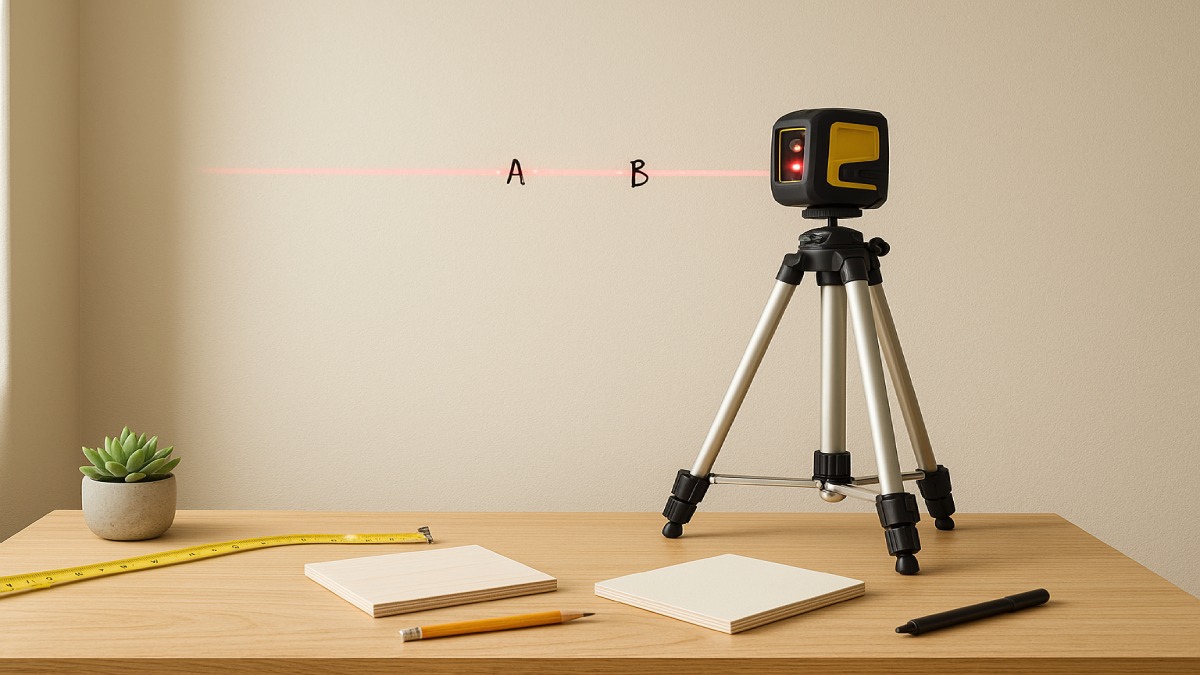
Field Calibration: The 180° Horizontal Test
The 180-degree rotation test is the simplest, most reliable field check for horizontal accuracy. It works for cross-line and rotary lasers and highlights misalignment quickly.
Step 1 — Set and Stabilize
Mount the laser on the tripod and position it roughly centered in front of a flat wall. Pick a distance that is relevant to your project. Longer distances amplify small errors, so test at 6–10 meters if possible for clear results. Lock the tripod and let the laser self-level and settle.
Step 2 — Mark Point A
With the laser facing the wall, turn on the horizontal beam. Use a fine pencil to mark the beam’s center on the wall. Label this mark “A.” Record the distance between the unit and the wall.
Step 3 — Rotate 180° and Mark Point B
Rotate the laser exactly 180 degrees on the tripod without changing the tripod legs. Allow the beam to settle, then mark the new beam center on the same wall at the same height and label it “B.”
Step 4 — Measure the Offset
Measure the vertical distance between marks A and B. Compare this measured difference to the device’s specified tolerance at that distance. If the difference exceeds the spec, the horizontal axis is out of calibration.
Adjusting Horizontal Alignment
Many consumer and professional lasers include user-adjustment screws for the horizontal axis. If your unit provides access, use tiny incremental turns to re-center the beam. Make small adjustments, re-test using the 180° method, and repeat until the offset falls within the spec. If your laser has no accessible adjustments or the offset remains large after adjustment, schedule professional calibration.
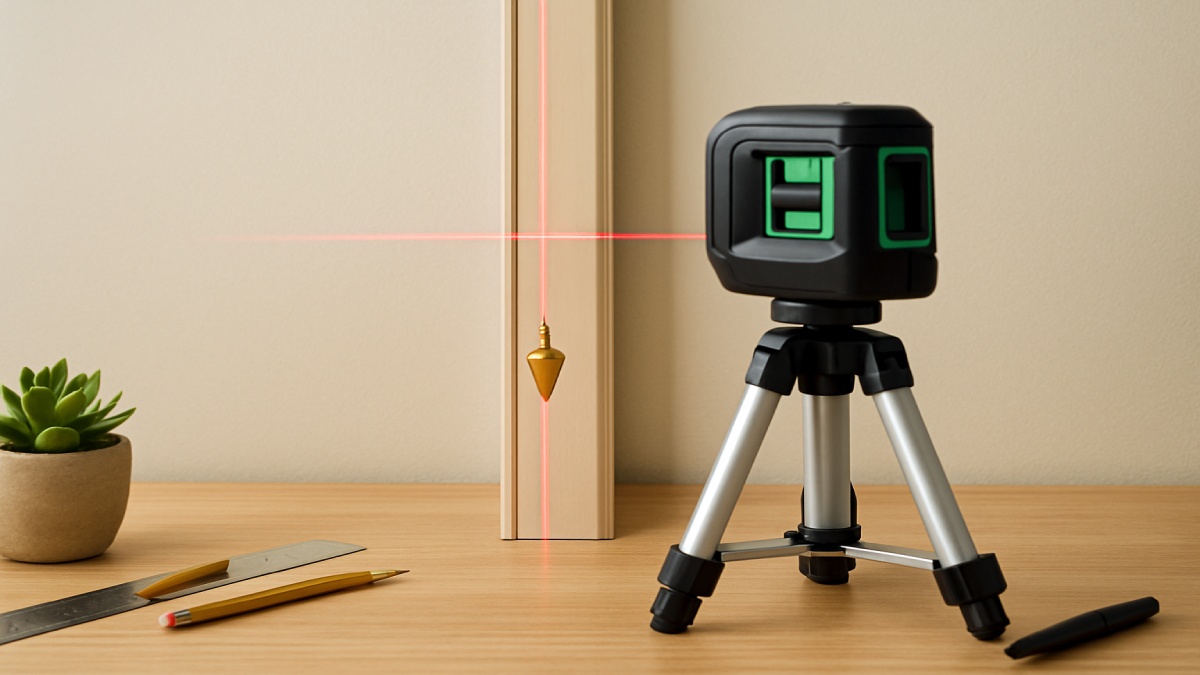
Vertical and Plumb Calibration
Vertical calibration checks the Y-axis and the plumb function. Many cross-line lasers project both axes and a plumb dot. Neglecting vertical checks creates perpendicularity errors that show up in cabinet and wall layouts.
Vertical Line Test
Place the level on a tripod so it projects a vertical line onto a tall flat surface, such as a door frame. Mark a point near the top and bottom of the vertical beam, then rotate the unit 180° and repeat. Measure the distance between corresponding marks. Any offset beyond tolerance needs vertical axis adjustment or professional servicing.
Plumb Dot Check
To test plumb accuracy, place a plumb bob at a floor mark. Project the plumb dot from ceiling to floor and compare its position with the plumb bob tip. A difference shows a plumb error. Small deviations can sometimes be corrected using the laser’s plumb adjustment; large deviations require factory service.
Cross-Line and Multi-Axis Verification
Multi-line units produce intersections where the horizontal and vertical beams cross. Check that the cross point is stable and repeats when you rotate the instrument. Project the intersection onto a flat target and mark the center, then rotate 90 or 180 degrees and confirm the cross remains centered. If it shifts, optical elements or the internal prism may have misaligned.
When to Use a Target Plate or Calibration Jig
Targets and jigs improve repeatability and reduce human error. A target plate with clear center lines helps you mark beam centers more precisely than freehand. For rental fleets and critical jobs, precision jigs and optical benches provide consistent test conditions. If you document calibration results, using a jig helps ensure every test is comparable.
Interpreting Test Results
When you measure offsets, always convert your measurement to the manufacturer spec format. If a unit states ±2 mm at 20 m, calculate expected tolerance at your test distance. If the result falls inside tolerance, log it as passed. If not, attempt field adjustment or send the unit for service. Note that temperature and tripod instability can create false positives, so repeat tests a couple of times before concluding a failure.
How to Adjust Different Models
Adjustment methods differ by manufacturer. Some units offer visible screws or knobs for X and Y axes. Others seal internal optics and require factory recalibration. If the manual describes user calibration, follow the small-increment approach and always re-test. Over-adjusting can make the problem worse, so keep movement minimal and record each change.
Documenting Calibration: Logs and Records
For contractors and rental houses, calibration logs are critical. Record the date, operator, device serial number, test distance, marks A and B, measured offset, and pass/fail status. Attach photos of the test setup when practical. Logs prove compliance and help spot recurring problems with specific units or environmental conditions.
Troubleshooting Common Calibration Problems
Calibration failures usually trace back to a few causes. Inspect for visible damage and listen for unusual pendulum sounds. Loose internal components, dirty optics, or a damaged pendulum often show symptoms. A dropped laser almost always requires careful testing.
Loose Tripod or Soft Surface
Tripod instability creates inconsistent readings. Use a solid tripod and firm floor. If the tripod legs sink into soft ground or carpet, place a rigid board under the legs.
Thermal and Draft Issues
Laser accuracy drifts when the instrument heats or cools rapidly. Do not test near HVAC vents or open doors. Allow the unit to thermally stabilize before marking beams.
Dirty Lens or Mirrors
Wipe lenses and prisms with a soft lint-free cloth. Dust and paint specks change beam intensity and may introduce apparent offsets. Avoid touching or smudging optics.
Internal Mechanical Damage
If internal components have shifted, field adjustment may not fix the problem. Send the unit to an authorized service center for bench calibration and replacement parts.
Field Calibration vs Professional Calibration
Field calibration detects drift and corrects shallow misalignments. Professional calibration provides traceable certification and bench-level adjustments that often involve recalibrating prisms and replacing worn parts. Use field checks for daily QA and professional calibration when traceability or millimeter-level certification is mandatory.
Send the unit for professional calibration if it fails field tests after your adjustments, if it has suffered a heavy impact, or if project specifications require a certificate. Manufacturers typically return units with a calibration certificate showing test measurements and compliance.
Calibration Frequency and Best Practices
Establish a schedule based on use: annual calibration suits many owners, while rental fleets or daily jobsite tools may need monthly or quarterly checks. Perform a quick 180-degree test before critical layouts or after any suspected shock. Keep a log and perform a full documented check at regular intervals.
Maintenance Tips to Preserve Calibration
- Store the laser in a padded case away from heat and humidity.
- Avoid leaving the tool in a hot vehicle for long periods.
- Transport the device securely; do not toss it into truck beds without padding.
- Replace batteries promptly; low power can affect self-leveling behavior.
- Clean optics carefully and regularly.
When to Repair or Replace
If a laser repeatedly fails calibration checks even after adjustments and cleaning, replacement may be more cost-effective. For older units, parts may be obsolete. Weigh the cost of professional recalibration and repairs against the price of a new unit with modern features and better accuracy specs.
FAQ — Quick Answers
How often should I calibrate my laser level?
Check annually for casual use. Check monthly or weekly for heavy, daily use or rental fleets. Always test after a drop or heavy vibration.
Can I calibrate a laser level at home?
Yes. Use the 180-degree rotation method for horizontal checks and similar rotation tests for vertical/plumb. If adjustments fail, send it to the manufacturer or authorized calibration lab.
What does ±2 mm at 20 m mean?
It means the beam should not deviate more than two millimeters from true level over a 20-meter distance. Adjust tests to your device’s specification for accurate interpretation.
Does low battery affect calibration?
Yes. Low battery can cause erratic self-leveling. Replace batteries and re-test before assuming a calibration failure.
Conclusion — Keep Levels Accurate, Keep Work Tight
Regular calibration reduces mistakes, prevents rework, and saves time. Use field checks for daily confidence and professional calibration for traceable precision. Keep logs, handle equipment with care, and test after any incident that might cause shock or vibration.
With the steps above, you can maintain laser accuracy across projects small and large. Periodic checks and careful maintenance keep your layouts true and your installations clean.