Build a Home Office Desk Using Two File Cabinets at Home
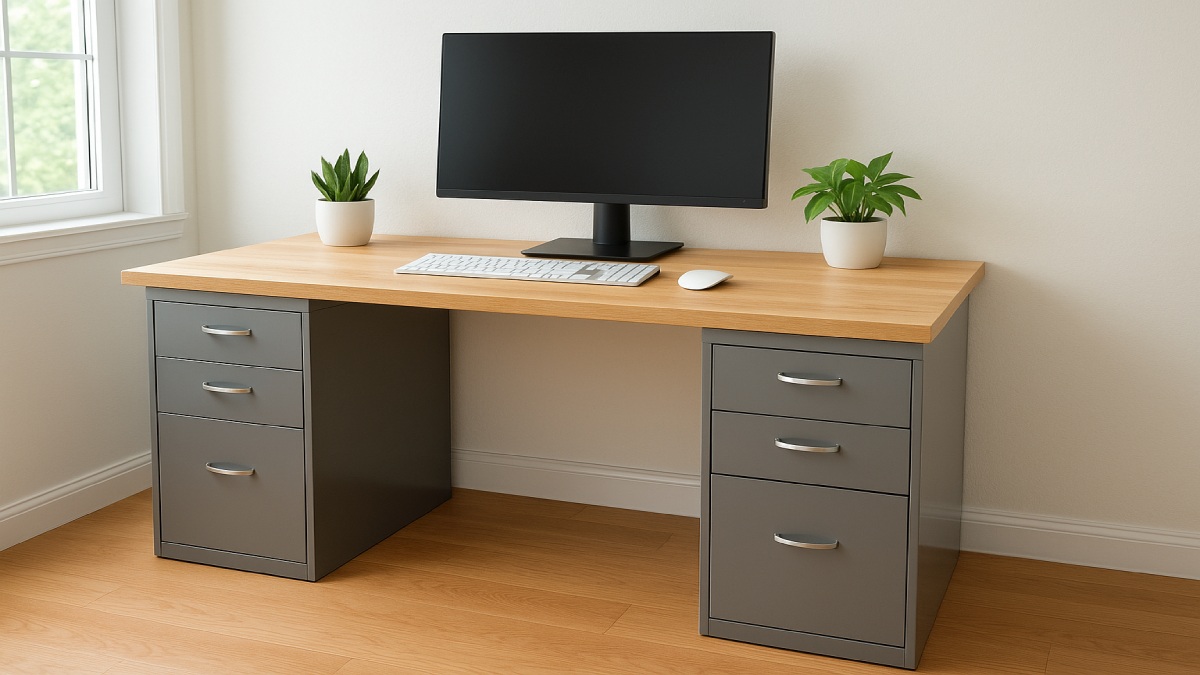
Many home offices start with a table that never quite fits. It wobbles, runs out of space, and hides nothing. A smarter path is to build a desk with two file cabinets and a sturdy desktop. You gain rock-solid support, real storage, and dimensions that match your body instead of the other way around. The result looks tailored, works better for long sessions, and often costs less than a store-bought setup.
This friendly guide shows you exactly how to plan, assemble, and style a cabinet-based desk. You’ll set ergonomic height targets, confirm leg clearance, and choose a top that accepts monitor arms without fuss. Then you’ll secure the span safely, manage cables, and dial in lighting and accessories. By the end, you’ll have a clean workstation that feels professional and lasts for years.
Why File Cabinets Make Excellent Desk Bases
Desks live or die on stability and storage. File cabinets deliver both. They are engineered to hold heavy loads, resist racking, and slide smoothly even when packed with paper. As desk bases, they support a long top without flex and give you drawers right where you need them. That means fewer add-on carts and far less clutter underfoot.
Built for Strength and Stability
Most quality cabinets are steel boxes with internal rails, counterweights, and stiff corners. Lateral files spread weight over a wide footprint, which helps when you plan a long desktop. Vertical files are narrower, yet short two-drawer units make great pedestals when braced and leveled. Anti-tilt interlocks on many models prevent multiple drawers from opening at once, which keeps the base from pitching forward as you move around the desk.
Saves Money and Adds Storage
Cabinet prices on the used market are friendly, and even new mid-range models cost less than full furniture systems. Two cabinets eliminate the need for separate drawer units or under-desk carts. You can dedicate one side to files and the other to tech accessories, stationery, and cables. With smart dividers, everything ends up within easy reach.
Customizable Height and Finish
Common cabinet heights land around 27–28 inches. Add a 1–1.5-inch top and you hit the comfort zone for most adults. If you’re taller, slip risers under the cabinets to raise the finished height. If you’re shorter, keep the top lean and pair the desk with a footrest or a negative-tilt keyboard tray. The metal base accepts paint beautifully, so you can match the room with calm neutrals or go bold with a saturated color.
Step 1 — Plan Your Desk Dimensions and Ergonomics
A little math now saves a lot of strain later. Aim for a desk height that lets your shoulders relax, elbows hover near 90 degrees, and wrists stay flat while typing. Map your span, legroom, and monitor position before you cut a single board or bring home a slab.
Define Your Workspace Size
Measure the wall and any nearby doors. A 60–72-inch span serves most dual-monitor setups; 48–60 inches works for compact spaces or single ultrawides. Leave a clear path behind the chair so the room still feels open. For seated comfort, plan at least 24 inches of free space between the cabinets so your knees never bump knobs or rails.
Set Ergonomic Desk Height
Most people land between 28 and 30 inches for seated desk height. Try this quick check: sit in your office chair with feet flat and arms at your sides. Raise your forearms until they’re level and relaxed. That surface height is your target for the keyboard area. If your chair is tall and your feet lift, add a footrest to get the angle right.
Monitor and Keyboard Positioning
Keep the top of the display at or slightly below eye level so your neck stays neutral. Set distance around arm’s length—roughly 20–40 inches depending on screen size. Position the keyboard so the key tops sit at or just below elbow height, with wrists straight. If your finished desk ends up high, a slide-out tray under the top lowers the typing plane without changing the cabinet layout.
Step 2 — Choose and Prepare the File Cabinets
Pick bases that are strong, square, and easy to level. You want drawers that glide, frames that don’t shimmy, and feet that sit solid on your floor. A mismatched pair can work if both share the same finished height and depth under the top.
Cabinet Type and Size
Lateral files create a broader stance for long desktops, which helps when you use heavy monitors or a thick slab. Two-drawer vertical files are a good fit for small rooms and can still anchor a 60-inch top if you add a center cleat. Confirm your final height by measuring cabinet bodies without casters, then add your desktop thickness to see where the numbers land.
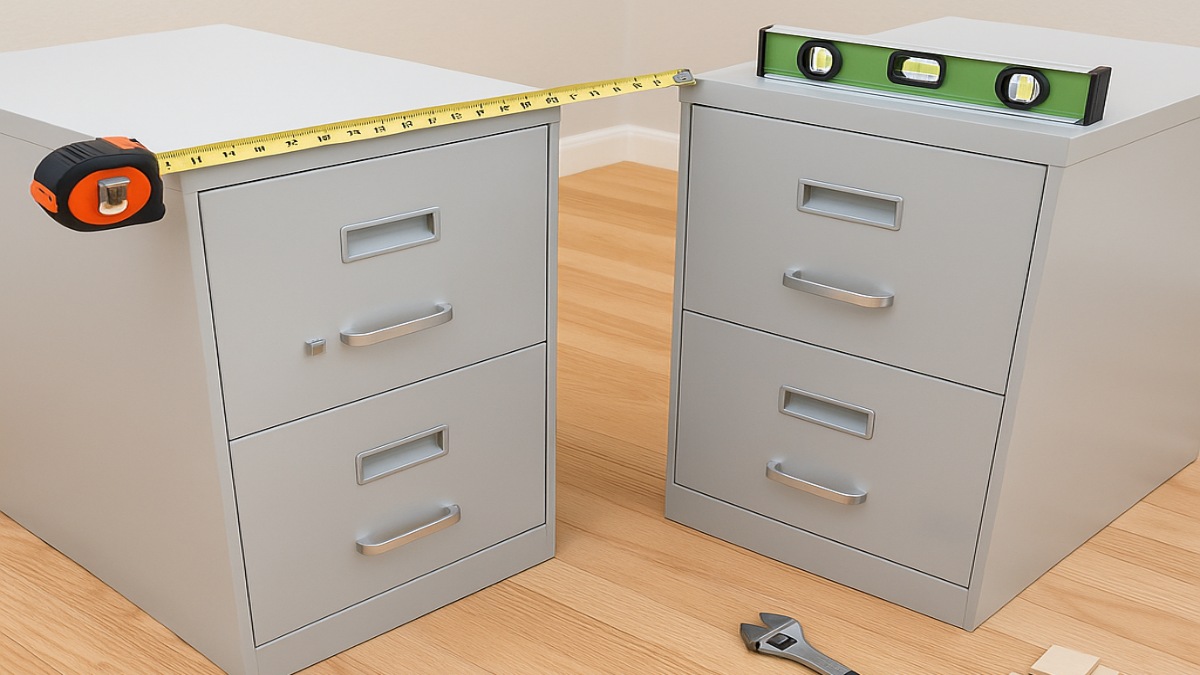
Safe and Level Setup
Anti-tilt interlocks are a plus, even when cabinets become desk bases. Place the units, check for rocking, and level the feet. On uneven floors, add composite shims under the corners. Slide both cabinets into their final stance and measure from the wall at front and back so the bases sit parallel. This prevents a twist that can telegraph as wobble in the top.
Paint or Refinish for Style
Flat metal takes paint well. Scuff sand with a fine pad, wipe clean, and spray a bonding primer. Follow with two light coats of durable enamel in satin or semi-gloss. Black with a warm wood top feels modern. White with a pale oak veneer reads light and airy. Swap handles for a cleaner line and you’ll get a premium look from everyday pieces.
Step 3 — Pick the Right Desktop Material
The desktop sets the tone and absorbs daily wear. Your best pick balances stiffness, surface feel, finish upkeep, and clamp compatibility for monitor arms or microphone mounts. Any option can work well if you support long spans and seal the surface properly.
Butcher-Block and Solid Wood
A butcher-block slab brings warmth and mass. It resists point loads, feels great under the wrists, and handles refinishing later if you scratch it. Maple, oak, and acacia are common. Seal with oil for a natural look or with a waterborne polyurethane for tougher protection. Expect seasonal movement; leave a small expansion gap at the wall and mount the top with elongated holes in cleats so the wood can breathe.
Veneer and Laminate Tops
Veneer worktops pair a real-wood face with a stable core, which keeps weight down while still looking upscale. Laminate tops are budget friendly and resist spills, coffee rings, and pen marks. Both options come in precise sizes and clean edges that suit a modern office. If you use a monitor arm, check the clamp’s maximum thickness and the edge profile so it seats flat without crushing the surface.
Reclaimed or Plywood Options
Reclaimed planks create a one-of-a-kind surface. Join boards with biscuits or loose tenons, then sand flush and seal. If you prefer plywood, choose a hardwood veneer panel in 1–1.25 inches and wrap the front with solid edging for a finished nose. A plywood top stays dimensionally quiet across long spans and takes paint or clear finishes well.
Support and Attachment
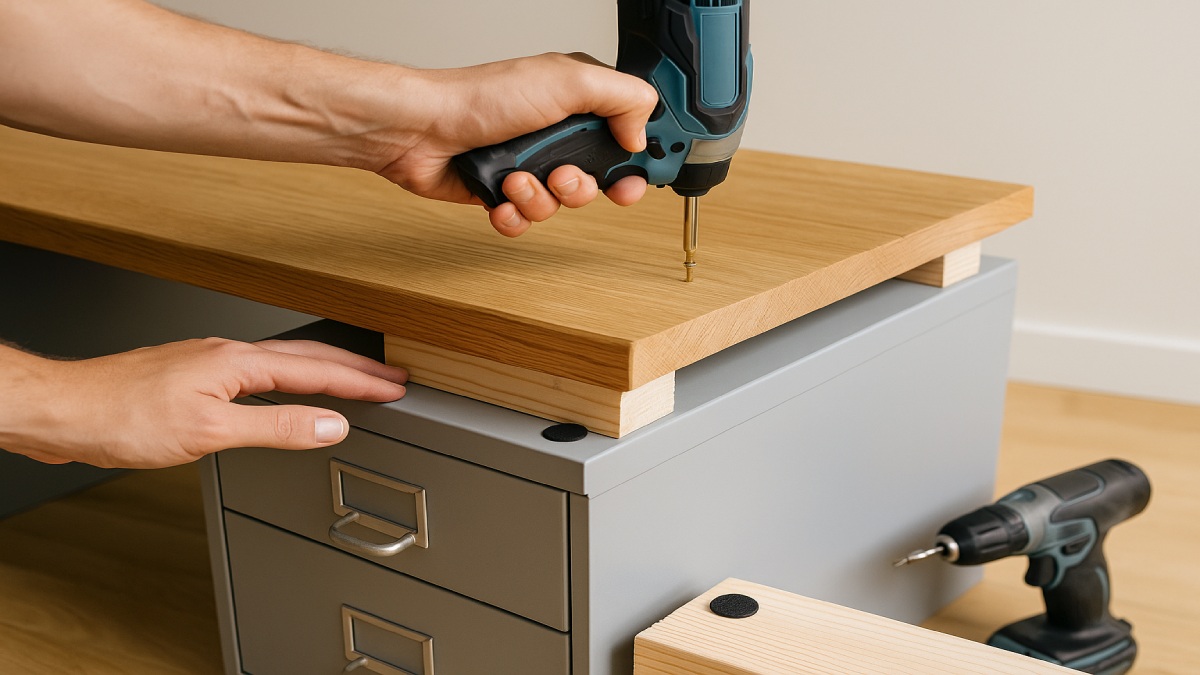
Long tops can flex if you skip structure. Add a hidden cleat along the back edge or a center stretcher in the leg bay for any span over about six feet. Avoid drilling into cabinet lids with internal counterweights or rails. Instead, set high-friction pads at each corner and secure the top to short wood cleats that sit on the cabinets. Screws go into the cleats from below, never into the metal box. The top stays put, yet the cabinets remain unmodified if you rearrange later.
Step 4 — Assemble and Secure the Desk
Assembly flows quickly once parts are prepped. Bring the cabinets to their final positions, set the top, and test for racking before loading gear. Small adjustments now prevent creaks, squeaks, and cable snags later.
Positioning and Spacing
Start by marking the cabinet outlines with painter’s tape. Space them 24–30 inches apart for open knees and thighs. Align the unit faces so the desktop overhang matches left and right. If you’re right-hand dominant, a slightly deeper overhang on the mouse side feels natural and adds space for a small notebook.
Attach Desktop Safely
Lay the top on thin rubber pads to create friction and silence. If you want a firmer connection, install two short cleats on each cabinet—one near the front and one near the back—then fasten the top into those cleats from below. The screw tips never touch the cabinet shell. For renters or frequent movers, high-bond mounting strips at the corners stop drift without permanent holes.
Level and Load Check
Set a level at the front, center, and back. Shim under cabinet feet until the bubble settles in the middle across all three readings. Place a few heavy books evenly across the top and tap the corners. No rattle means the structure is tight. If you hear pinging or feel bounce, add a center support foot or a wider cleat along the rear edge and test again.
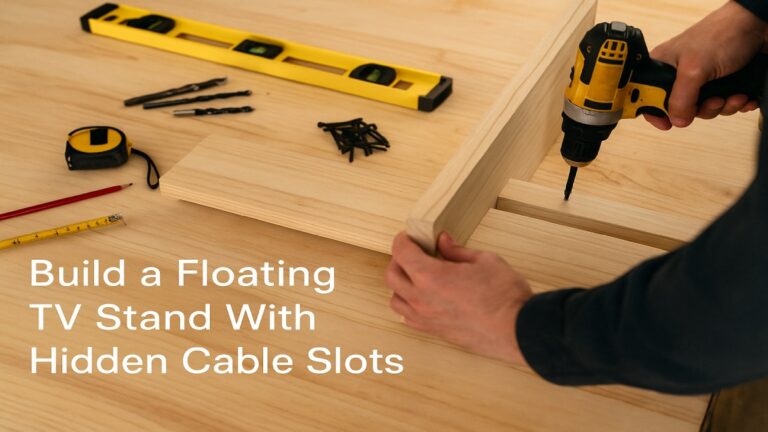
Cable and Power Management
Clean wiring protects legroom and keeps the desk looking sharp. Drill a grommet hole near the back center of the desktop or route cables along the rear edge with adhesive clips. Mount a surge protector under the top and feed monitor, charger, and light cords into a cable tray. Label both ends of every line. That small habit makes swaps painless six months from now.
Step 5 — Optimize Comfort and Productivity
Ergonomics turn a strong desk into a place you can work all day without fatigue. Focus on chair fit, screen height, lighting, and a layout that keeps essentials close. Comfort and speed follow when every reach feels natural.
Chair and Footrest Setup
Dial the chair so your hips and knees sit level, feet flat, and lower back supported. If your heels hover, add a compact footrest. A slight negative tilt on the keyboard tray helps wrists stay neutral during long typing sprints. Stand up every hour, roll your shoulders, and step away for a minute. Small breaks keep focus sharp.
Monitor and Lighting Tips
Place the display perpendicular to windows to reduce glare. An adjustable LED desk lamp with a wide head lights the board game of your keyboard and notebook without bright hotspots. If you use two monitors, keep the main display centered and angle the second slightly inward. For ultrawide screens, drop the top a touch so your neck stays comfortable while scanning left to right.
Accessory Placement
Keep daily tools in the primary reach zone—about 16–18 inches from the front edge. Dock your laptop on the non-mousing side. Store headphones on a small hook under the top so they never tangle with drawer pulls. Use shallow trays in the upper drawer for pens, adapters, and small drives. Reserve deep drawers for files, camera gear, or a label maker you grab often.
Step 6 — Style Your Workspace
A desk that works hard can still look calm. Color, texture, and a few personal touches create a zone that invites focus. The goal is clarity. Every visible object earns its place and supports how you work.
Matching Aesthetics
Paint the cabinets a neutral tone that complements the room—graphite, ivory, or warm gray all play nicely with natural wood. If you prefer color, deep green or navy reads modern without shouting. Tie the palette together with a desk mat, a small planter, and a framed print that matches your theme.
Minimalist or Industrial Looks
Minimalists often pick white cabinets under a pale birch or maple top. Industrial fans lean toward charcoal steel with a reclaimed oak slab and matte black hardware. Either path keeps lines simple and the eye on the work instead of the furniture. Hardware swaps are an easy win—slim pulls transform older cabinets in minutes.
Personalization Tips
Hang a floating shelf above the desk for books or decor. Add a cork strip under the shelf for notes and color swatches. Use a low-glare monitor arm in a finish that matches cabinet pulls for a clean, intentional look. Set a small plant near the back corner where it won’t fight your mouse.
Step 7 — Maintenance and Safety Tips
Solid hardware and gentle care extend the life of the build. A five-minute check each month keeps the structure silent and the finish fresh. Your back will thank you, and your desk will keep looking new.
Regular Care
Wipe the top weekly with a soft cloth. Avoid standing liquids near the keyboard area. If you chose an oiled wood top, refresh with a thin coat every six to twelve months. For waterborne polys, a light buff and a fresh coat every few years keeps the surface smooth and stain resistant.
Prevent Wobble and Wear
Recheck cabinet level after seasonal floor shifts. Tighten cleat screws if you hear any creak. Replace worn drawer slides or sticky rails; fresh runners make the desk feel new and stop metal chatter. If chair casters scuff the cabinet toes, add clear bumpers or a narrow toe-kick strip.
Future Flexibility
Your needs will change. The beauty of this build is how easily it adapts. Swap in a longer top for a growing setup. Add a center leg for a heavy audio rack. Convert to sit-stand later by keeping the cabinets as flanking storage and sliding a height-adjustable frame between them. Nothing goes to waste.
Common Questions About File Cabinet Desks
Are metal file cabinets strong enough for a desk?
Yes. Quality units are designed for heavy drawers and stay rigid under real loads. Lateral files offer the most stability for long spans. Vertical two-drawer cabinets still work well when leveled and braced under a shorter top.
What’s the best top thickness for a monitor arm?
Most clamp-style arms handle roughly 0.4 to 4.5 inches. A 1–1.5-inch wood or veneer top sits in the sweet spot. Confirm the clamp range and check that the edge profile is square so the arm bites evenly.
Do I need to attach the top permanently?
Not always. Non-slip pads and wood cleats hold the top steady for normal use. If you have kids, pets, or a very slick floor, add concealed screws through cleats into the underside of the top for extra security.
How wide should I space the cabinets?
Plan for at least 24 inches of clear span to protect knees and thighs. If you need a drawer on the inside face, test that the handle clears your legs and that the drawer opens without hitting the chair arms.
What if my desktop sags in the middle?
Add a center support. A simple stretcher screwed to the underside of the top, a shallow steel angle along the back edge, or a single center foot all stop flex. Pick the option that hides best with your layout.
Conclusion
Two file cabinets and a well-chosen desktop form a desk that looks custom and works like a tool. The bases give you stable footing and generous storage. The top brings surface area and style. With a careful plan—right height, safe span, and tidy wiring—you get a workstation that supports long days without clutter or wobble. The build is simple, the materials are easy to find, and the result feels tailored to you. Clear the surface, sit down, and enjoy a workspace that makes every task smoother.