Fix Flickering Lights Fast: Find & Secure Loose Connections
Flickering lights are more than a nuisance—they’re a signal that something in your electrical path isn’t making a reliable connection. In many homes, the culprit is a loose connection at the lamp, light fixture, switch, wire nut, or inside the breaker panel. Left unsolved, intermittent contact can produce heat, accelerate wear, and in worst cases create a safety hazard. The good news: with methodical checks, smart tools, and good technique, you can track down the problem and restore steady, safe lighting.
This guide walks you through a practical, step-by-step workflow to isolate and correct loose connections that cause flicker. You’ll learn how to differentiate real power issues from bulb quirks, how to test safely with non-contact and contact meters, where loose terminations like to hide, and how to re-make tight, code-conscious connections. If at any point you encounter overheating, damaged insulation, aluminum branch wiring, or anything that feels beyond your comfort level, stop and call a licensed electrician.
Why Lights Flicker: A Quick Primer
Flicker happens when voltage or current to the lamp fluctuates. That fluctuation can come from the supply (utility dips or large loads switching on), the control path (dimmer compatibility or poor switch contact), or the load itself (loose bulb, failing driver, or thermal protection). In a typical home, the most common cause is mechanical: a loose termination that introduces resistance and intermittency. Your job is to find every joint from the breaker to the lamp and make sure it’s electrically sound.
Loose Connection Hotspots
- Bulb or lamp holder: Threads, pins, or GU10/GU24 bases not seated firmly; worn spring contacts in sockets.
- Fixture wiring: Twisted splices under wire nuts that weren’t properly twisted, stripped, or sized.
- Switches and dimmers: Back-stabbed conductors that loosen over time; incompatible dimmer/LED pairings.
- Ceiling boxes: Vibrations loosen wirenuts or mounting screws; heat cycles relax springs and contacts.
- Outlets on the same circuit: Loose feed-through connections can starve downstream fixtures.
- Service/breaker panel: Loose neutral or breaker lug (panel work should be left to a pro unless you’re qualified).
Safety First: Set Yourself Up for Success
Before you touch conductors, adopt a safety routine. Label the problem circuit, keep one hand behind your back when probing energized equipment, and use tools that are rated for household circuits. If you need to open a junction box, kill the breaker and verify that power is truly off.
Essential Tools
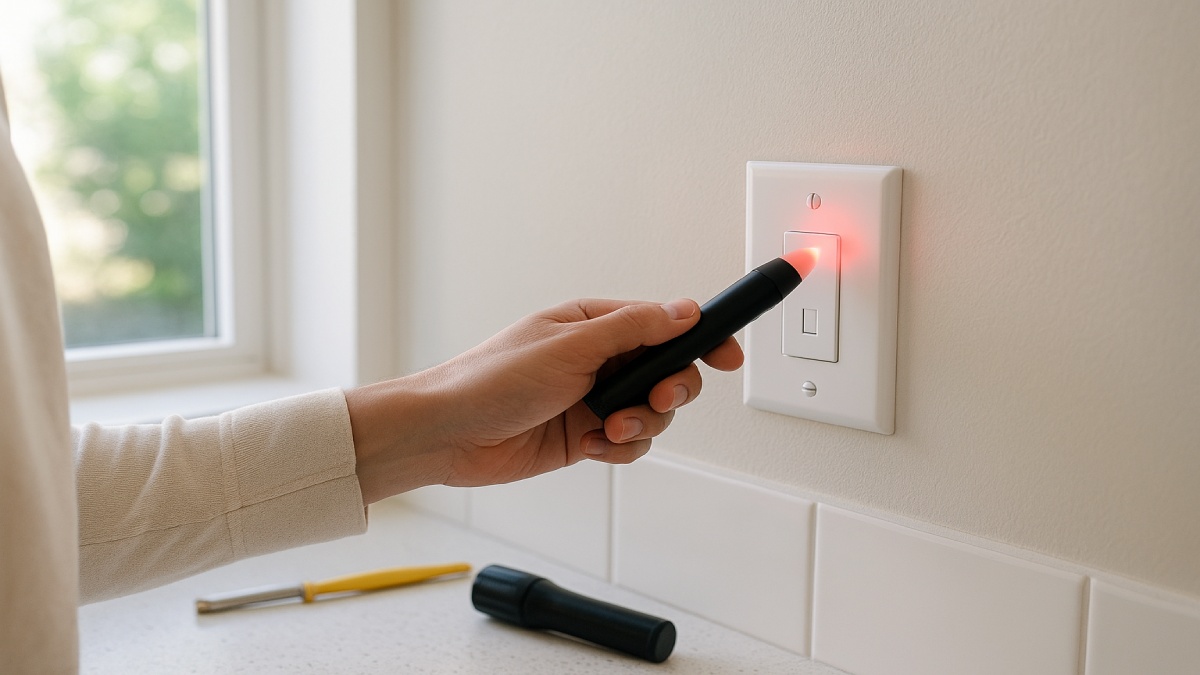
- Non-contact voltage tester (NCVT): For a quick “hot or not” check without exposing bare metal.
- Multimeter: For measuring voltage and continuity; choose one with CAT II/III ratings appropriate for residential work.
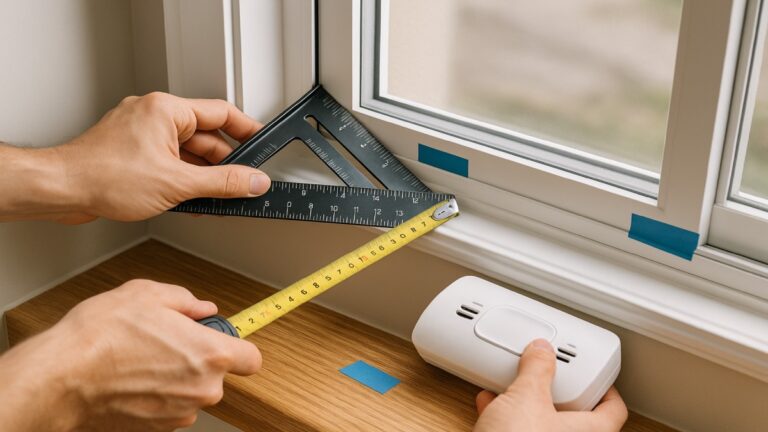
- Insulated screwdrivers & nut driver: For terminal screws, cover plates, and fixture hardware.
- Combination pliers & wire strippers: To re-terminate and prepare clean copper ends.
- Assorted wire connectors: Properly sized wirenuts or listed push-in connectors.
- Flashlight or headlamp: Ceiling boxes and cabinets can be dim—ironically.
- Ladder & PPE: Stable ladder, safety glasses, and gloves for debris and insulation.
Step-by-Step: Track Down the Flicker
Step 1: Rule Out the Obvious
- Swap the bulb. Try a known-good bulb of the same base. If you use LEDs, confirm they’re dimmer-compatible.
- Check the fit. For Edison bases, seat the bulb fully; for bi-pin, confirm both pins are locked. Inspect for bent socket tabs.
- Bypass the dimmer. If the circuit uses a dimmer, temporarily set to full or swap to a standard switch to test lamp stability.
Step 2: Observe the Pattern
- Only one fixture flickers? Likely a local socket, splice, or fixture issue.
- Multiple fixtures on one switch? Suspect the switch box or first junction in line.
- Several circuits flicker at once? Call your utility or an electrician; this can indicate service problems or loose neutral at the main.
Step 3: Test Power Safely
With power on and hands clear of conductors, use an NCVT to confirm the switch is feeding the fixture. Then, turn the breaker off, lock it out if possible, and verify de-energized with the NCVT and a multimeter. Only then open boxes to inspect connections.
Open, Inspect, Tighten: Where to Look and What to Do
At the Bulb and Socket
- De-energize, then inspect: Look for scorch marks, pitting, or a loose center contact tab. Gently lift the tab for firmer spring pressure if needed.
- Clean contacts: Lightly wipe corrosion with a clean, dry cloth. Never file plated contacts on live equipment.
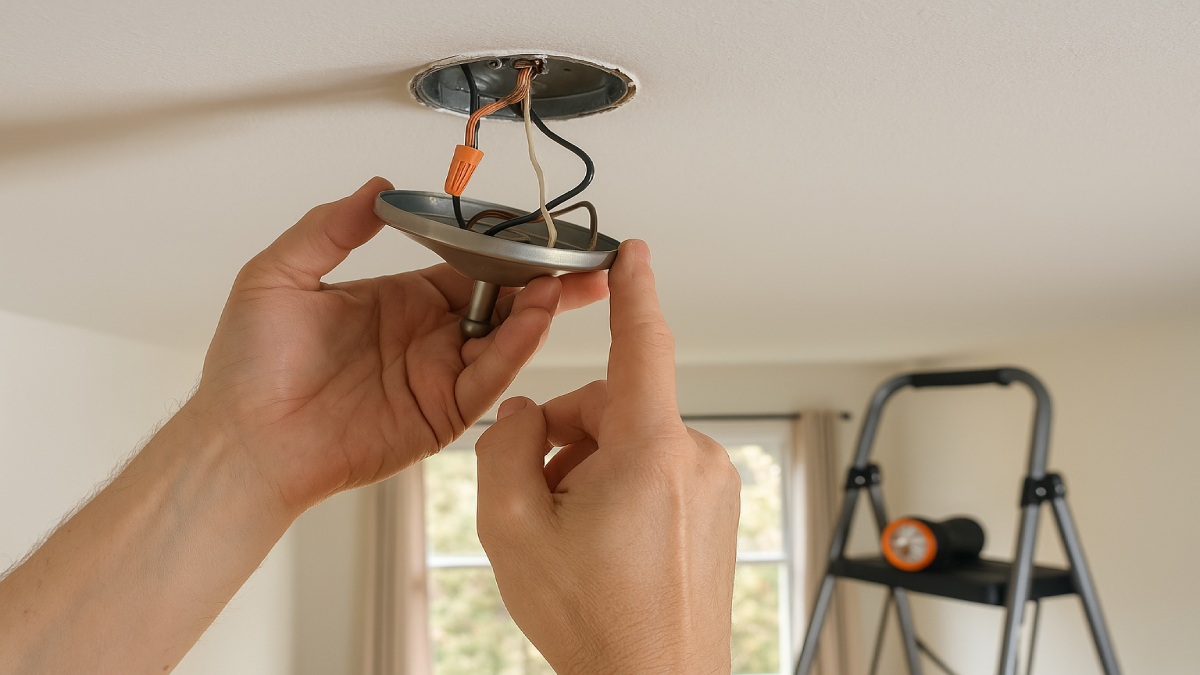
Inside the Fixture Canopy or Ceiling Box
- Wirenuts: Remove and re-make suspect splices. Strip to the connector’s spec (often ~1/2–5/8 in), align copper ends, twist clockwise with lineman’s pliers, then install the right-sized connector. Tug test each conductor individually.
- Solid vs stranded: If mixing stranded fixture leads and solid house wiring, pre-twist firmly and use a connector rated for mixed conductors.
- Grounds: Ensure the ground is continuous: fixture green to box ground pigtail to circuit ground. Loose grounds can cause erratic behavior in some electronic drivers.
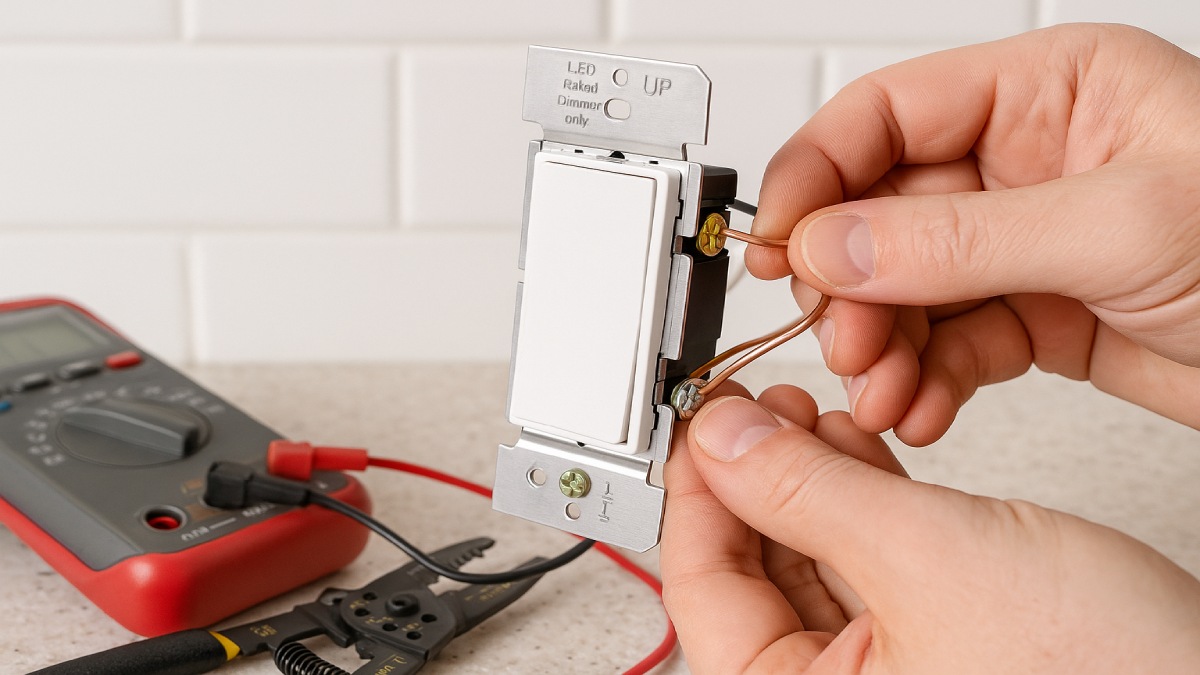
Switch Box and Dimmers
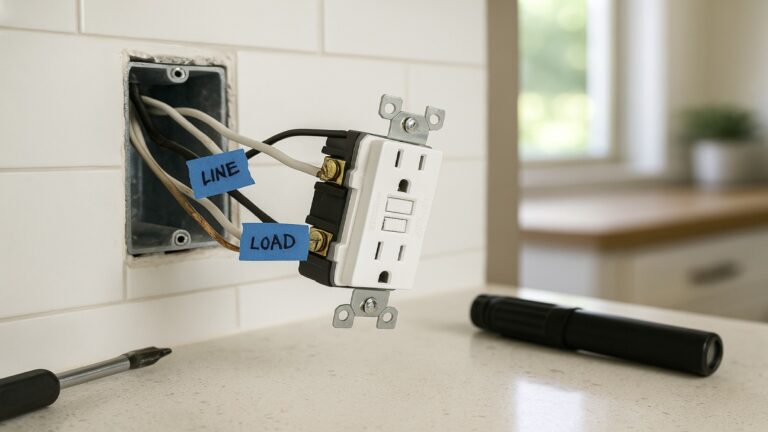
- Back-stab release: If wires were pushed into back-stab holes, move them to the screw terminals. Create a clockwise hook, place under the screw head, and tighten securely.
- Dimmer compatibility: Confirm your dimmer is LED-rated and matches bulb type. Many manufacturers publish compatibility lists.
- Neutral bundles: If neutrals are present in the switch box, make sure the wirenut on the neutral splice is snug with clean copper under it.
Downstream Outlets on the Same Circuit
Some lighting circuits share feed-through connections at receptacles. A loose feed can starve the light. Open the suspect receptacle (power off), move any back-stabs to screw terminals, and re-make the neutral splice if it’s loose. Mark the box cover with a small note so you remember where you worked.
Re-Making Quality Connections: Best Practices
Good connections start with good prep. Cut back to shiny copper if you find darkened ends. Strip to the correct length, avoid nicking conductors, and keep insulation just shy of the connector entry. When using wirenuts, choose the smallest size that fits all conductors and listed for their gauge and quantity.
Wire Nuts vs Push-In Connectors
- Twist-on (wirenuts): Time-tested, great for solid copper and mixed pairs when pre-twisted correctly.
- Push-in (lever) connectors: Fast and tidy, especially with multiple neutrals, but verify listing and conductor size. Strip lengths must be exact.
Terminal Screws
- Clockwise hook: Bend the conductor so tightening the screw draws the hook in, not out.
- Torque matters: Snug, not stripped. If a device provides torque specs, use a torque screwdriver.
- No two under one screw: Most terminals are rated for a single conductor unless listed for two—don’t double up.
Special Cases That Mimic Loose Connections
LED & Dimmer Incompatibility
Many flicker complaints trace to dimmer/driver mismatch, especially at low dim levels. If tightening connections doesn’t help, test with a dimmer rated for LEDs and bulbs on its compatibility list. Consider bulbs with higher-quality drivers designed for dimming and low flicker percentage.
Shared Neutrals and Multi-Wire Branch Circuits
Older homes may use multi-wire branch circuits (MWBC) that share a neutral. If a shared neutral splice is loose, two circuits can flicker or brighten as loads change. This scenario warrants a pro, as code requires handle-tied breakers and careful neutral continuity.
Appliance Inrush and Voltage Dips
Large motors (HVAC, refrigerator) cause brief dips when they start. If flicker coincides with compressor cycles and all connections check out, talk to an electrician about dedicated circuits, soft-start kits, or utility service evaluation.
When to Call a Licensed Electrician
- Heat or odor: Warm cover plates, scorched insulation, or buzzing devices.
- Panel work: Loose neutral lugs, main connections, or breaker replacement should be handled by a pro.
- Aluminum branch wiring: Requires CO/ALR rated devices and specific splice methods.
- Recurring flicker across multiple circuits: Possible service drop or meter base issues.
Preventative Tips to Keep Lights Steady
- Avoid back-stabs: Use side screws or pigtails for robust terminations.
- Label junction boxes: A little note about what you fixed helps future you.
- Use quality lamps: Choose low-flicker LED bulbs from reputable brands; match dimmers to the bulb technology.
- Quarterly visual check: Look for loose fixtures, vibrating fans, or sagging ceiling boxes.

Troubleshooting Workflow You Can Reuse
- Confirm the symptom: Note when the flicker occurs, which fixtures, and whether it correlates with appliances.
- Rule out the lamp: Swap a known-good, compatible bulb.
- Test safely: Use an NCVT to map where power exists, then shut off the breaker and verify de-energized.
- Open and inspect: Start at the affected fixture, then the switch box, then upstream receptacles feeding the circuit.
- Re-terminate: Re-make splices, move back-stabs to screws, torque terminals properly, and tidy neutral bundles.
- Evaluate controls: Replace incompatible dimmers with LED-rated models on a compatibility list.
- Escalate if needed: If multiple circuits flicker or you find panel issues, call a licensed electrician.
FAQ: Quick Answers for Common Flicker Problems
Why do my LEDs flicker only at low dim settings?
Many LED drivers struggle with older dimmer technologies. Pair LED-rated dimmers with bulbs on the dimmer’s compatibility list and set the trim/low-end adjustment so the lamp never dips into an unstable range.
Is a back-stabbed outlet or switch really that bad?
Back-stab connections rely on spring tension that can weaken. Side-screw terminations or pigtails tend to be more reliable over years of thermal cycling and vibration.
Can a loose neutral cause lights to brighten and dim randomly?
Yes. A compromised neutral can cause voltage swings between circuits on the same leg. Treat this as urgent and call a pro if you suspect a neutral issue at a panel or service connection.
Do smart bulbs or smart dimmers fix flicker?
They can help if the issue is control compatibility, but they won’t solve mechanical loose connections. Always verify your splices and terminations first.
Key Takeaways
- Most flickering in single fixtures traces to a loose connection at the lamp, fixture splice, or switch.
- Work methodically from the lamp back toward the panel, re-making splices and moving wires from back-stabs to screws.
- Use compatible dimmers and quality low-flicker LED bulbs for stable performance.
- Call a licensed electrician for panel, neutral, aluminum wiring, or whole-home flicker concerns.
What You’ll Need (Checklist)
- Non-contact voltage tester, multimeter
- Insulated screwdrivers, nut driver, lineman’s pliers
- Wire strippers and assortment of listed connectors
- Replacement dimmer or switch (LED-rated, if applicable)
- Flashlight/headlamp, ladder, safety glasses, gloves
Reliable lighting starts with reliable connections. With the right tools, a careful eye, and the process above, you can eliminate flicker at the source and enjoy steady, efficient light throughout your home.