Seal Air Leaks Around Windows for Lower Energy Bills
Drafty windows waste energy, strain your HVAC system, and make rooms feel uncomfortable. The good news is that most air leaks around windows can be found and fixed in a single weekend with basic tools and the right materials. This guide walks you through detection, sealing, and long-term care so you can stop drafts, boost comfort, and trim utility costs—without replacing your windows.
You’ll learn how to spot hidden gaps, choose the best sealants and weatherstripping, and apply them step by step. You’ll also see smart upgrades that multiply your savings—like insulated shades and window films—plus a maintenance checklist to keep your hard work paying off year after year. Set aside a little time, follow the steps, and enjoy a quieter, warmer, more efficient home.

Why Sealing Air Leaks Around Windows Matters
Air leaks create drafts that force your heating and cooling equipment to run longer for the same comfort level. That extra runtime raises bills and can shorten equipment life. Leaks also allow moisture-laden air to move through gaps, which may contribute to condensation at the glass edge, paint failure, and even hidden mold where warm indoor air meets cold exterior surfaces. When you seal the pathways, you reduce infiltration, stabilize indoor temperatures, and protect the building envelope.
Small gaps add up. A handful of hairline cracks around a single window may not look like much, yet across a whole house those openings can equal the area of an open vent. By sealing them, homeowners often notice steadier room temperatures, fewer cold spots by the couch or desk, and lower fan noise as HVAC cycles smooth out. Comfort improves quickly, and savings continue month after month.
How to Detect Air Leaks Like a Pro
Quick DIY Tests That Work
Start on a breezy day or when your HVAC is running. Close exterior doors and windows except the one you are testing. Then try these simple techniques:
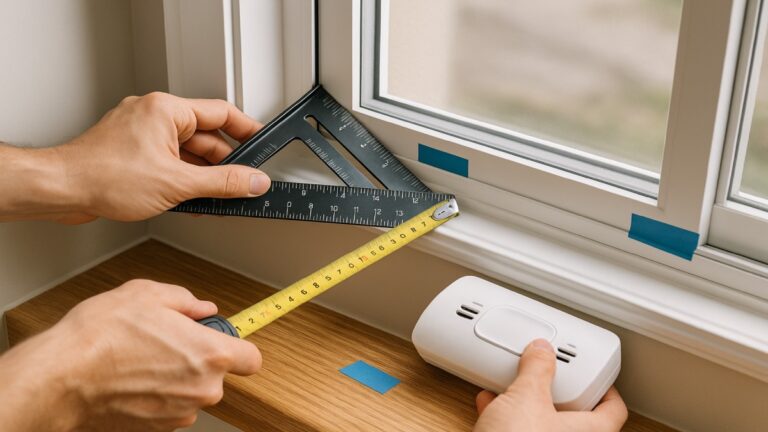
- Hand sweep: Move your hand slowly around the frame, sash edges, meeting rails, and trim-to-wall joints. A noticeable temperature change or tickle against your skin points to a gap.
- Incense or tissue test: Hold a smoking incense stick or a thin strip of tissue and watch for smoke or paper movement along the perimeter. Any flutter means air is moving.
- Daylight check: Turn off interior lights at dusk and stand outside with a flashlight aimed at the frame. Light shining through reveals cracks and voids.
- Dust tracking: Dark, dusty streaks at trim joints or along the sill often form where air pulls particles through a gap over time.
Professional Tools for Deep Insights
Energy auditors use blower door equipment and thermal imaging to find leaks that DIY tests miss. A blower door test slightly depressurizes the home, exaggerating airflow through cracks so they’re easier to pinpoint. An infrared camera then reveals cooler streaks near frames, headers, and jambs. Many utilities offer rebates for audits, and the findings can guide targeted sealing for the best return on effort.
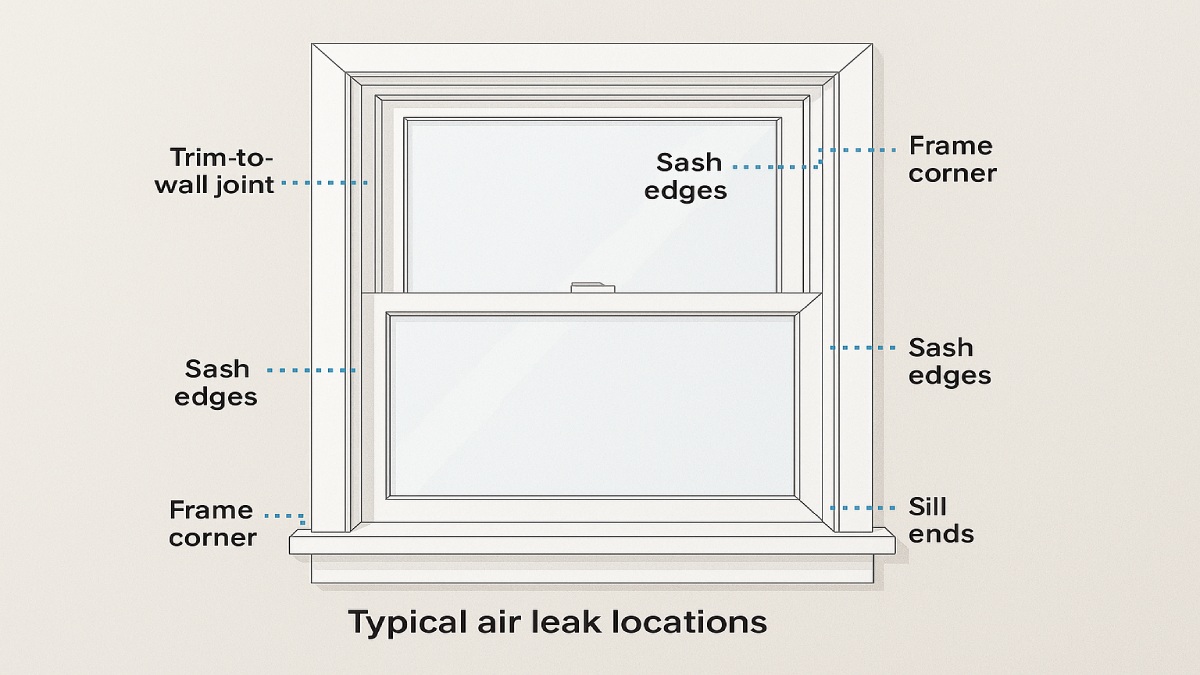
Most Common Leak Zones
- Sash-to-frame contact: Worn weatherstripping along operable segments allows air to slip past.
- Trim-to-wall joint: The small shadow line where casing meets drywall is a frequent offender when the caulk has failed.
- Frame corners and sill ends: Seasonal movement opens miter joints and joinery.
- Pulley cavities (older windows): Weight-and-pulley openings in vintage double-hungs leak unless blocked or weatherstripped.
Best Materials to Seal Window Air Leaks
Caulk for Fixed Gaps
Caulk is the go-to for nonmoving joints where trim meets a wall, and where the frame meets the siding or interior casing. For most interior work, paintable acrylic latex offers easy cleanup and a clean finish. For areas that get more movement or moisture, silicone or polyurethane provides superior flexibility and adhesion. Check the label for application temperatures and cure times, and pick a product rated for your location—interior or exterior.
Always remove loose or brittle caulk before applying a new bead. Use a sharp utility blade and a narrow scraper to clean the channel. Vacuum dust, then wipe with a damp rag to ensure good adhesion. Cut the nozzle at a 45-degree angle and start with a small opening. A thinner bead is easier to control and tool smooth.
Weatherstripping for Operable Parts
Where two parts move against each other—such as a sash meeting a frame—install weatherstripping that compresses when the window closes. Popular choices include:
- V-strip (vinyl or metal): Low-profile and durable for vertical tracks.
- Silicone bulb: Excellent compression and longevity for casements and sliders.
- High-density foam: Fast to install and cost-effective, best for temporary fixes.
- Felt: Inexpensive and easy to cut, suitable for low-friction surfaces.
Select a type that matches the gap size and motion of your window. When installed correctly, the sash should close easily while maintaining a snug seal.
Backer Rod and Low-Expansion Foam
For larger cracks (about 1/4 to 1/2 inch), push in a foam backer rod first, then cover with caulk. The rod saves material and helps you form the ideal hourglass bead, which stretches without splitting as materials expand and contract. For hidden cavities around frames, a low-expansion spray foam labeled for windows and doors fills voids without bowing jambs or binding sashes.
Step-by-Step: Seal Window Air Leaks
This sequence works for most windows—double-hung, sliders, and casements. Read product labels and allow recommended cure times before painting or operating the sash.
1) Prep the Surface
- Clear the area: Remove curtains, blinds, and nearby décor. Lay a drop cloth.
- Remove failed material: Cut and scrape out brittle caulk or worn weatherstrip. Vacuum debris.
- Clean and dry: Wipe with a mild cleaner or rubbing alcohol. Let dry completely to ensure adhesion.
- Mask if needed: Painter’s tape helps keep beads straight along painted trim or delicate finishes.
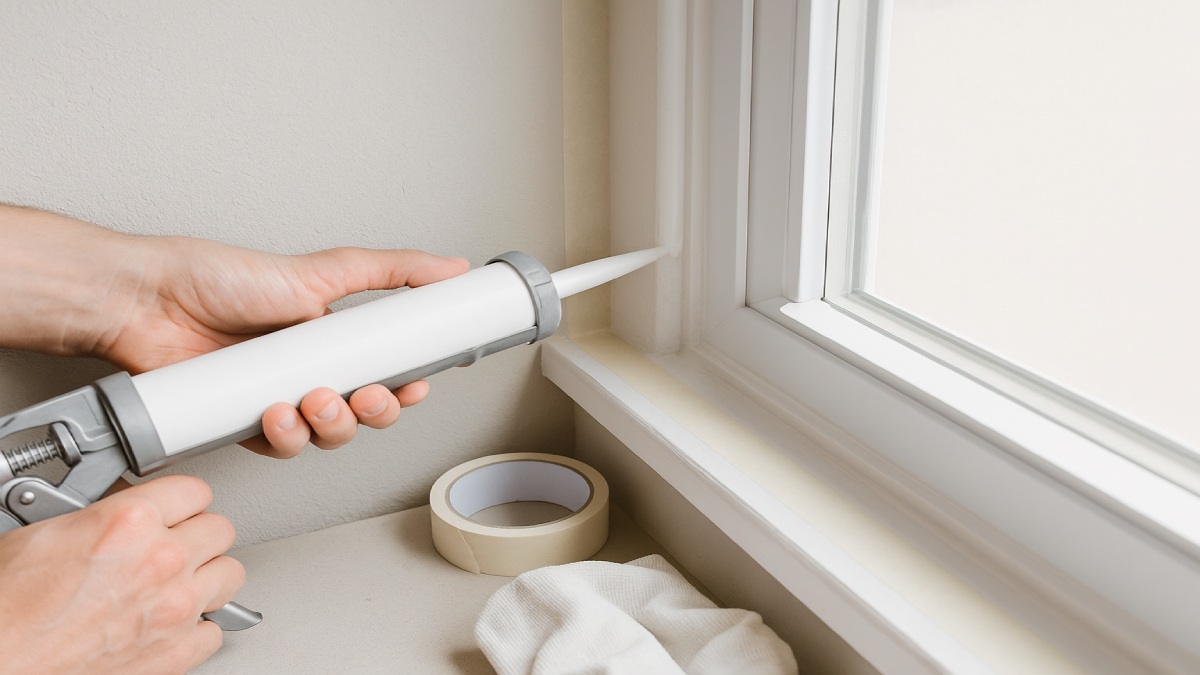
2) Caulk Fixed Joints
- Load the gun: Cut a small nozzle opening and puncture the seal.
- Apply a steady bead: Move at a consistent pace, keeping the tip at the joint. Avoid stopping and starting mid-run.
- Tool the bead: Lightly mist with water (for acrylics) and smooth with a caulk tool or a gloved finger for a neat concave finish.
- Clean up: Wipe stray smears immediately. Remove tape while the caulk is still wet.
3) Install or Replace Weatherstripping
- Measure gaps: Close the sash gently on a strip of paper to gauge compression. If the paper pulls out easily, you need a thicker profile.
- Cut to length: Dry-fit before peeling adhesive backings.
- Apply with even pressure: Follow the frame perimeter; avoid stretching the material, which can cause future gaps.
- Test the action: Open and close the window to confirm smooth operation and consistent contact.
4) Foam Hidden Cavities (If Present)
- Choose low-expansion foam: Products for windows and doors remain flexible as they cure.
- Apply sparingly: A little goes a long way. Foam expands to fill the void.
- Trim and seal: After curing, trim excess flush and cover with a thin bead of paintable caulk if exposed.
5) Confirm Airtightness
After the material cures, repeat the incense or tissue tests. If you still detect movement, reassess corners, sash locks, and the sill. Many homeowners discover that improving the sash lock alignment also tightens the seal for an easy win.
Smart Comfort Upgrades That Multiply Savings
Insulated Shades and Thermal Curtains
Air sealing tackles infiltration at the source. Layering in cellular shades, thermal curtains, or tight roller shades adds insulation and cuts radiant heat loss. In winter, close them at night to reduce drafts and open them by day to harvest solar warmth. In summer, close them during peak sun to tame heat gain and protect furnishings.
Low-E and UV-Filtering Window Films
In sunny climates, certain films reduce solar heat gain and glare while protecting fabrics from fading. Select a product tuned to your region and window type. For cold climates, focus on air sealing first; the wrong film can limit beneficial winter heat gain. Always follow manufacturer guidance so coatings and seals aren’t compromised.
Storm Panels and Interior Inserts
Removable interior storm panels or magnetic inserts create a secondary air barrier that helps older windows perform closer to modern standards. These upgrades are less expensive than full replacement and can be installed seasonally.
Maintenance: Keep Leaks from Sneaking Back
Your seal will last much longer if you build maintenance into your seasonal routine. Use this checklist every spring and fall to stay ahead of movement and wear.
- Inspect beads: Look for cracks, gaps, or separation along trim and frame joints.
- Check weatherstrips: Replace sections that have flattened or lost adhesion.
- Clean gently: Wipe seals with mild soap and water; avoid harsh solvents that can damage materials.
- Verify drainage: Keep weep holes open so water can exit the frame. Do not caulk them shut.
- Touch-up paint: Protect exposed caulk and wood with a quality paint or sealant for UV and moisture resistance.
Mistakes That Undermine a Good Seal
Sealing windows is straightforward, yet a few pitfalls can undo your effort. Watch out for these common errors:
- Overfilling cavities with foam: Standard foam expands aggressively and can bow jambs. Use low-expansion products designed for windows and doors.
- Caulking moving joints: Caulk isn’t meant for sliding or hinged contact areas. Use weatherstripping where movement occurs.
- Applying over dirt or loose paint: Adhesion depends on clean, sound surfaces. Take the time to prep.
- Sealing the wrong holes: Do not block weep paths or pressure-equalization slots; these are intentional drainage features.
- Ignoring sash locks and alignment: Loose or misaligned locks allow play at the meeting rails and invite leakage.

When to Call a Professional
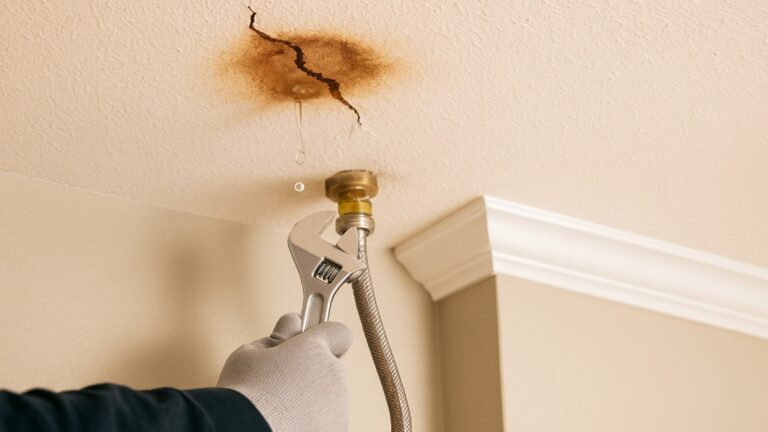
DIY sealing handles most drafts. If you see water stains, rotting wood, swollen sills, or gaps so large you can see outside, consult a pro. An energy auditor can perform a blower door test, map loss with an infrared camera, and create a prioritized plan. A window specialist can address failed glazing seals, deteriorated frames, and complex flashing issues. If your windows are near end of life, an honest assessment will help you decide between targeted repairs and strategic replacement.
FAQs: Air Sealing Windows
Can I seal windows in winter?
Yes. Many acrylic-latex caulks are rated for cool temperatures, and some silicones can be applied in colder weather. Confirm the label and keep materials warm indoors until you apply them.
How long will my seal last?
Paintable acrylic-latex beads often last five to ten years indoors. Exterior silicone or polyurethane can last longer. Weatherstripping life depends on movement and UV exposure, but three to five years is common for foam and longer for silicone.
Will my home get too tight?
Air sealing reduces uncontrolled drafts and improves comfort. If you upgrade insulation and windows heavily, consider balanced ventilation, such as a properly sized bathroom fan or a heat recovery ventilator, to keep indoor air fresh.
Do I need to seal both inside and outside?
Interior trim joints are the easiest targets. If exterior joints are open or the siding-to-frame caulk has failed, plan a dry, mild day to refresh those beads as well.
Conclusion: Seal Today, Save Every Month
Stopping air leaks around windows is one of the highest-value home projects you can do. The process is straightforward, the tools are simple, and the benefits show up fast in comfort and energy savings. Focus on the usual suspects—trim joints, sash edges, corners, and sill ends—then verify your work with a quick smoke or tissue test. Layer in insulated shades or interior inserts to multiply the effect, and set a seasonal reminder to recheck seals before the next temperature swing.
Take an afternoon to tighten up the gaps, and enjoy a home that feels warmer in winter, cooler in summer, and quieter all year long. Your future utility bills will thank you.